Chimney Flue Explained: 7 Critical Parts & Common Problems
By ehasan28
Posted on September 25, 2026
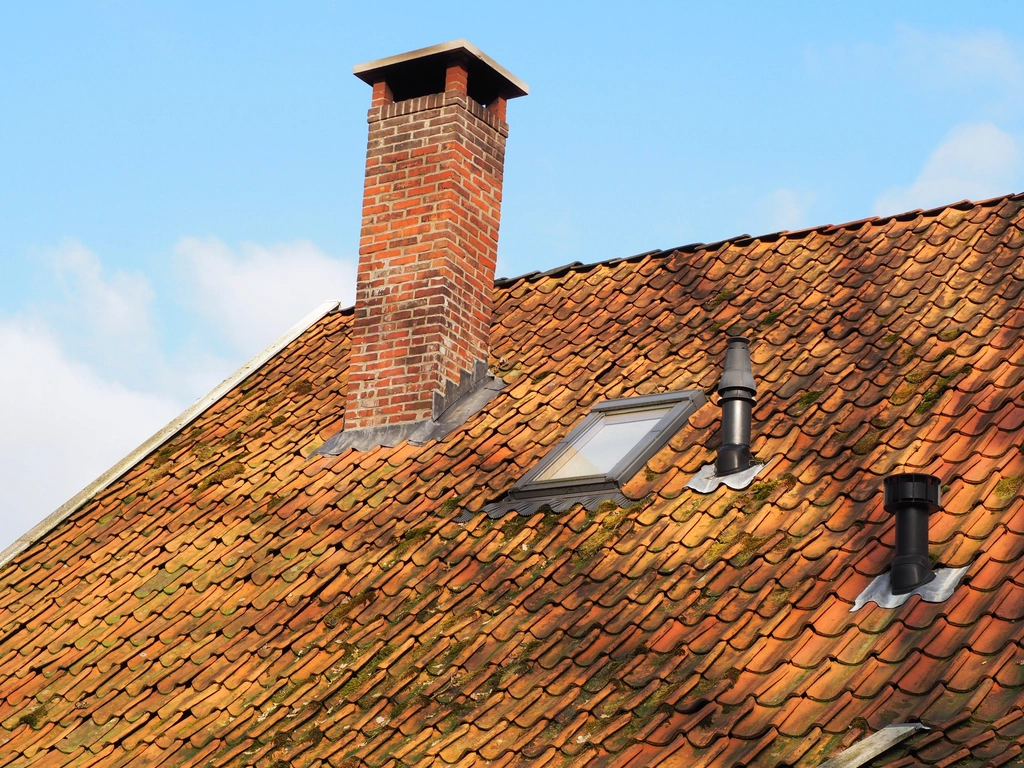
A chimney flue is the passage that carries smoke, hot gases, and combustion byproducts from a fireplace or fuel-burning appliance to the outdoors. It is not the whole chimney, and it is not always the same thing as a liner. Its shape, material, condition, and compatibility with the connected appliance all affect draft and safety.
This homeowner guide explains the main parts of a chimney flue, how sizing is determined, which warning signs matter, and where do-it-yourself checks should stop. If smoke enters the room, a carbon monoxide alarm sounds, or a chimney fire is suspected, stop using the appliance. Leave the building and call 911 during an active emergency.
What Is a Chimney Flue?
The chimney is the complete structure or listed venting system. The chimney flue is the interior path through which exhaust travels. A masonry chimney can contain one or several separate flues. For example, one flue may serve a fireplace while another serves a furnace. They must remain separate unless a qualified design and applicable rules explicitly permit a shared connection.
A flue may be formed by clay tiles, a listed metal chimney, a stainless-steel liner installed inside masonry, or another approved lining system. The correct construction depends on the appliance, fuel, chimney design, listing, manufacturer instructions, and local requirements. A passage that merely looks open is not proof that it is sound or safe.
Chimney Flue vs. Chimney Liner
The terms are often used interchangeably, but they describe different things. The flue is the passage. The liner is the material or system that forms or protects that passage. A traditional masonry chimney may have clay flue tiles. A damaged or incompatible masonry flue may be relined with a listed stainless-steel or cast-in-place system after professional evaluation.
A liner is not an automatic cure for every draft, moisture, or structural problem. It must be correctly sized and connected, and any required insulation and clearances must be addressed. Our chimney liner guide explains material choices, insulation, and replacement signs in more detail.
7 Critical Parts Around the Flue Path
| Part | What it does | What can go wrong |
|---|---|---|
| 1. Firebox or appliance outlet | Begins the exhaust path. | Improper connection, damaged firebox surfaces, or an appliance not matched to the venting system. |
| 2. Damper area | Controls the fireplace opening when the system is designed with a damper. | A stuck or partially closed damper can restrict flow and spill smoke indoors. |
| 3. Smoke chamber | Transitions gases from the wide firebox toward the narrower passage. | Rough surfaces, gaps, damage, and deposits can complicate cleaning and inspection. |
| 4. Flue liner | Forms the protected interior passage. | Cracks, gaps, corrosion, separated joints, or the wrong material for the fuel. |
| 5. Flue termination | Allows exhaust to discharge above the roof. | Poor location, inadequate height, nearby obstructions, or wind effects can impair draft. |
| 6. Crown or chase cover | Directs water away from the chimney body or factory-built chase. | Cracks, rust, or failed edges can admit water around the system. |
| 7. Cap | Helps limit rain, debris, and animal entry when properly selected. | Damage, blockage, poor sizing, or an incompatible spark screen can restrict flow. |
Useful Tools for a Preliminary Flue Check
As an Amazon Associate, ChimneyInsight may earn from qualifying purchases. These tools are for limited homeowner observation or compatible routine maintenance; they do not certify a chimney as safe. Confirm dimensions, appliance instructions, liner material, access, and product compatibility before buying. Never use a consumer tool to enter a hot flue or to investigate an active fire.
TESLONG Inspection Camera
Best for: photographing a cool, accessible area before a service visit.
Useful benefit: the semi-rigid probe can be easier to guide than a loose cable in an accessible opening.
Before buying: it cannot reveal every concealed defect or replace a professional video scan and interpretation.
Gardus SootEater RCH205-B
Best for: experienced homeowners whose specific chimney flue and appliance instructions permit rotary cleaning.
Useful benefit: the stored listing describes a flexible-rod cleaning system designed to provide reach without improvised parts.
Before buying: brush type, diameter, liner material, deposit condition, and access must match. Glazed deposits and suspected damage require a professional.
How Chimney Flue Size Is Determined
Flue size means the interior cross-sectional dimensions or diameter of the venting passage. It is not safely selected by matching the visible fireplace opening to a generic chart. The correct size can depend on the appliance type, fuel, input or output rating, flue-collar size, fireplace-opening dimensions, chimney height, connector length, elbows, offsets, installation listing, and local code.
An undersized chimney flue may restrict exhaust flow. An oversized passage can cool gases too rapidly in some systems, weakening draft and encouraging condensation or deposits. Shape matters as well: a round liner, a rectangular clay tile, and an irregular damaged passage do not behave identically simply because their widest dimensions look similar.
Before an appliance change or relining project, record the appliance manufacturer and model, fuel, rating-plate information, outlet size, existing flue dimensions, chimney height, offsets, and connector route. Use the appliance manual and a qualified professional’s documented sizing method. Do not reduce, enlarge, or combine vent paths based only on a product listing or an online rule of thumb.
7 Common Chimney Flue Problems
1. Soot and Creosote Deposits
Wood combustion can leave soot and combustible creosote on flue surfaces. Restricted air supply, wet wood, and cooler flue temperatures can accelerate buildup. The Chimney Safety Institute of America advises annual inspection and cleaning when needed; its homeowner guidance explains that chemical products are not a substitute for mechanical cleaning and evaluation.
2. Blockage or Animal Debris
Nests, leaves, broken masonry, fallen liner pieces, and other debris can reduce the passage. Do not light a fire to “test” a suspected blockage. A flashlight may reveal the lower area, but an open-looking section does not prove the entire chimney flue is clear.
3. Cracked Clay Tiles or Open Joints
Thermal shock, movement, age, or a previous chimney fire can crack tiles or displace mortar. Gaps may expose surrounding construction to heat and combustion products. This is not a surface patch based on what can be reached from the firebox; the complete defect and repair method require evaluation.
4. Metal Liner Corrosion or Separation
Moisture, incompatible combustion byproducts, poor connections, or damage during cleaning can affect metal liners. Rust staining, loose pieces, or visible gaps are reasons to stop use until the system is assessed. See the liner replacement warning signs for a focused checklist.
5. Water Intrusion
A damaged cap, crown, chase cover, flashing detail, or masonry surface can admit water. Moisture may deteriorate mortar, corrode metal, create staining, and worsen freeze-thaw damage. Replacing a cap alone will not fix a flashing or crown leak, so locate the entry point before choosing a repair.
6. Poor Draft or Smoke Spillage
Draft problems can involve a cold passage, wrong sizing, blockage, inadequate height, wind, house depressurization, competing exhaust fans, or an appliance problem. Our guide to testing chimney draft and airflow explains observation limits without encouraging a risky fire test.
7. Incompatible Appliance or Fuel
A chimney flue that served one appliance may not be suitable for a replacement. Fuel type, exhaust temperature, condensation, connector configuration, and listing all matter. Never assume that an unused fireplace flue can accept a stove, furnace, or insert without a condition assessment and approved venting plan.
What Homeowners Can Check Safely
- When the system is completely cold, look for loose debris, staining, rust, fallen tile pieces, or an obviously damaged damper in accessible areas.
- Confirm the damper opens fully before using a traditional fireplace.
- Check that the cap appears present and intact from the ground. Do not climb onto a roof for a routine visual check.
- Review carbon monoxide and smoke-alarm placement, testing, and replacement instructions.
- Keep records of inspections, cleaning, repairs, appliance changes, and any chimney-fire event.
- Arrange the appropriate inspection when performance changes, damage is suspected, or the property or appliance changes.
A professional inspection level depends on the circumstances. Read our explanation of chimney inspection Levels 1, 2, and 3 before requesting quotes. If the system only needs routine cleaning and the manufacturer permits homeowner maintenance, use the procedure and stop conditions in how to clean a chimney flue.
When to Stop Using the Fireplace or Appliance
Stop use and seek professional evaluation after a suspected chimney fire, when smoke spills indoors, when a carbon monoxide alarm activates, or when you see cracks, open joints, missing liner pieces, severe corrosion, persistent water, or an unexplained draft change. During an active fire or carbon monoxide emergency, leave the building and call emergency services. Do not relight the appliance to see whether the problem repeats.
A consumer camera can document a visible symptom, but it cannot prove clearances, hidden continuity, correct sizing, or appliance compatibility. Likewise, a brush can remove certain accessible deposits but cannot repair a crack or determine whether a liner remains serviceable.
Choose the Right Tool for the Job
The two products below solve different, limited problems. They are not substitutes for one another or for a qualified inspection.
TESLONG Inspection Camera: for Documentation
Choose it when: you want to record a cool, reachable surface and share the image with a service professional.
Practical advantage: lighting and a semi-rigid cable can make limited viewing easier than relying on a phone and flashlight.
Honest limitation: seeing one section does not establish the condition of the full flue, and image interpretation matters. Do not force the probe through a damper, offset, or obstruction.
Gardus SootEater: for Compatible Routine Cleaning
Choose it when: the flue material, dimensions, access, deposits, and appliance manufacturer instructions all permit this rotary method.
Practical advantage: a purpose-built head and rods offer a coordinated system instead of improvised extensions.
Honest limitation: it cannot diagnose damage or make glazed creosote a safe DIY task. The wrong head, diameter, speed, or technique can damage components or leave debris in offsets and smoke chambers.
Conclusion
A chimney flue is a complete exhaust path, not just the opening visible above the firebox. Safe performance depends on compatible sizing, an intact liner, unobstructed flow, suitable termination, moisture control, and the connected appliance. Homeowners can document accessible symptoms and keep maintenance records, but hidden damage, sizing, relining, and post-fire decisions belong with a qualified professional.
For routine care, compare brush type with the liner manufacturer’s instructions before cleaning. Our guide to the best brushes for stainless-steel liners and flues explains why brush material matters.
Frequently Asked Questions
Is a chimney flue the same as a chimney liner?
No. The flue is the passage that carries exhaust. The liner is the material or listed system that forms or protects that passage. Clay tiles, stainless steel, and certain cast-in-place systems can serve as liners in appropriate installations.
How do I know what size chimney flue I need?
Use the connected appliance’s listing and manual plus an approved sizing method. Fuel, appliance rating, outlet size, fireplace opening, chimney height, connectors, and offsets can all matter. Do not select a diameter only because it physically fits.
Can I inspect a chimney flue myself?
You can look for obvious symptoms in cool, accessible areas and document them. A homeowner view cannot establish hidden continuity, clearances, correct sizing, or full safety. Appliance changes, property transfers, performance changes, and suspected damage may justify a professional Level 2 or Level 3 inspection.
What are signs of a blocked or damaged flue?
Warning signs include smoke spillage, a sudden draft change, falling debris or tile pieces, rust, persistent moisture, visible gaps, animal activity, or a carbon monoxide alarm. Stop use until the cause is identified; do not light another fire as a test.
How often should a chimney flue be inspected?
CSIA’s homeowner guidance cites NFPA 211 for inspection of chimneys, fireplaces, and vents at least annually, with cleaning, maintenance, and repairs performed as needed. The required service can vary with fuel, use, deposits, appliance instructions, and observed conditions.
Safety Source
For homeowner guidance on annual inspection, sweeping, creosote, dampers, gas-appliance venting, and chemical cleaners, see the Chimney Safety Institute of America homeowner resources.