Quick answer: Attaching a chimney cap safely starts with identifying the chimney system and using the exact mounting method specified for that cap. A single clay flue may accept a clamp-on or set-screw cap; a round flue may use a listed bolt-on or slip-in design; and a multi-flue cap normally fastens to the chimney crown. Never assume a universal cap fits a factory-built chimney, and do not climb onto a roof when access or fall protection is uncertain.
A chimney cap can reduce rain, leaves, and animal entry while keeping the exhaust opening serviceable. But a secure installation is more than tightening four screws. The cap must match the flue dimensions, fuel-burning appliance, material, exhaust clearance, and service access. This guide explains the main mounting methods, what to check before fastening anything, and when the safest DIY decision is to stop.
Before Attaching a Chimney Cap, Identify the System
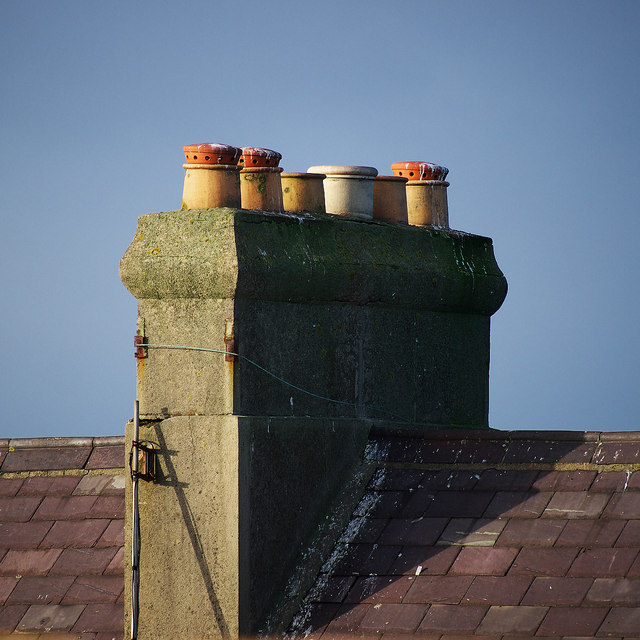
Look at the chimney from a safe location and check records, appliance manuals, or a recent inspection report. The visible top may be a projecting square clay tile, a round masonry flue, a listed metal chimney, or a group of flues surrounded by one masonry crown. These are not interchangeable mounting surfaces.
- Single clay flue: often uses a cap sized to the outside dimensions of the tile.
- Round masonry flue: may use a bolt-on, clamp-on, or model-specific slip-in cap.
- Multiple flues: may need individual caps or one top-mount assembly fastened to the crown.
- Factory-built metal chimney: requires a termination approved for that exact chimney system; do not substitute a generic masonry cap.
- Gas vent: must keep its listed termination and appliance compatibility. A decorative universal cap is not a safe substitute.
The manufacturer HY-C explains that multi-flue caps mount to the crown rather than directly to one flue, while its round-cap guidance distinguishes bolt-on, clamp-on, and slip-in designs. Treat those descriptions as product categories, not permission to mix parts from different systems. Start with the exact instructions packed with the cap.
Measure the Mounting Surface, Not the Opening You Can Guess
For a square or rectangular single-flue cap, measure the outside length and width of the clay tile and note how far it projects above the crown. For a round flue, confirm the diameter and whether the product is sized to the inside or outside measurement. For a top-mount cap, measure the outside span of the flue group, the crown area available for the flange, the tallest flue, and the clear exhaust space required below the hood.
Do not round a measurement to the nearest common product size until you compare it with the manufacturer’s stated fit range. A base that is too small may not seat; an oversized base may leave the fasteners with too little purchase. Our chimney cap buying guide explains sizing and material choices before installation.
Roof Access Is the First Safety Decision
Falls are a serious roofing hazard even for experienced workers. OSHA guidance emphasizes stable access, fall protection for roofing work, and extra caution around wet surfaces, wind, and power lines. Homeowners should not treat a cap as a reason to improvise with an unsecured ladder or to work alone on a steep roof.
Stop and hire a qualified chimney professional if the roof is steep, high, damp, icy, fragile, exposed to gusts, close to overhead wiring, or difficult to reach with appropriate equipment. Also stop if the crown is cracked, the flue tile is loose, masonry moves under light hand pressure, or the termination serves a system you cannot identify. A cap should never hide a damaged crown, liner, or flashing problem.
Two Cap Options to Compare Before Installation
As an Amazon Associate, ChimneyInsight may earn from qualifying purchases. Confirm the flue dimensions, fuel appliance, mounting method, and manufacturer instructions before ordering. The products below are examples for compatible masonry flues, not universal replacements.
Forever Cap CCSS88S Stainless Chimney Cap
Best for: a compatible square single clay flue when corrosion resistance matters.
Useful benefit: stainless construction suits long-term outdoor exposure.
Before buying: it is size-specific. Verify the outside tile dimensions and the included attachment method instead of choosing by appearance.
HY-GUARD HG1216 Galvanized Chimney Cap
Best for: a compatible rectangular masonry flue where initial cost is a priority.
Useful benefit: it offers a practical screened hood for correctly matched dimensions.
Before buying: galvanized metal needs closer rust monitoring, and this specific fit should not be assumed for a different tile size.
4 Common Chimney Cap Mounting Methods
1. Set-Screw or Bolt-On Single-Flue Cap
This design sits over the outside of a projecting clay tile. The base is centered and leveled, then the supplied screws are tightened evenly against the flue exterior according to the product instructions. Alternate between sides instead of fully tightening one corner first so the base stays square.
Do not add extra holes or substitute longer screws simply because the cap moves. The wrong model, a damaged tile, or an out-of-range measurement may be the real problem. Excessive tightening can deform the base or stress clay. The goal is a stable cap installed to the specified tension, not maximum force.
2. Clamp-On Cap
A clamp-on model uses a band around the cap base. After the correctly sized base is seated, the band is tightened to grip the flue. This can avoid point pressure from several separate screws, but it still depends on the correct tile shape, projection, and product fit range.
Keep the band straight and check that the cap does not rock. A clamp cannot compensate for a crumbling tile or irregular broken edge. If the flue surface is unsound, have the chimney inspected before covering it.
3. Slip-In Round-Flue Cap
Some round-cap designs use legs or a collar that fit inside a compatible round clay flue. Others fasten around the outside. The label “round cap” alone does not identify the mounting method, so confirm whether the listed diameter refers to the flue interior or exterior.
A slip-in cap must not reduce the exhaust path below what the chimney and appliance require. Do not bend legs, add sheet-metal screws, or force a near-fit component into a liner. Factory-built metal chimneys require their approved termination rather than a generic slip-in masonry product.
4. Crown-Mounted Multi-Flue Cap
A top-mount cap uses a flange around its base and fastens to the masonry crown. Manufacturer directions may call for marked anchor locations, compatible masonry fasteners, and a specified adhesive or sealant. HY-C’s multi-flue installation information, for example, describes both adhesive and masonry screws for its relevant product. That does not make the same sequence correct for every brand.
The flange needs sound, adequately sized crown material. Avoid drilling close to a cracked edge or into a hidden flue. The cap must clear the tallest flue and remain removable for sweeping. The International Residential Code provisions for spark arrestors state that the screen or cap must be removable so the flue can be cleaned; local adopted code and product instructions control the installation at a specific home.
Installation Checklist: What to Verify Before and After Fastening
- The cap model matches the chimney or venting system.
- The measured flue dimensions fall inside the manufacturer’s fit range.
- The tile, crown, and mortar are stable and free of critical damage.
- The hood preserves the required exhaust area and clearance.
- The cap is centered, level, and cannot rock or rotate by hand.
- Only the supplied or manufacturer-approved fasteners, clamps, anchors, and sealants are used.
- The screen and hood do not obstruct a neighboring flue.
- The cap can be removed or opened for cleaning and inspection.
- No sharp edge, loose tool, packaging, or drilling debris remains on the roof or in the flue.
Mistakes That Cause Loose Caps, Cracked Tiles, or Draft Problems
Guessing the flue size. A photo from the yard cannot supply reliable dimensions. Measure the surface the product actually grips.
Using sealant as the structure. Exterior sealant can be part of a listed crown-mount method, but ordinary caulk does not replace required mechanical attachment.
Overtightening against clay. More torque is not automatically safer. Follow the product directions and stop if the tile cracks, shifts, or sounds unstable.
Covering more than one flue incorrectly. A hood that crowds one termination or routes exhaust toward another can create performance problems. Multi-flue geometry deserves professional review when clearances are uncertain.
Using a generic cap on a factory-built system. Listed metal chimneys depend on matched components. Similar diameter does not prove compatibility.
Trying to solve smoke spillage with a new cap. Blockage, insufficient height, house depressurization, liner damage, appliance mismatch, and cold-flue conditions can all affect draft. Use our guide to testing chimney draft and airflow before blaming the cap.
When the Chimney Needs Repair Before a New Cap
Delay installation if the crown has open cracks, the top course of brick is loose, the clay tile is split, the liner shows damage, or water staining points to another entry route. A cap blocks rain entering through the flue opening; it does not repair failed counterflashing, porous masonry, or a defective crown. See the guide to identifying chimney flashing leaks if indoor staining appears near the chimney.
Arrange an appropriate inspection after a chimney fire, appliance change, storm impact, animal blockage, or unexplained performance change. Our explanation of chimney inspection Levels 1, 2, and 3 helps homeowners understand the scope to request.
Product Decision Aid Before You Buy
The same two stored products solve different fit and material priorities. Compare the mounting surface first, then material and price. Neither should be adapted to an incompatible flue.
Choose Forever Cap CCSS88S When Fit and Durability Align
Choose it when: the exact square single-flue dimensions and mounting instructions match your clay tile.
Practical advantage: stainless steel generally offers stronger corrosion resistance than galvanized steel.
Honest limitation: it does not protect the full crown and cannot repair masonry, flashing, liner, or draft defects.
Choose HY-GUARD HG1216 for a Verified Rectangular Fit
Choose it when: its stated rectangular fit and attachment method match the measured masonry flue.
Practical advantage: galvanized construction can lower the initial purchase cost for a compatible installation.
Honest limitation: inspect the coating, mesh, and fasteners regularly for rust or weather damage.
After Installation: Check It Without Creating a New Hazard
View the cap from the ground after severe wind or storms. Look for a tilted hood, missing mesh, rust streaks, or obvious movement. Do not make a special roof trip only to tug on it. Ask the chimney professional to inspect the cap during regular service and remove it as needed for cleaning.
If birds or animals are already inside, do not trap them by installing a cap over an occupied flue. Follow the safe steps in the bird-in-a-chimney guide and account for protected species or active nests before closing the opening.
Conclusion
The safest way to attach a chimney cap is to match the product to the exact chimney system and use only its approved mounting method. Set-screw, clamp-on, slip-in, and crown-mount caps each solve a different fit problem. Accurate measurements, sound masonry, preserved exhaust clearance, removable service access, and safe roof conditions matter more than forcing a convenient product to fit.
When access, system identity, flue condition, or crown strength is uncertain, professional installation is the better result—not a failed DIY attempt on a roof.
Frequently Asked Questions
Can I attach a chimney cap without drilling?
Sometimes. Many single-flue caps use exterior set screws, a wraparound clamp, or a model-specific slip-in connection. Top-mount and multi-flue caps commonly require crown fasteners. Use only the attachment method listed by the cap manufacturer for the exact flue and chimney system.
Should screws go into the clay flue tile?
Do not improvise by drilling a clay tile. Clay can crack, and cap designs fasten in different ways. Some use pressure against the outside of the tile, while others mount to the crown. Follow the product instructions or have a chimney professional install it.
Can I use adhesive alone to hold a chimney cap?
Only if the exact manufacturer instructions specify an adhesive-only system. Many crown-mounted caps use both a compatible adhesive or sealant and mechanical fasteners. Ordinary caulk should not replace required anchors, clamps, or screws.
How tight should chimney-cap screws be?
Tighten only as directed for the product. The cap should be secure and level, but excessive force can distort a metal base or damage a fragile clay tile. Recheck the cap after severe weather and during chimney service.
When should a professional install the cap?
Use a qualified professional when roof access is steep, high, wet, icy, windy, near power lines, or otherwise uncertain; when the chimney is damaged; when several flues share one cap; or when the termination serves a listed factory-built chimney or gas appliance.