
Mastering Chimney Maintenance: A Step-by-Step Guide to Using a Chimney Brush Like a Pro
There is nothing quite like the comforting crackle and deep warmth of a wood-burning fireplace on a freezing winter evening. However, that cozy ambiance comes with a massive, unavoidable responsibility. Every time you burn wood, a highly combustible, tar-like substance called creosote is deposited along the inner walls of your chimney flue. Left unchecked, this buildup severely restricts airflow, pushes toxic carbon monoxide back into your living room, and acts as the primary fuel source for devastating, explosive chimney fires.
Taking control of your home’s safety by learning how to use a chimney brush is one of the most empowering and cost-effective DIY skills a homeowner can master. While it may seem daunting to peer down a dark, soot-covered flue, the actual mechanical process of brushing a chimney is straightforward, provided you have the correct equipment and follow strict safety protocols.
This comprehensive, expert-led guide will walk you through every single phase of the process. From understanding the chemistry of creosote and sizing your brush perfectly, to mastering the “top-down” plunging technique and securing your firebox from soot explosions, we leave no stone unturned. Grab your gloves, secure your ladder, and let’s get your chimney breathing freely again.
Understanding the Enemy: Creosote and When to Clean
Before you start shoving bristles down a pipe, you need to understand exactly what you are trying to remove. When wood burns, it releases smoke, water vapor, gases, unburned wood particles, and hydrocarbon volatiles. As these substances travel up the relatively cooler chimney flue, condensation occurs. The resulting residue that sticks to the inner walls is creosote.
Creosote develops in three distinct stages, and a chimney brush is only highly effective against the first two:
- Stage 1 (Flaky/Dusty): This soot is velvety, loose, and easy to brush away. It occurs when you burn well-seasoned wood with a hot, efficient draft. A standard chimney brush handles this effortlessly.
- Stage 2 (Crunchy/Tar-like): This looks like black, crunchy cornflakes or hardened tar. It is highly flammable. A stiff wire brush combined with aggressive scraping is required to break this loose.
- Stage 3 (Glaze): This is a thick, shiny, rock-hard glaze of concentrated fuel. It is incredibly dangerous and cannot be removed with a standard chimney brush. Chemical creosote removers or specialized rotary chains wielded by professionals are required.
The National Fire Protection Association (NFPA) recommends an annual inspection, but the actual frequency of cleaning depends heavily on your habits. If you burn green (unseasoned) wood or heavily rely on your stove for primary heating, you may need to brush the flue mid-season. A good rule of thumb is to sweep the chimney whenever you observe 1/8 inch of creosote buildup on the flue walls. For a deeper understanding of this timeline, review our detailed guide on chimney cleaning frequency based on usage and fuel types.
Choosing the Correct Chimney Brush: Size, Shape, and Material
Using the wrong brush is the fastest way to ruin your weekend. A brush that is too small won’t scrape the walls clean, and a brush that is too large will become permanently wedged inside the flue, forcing you to call a professional for an embarrassing and expensive rescue mission.
1. Measuring the Flue (Shape and Size)
You cannot guess your flue size. You must safely access your roof or look up through your damper to physically measure the inner dimensions of the flue liner.
- Round Flues (Common in metal pipes): Measure the inner diameter straight across. If it measures 6 inches, buy a 6-inch round brush.
- Square/Rectangular Flues (Common in masonry): Measure the inner width and length. If the inner dimensions are 8×12 inches, you must purchase an 8×12 inch rectangular brush.
2. Wire Bristles vs. Polypropylene Bristles
The material of your flue liner dictates the material of your brush. Using the wrong bristles can cause catastrophic structural damage to your chimney.
| Brush Material | Best Used For | Why? |
|---|---|---|
| Stiff Wire (Steel) | Clay tile liners, traditional unlined masonry brick flues. | Wire is aggressive enough to scrape stage 2 creosote off hard clay and brick without damaging the robust masonry. |
| Polypropylene (Poly/Plastic) | Stainless steel liners, prefabricated metal chimneys. | Steel brushes will deeply scratch stainless steel liners, removing their anti-corrosive coating and creating grooves where creosote can rapidly accumulate. Poly brushes are stiff enough to clean but soft enough not to gouge the metal. |
If you have recently had your chimney relined, you absolutely must use the correct tool. Dive deeper into our comprehensive breakdown of the best chimney brushes for stainless steel liners and flues to ensure you don’t void your liner’s warranty.

Top Rated: Midwest Hearth Polypropylene Chimney Brush Kit
Protect your expensive stainless steel liner while effortlessly stripping away dangerous creosote. This professional-grade poly brush features a heavy-duty galvanized stem and can be customized to fit 6″, 8″, or 10″ round flues. Pair it with flexible fiberglass rods for the ultimate DIY cleaning system.
Check Price on AmazonGathering Your Tools & Safety Gear
Before you execute the sweep, you need to assemble your arsenal. Missing a single piece of equipment can lead to a house full of carcinogenic soot or a dangerous slip on the roof.
- The Chimney Brush: Sized perfectly to your flue, in the correct material (Wire or Poly).
- Flexible Extension Rods: These screw into the brush and into each other. Fiberglass rods are standard for straight flues, while highly flexible nylon rods are required if your chimney has elbows or bends. You need enough rods to equal the total height of your chimney plus 3-4 feet of slack.
- Heavy-Duty Drop Cloths or Canvas Tarp: Do not use thin plastic; it tears easily and poses a slipping hazard.
- Painter’s Tape and Heavy Plastic Sheeting: To seal the fireplace opening.
- Shop-Vac with a HEPA Filter: A standard vacuum will simply blow the microscopic soot particles right back into the air. A HEPA filter or specialized ash vacuum is mandatory.
- A Stiff Hand Brush and Metal Dustpan: For detailing the smoke shelf and firebox.
Creosote is toxic, highly irritating to the skin and eyes, and a known carcinogen. You must wear:
- A well-fitting N95 or P100 respirator mask.
- Wrap-around safety goggles (not just glasses).
- Heavy-duty work gloves.
- Old clothing with long sleeves (or a disposable Tyvek suit) and a hat/bandana.
- Non-slip, rubber-soled shoes for roof work.
Preparation: Securing the Firebox & Roof Safety
Failure to prepare the interior of your home before brushing will result in a catastrophic, powdery black mess that will embed itself into your carpets, furniture, and curtains for years to come. Do not skip this phase.
Securing the Interior (The “Soot Seal”)
- Cool Down: Ensure the fireplace has not been used for at least 48 hours. Ash stays hot for an incredibly long time.
- Empty the Firebox: Shovel out all old ash, unburned wood, and the metal grate. Vacuum the floor of the firebox clean.
- Open the Damper: Reach up and ensure the metal damper plate is fully open. You cannot push a brush through a closed damper.
- Seal the Opening: Lay your canvas drop cloth over the hearth and several feet into the room. Take your heavy plastic sheeting and use painter’s tape to tape it completely over the fireplace opening. Tape every single edge securely to the brick or metal surround. Leave a small, 2-inch slit at the very bottom where you can insert your Shop-Vac hose later.
Roof Safety Assessment
If you have a steeply pitched roof (above 6/12 pitch), a slate/tile roof, or are uncomfortable with heights, do not attempt the top-down method. Instead, use the bottom-up method or hire a professional. If you are proceeding to the roof, use a sturdy, stabilized extension ladder, wear a certified roof safety harness anchored to a secure point, and never work on a wet or windy day.
The Top-Down Cleaning Method (Recommended)
The top-down method is the industry standard for a reason. Gravity works with you, making it significantly easier to push the brush, and it keeps all the dislodged soot firmly contained behind your plastic seal in the living room.
-
Remove the Chimney Cap
Once safely on the roof beside the chimney crown, remove the chimney cap. Most caps are secured with a few hex screws or bolts around the collar. Place the screws in your pocket so they don’t roll off the roof, and set the cap aside safely.
-
Assemble the Brush and First Rod
Thread your appropriately sized brush onto the first flexible extension rod. Ensure it is screwed on tightly. Crucial Warning: Once the brush is in the flue, never twist the rod counter-clockwise. Doing so can unscrew the brush, leaving it permanently stuck deep inside your chimney.
-
The Initial Plunge
Insert the brush into the top of the flue. It should be a tight, abrasive fit. Grip the rod firmly with both hands. Push the brush down vigorously for about 3 to 4 feet, then pull it back up. Repeat this vigorous up-and-down scrubbing motion (“plunging”) several times until you feel the resistance decrease, indicating the creosote has been scraped away.
-
Add Rods and Continue Descent
Hold the rod securely so it doesn’t drop down the flue. Screw the second flexible rod onto the back of the first rod. Again, ensure the connection is tight. Push the assembly down another 3 to 4 feet, executing the same vigorous up-and-down scrubbing motion. Continue adding rods and plunging section by section until you feel the brush break through the damper and enter the firebox.
-
The Extraction
Once you hit the bottom, begin pulling the assembly back up. As each rod joint clears the top of the chimney, unscrew the top rod, set it aside, and continue pulling the remaining assembly up. Do this until the brush emerges from the flue. Reinstall your chimney cap securely.

Upgrade Your Kit: Button-Link Flexible Nylon Rods
Tired of worrying about unscrewing your brush in the middle of the flue? Upgrade from threaded fiberglass to button-link nylon rods. These ultra-flexible rods snap together securely, allowing you to spin the brush in any direction without fear of detachment. Perfect for chimneys with elbows or slight offsets.
Check Price on AmazonThe Bottom-Up Cleaning Method (The Indoor Alternative)
If accessing your roof is too dangerous, you can brush the chimney from the inside out. This method is physically harder (you are fighting gravity to push the brush up) and significantly messier, requiring meticulous interior preparation.
How to execute the bottom-up sweep:
- Prepare the interior exactly as described above, but instead of sealing the opening completely, tape the plastic sheet to the top and sides, leaving the bottom loose enough for you to reach your arms underneath.
- Assemble the brush and the first rod. Kneel in front of the firebox and reach under the plastic sheeting.
- Push the brush up through the open damper and into the flue. Perform the vigorous up-and-down scrubbing motion.
- Add rods one by one, pushing the assembly higher into the chimney until it pops out of the top (if you don’t have a cap) or hits the underside of the chimney cap.
- Pull the rods back down, disconnecting them one by one, letting the massive cascade of soot fall into the firebox. Keep the plastic sheet pulled as tight as possible around your arms to prevent the soot cloud from entering the room.
Cleaning the Smoke Shelf & Firebox (The Dirty Work)
Pushing the brush through the flue is only half the job. All that dislodged creosote has now fallen down and collected in two places: the floor of the firebox, and the smoke shelf.
The smoke shelf is a flat, hidden ledge located directly behind the damper. Its job is to catch downdrafts and prevent rain from hitting the fire, but it also acts as a massive collection tray for falling debris during a sweep.
- After waiting for the dust to settle, carefully peel back the top edge of the plastic sheeting.
- Turn on your HEPA Shop-Vac. Insert the hose into the firebox and vacuum up the massive pile of soot on the floor.
- Put on your safety goggles and respirator. Reach up through the damper with your vacuum hose or a small hand brush and a specialized narrow dustpan. Feel around the flat ledge behind the damper (the smoke shelf) and vacuum or scoop out the thick piles of soot that have landed there. Failure to clean the smoke shelf will result in a terrible odor in your home during the humid summer months.
- Use a stiff wire hand brush to scrub the walls of the firebox, the metal grate, and the damper plate itself. Vacuum up the remaining residue.
- Remove the plastic sheeting and carefully fold the drop cloth inwards to contain any stray soot.
Post-Cleaning Inspection & Cleanup
Now that the flue is clean, take a powerful LED flashlight and shine it straight up the chimney from the firebox. The walls should look clean and free of fuzzy, textured buildup. You should be able to see the joints between the clay tiles or the smooth reflection of the stainless steel liner.
This is the perfect time to look for structural damage. Do you see cracks in the clay flue tiles? Is the mortar joint deteriorating? Is there evidence of water intrusion, like rust streaks or white, powdery efflorescence on the brick? If you spot any of these issues, your DIY cleaning has successfully uncovered a problem that needs professional repair.
For a detailed breakdown of what a professional looks for during these assessments, check out our guide explaining Chimney Inspection Levels 1, 2, and 3. Even as a DIYer, understanding a Level 1 visual inspection empowers you to keep your home safe.
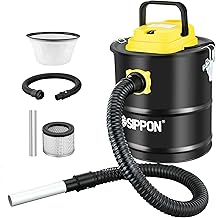
Essential Cleanup Tool: HEPA Ash Vacuum
Do not ruin your expensive household vacuum or blow microscopic soot back into your living room. A dedicated Ash Vacuum features a metal canister, heat-resistant hoses, and ultra-fine HEPA filtration designed specifically to trap fine fireplace ash and toxic creosote dust safely.
Check Price on AmazonWhen to Put Down the Brush and Call a Certified Professional
DIY chimney sweeping saves money and builds homeownership confidence, but it is not a cure-all. You must recognize when a situation exceeds mechanical brushing.
You need to contact a chimney sweep certified by the Chimney Safety Institute of America (CSIA) if you encounter the following:
- Stage 3 Glazed Creosote: If the walls of your flue look like black, shiny glass, a standard brush will just glide right over it. It requires aggressive chemical treatments and rotary power sweeping.
- Animal Nests or Blockages: If your brush hits a solid, immovable mass, it could be a collapsed flue tile or a massive raccoon/bird nest. Trying to ram a brush through a dense nest can severely damage your chimney.
- Drafting Issues Persist: If you have thoroughly brushed the chimney, but smoke still pours into your living room when you light a fire, you have a negative pressure, drafting, or structural issue that requires expert diagnostics.
If you find yourself in over your head, don’t hire the first cheap handyman you find online. Read our expert advice on how to choose a trusted chimney sweep and repair professional to ensure you aren’t scammed.
Frequently Asked Questions (FAQs)
Yes, the bottom-up method is a viable alternative if roof access is dangerous. However, it requires significantly more physical effort to push the brush against gravity, and you must seal the fireplace opening flawlessly to prevent a massive soot cloud from ruining your living room.
This usually happens if you buy a brush that is too large, or if you twist threaded rods counter-clockwise. Do not panic and do not pull with extreme force, which can damage the flue. Try pushing it down slightly, twisting clockwise, and pulling up with steady pressure. If it is hopelessly wedged, you must call a professional chimney sweep to extract it.
Absolutely not. Chemical sweeping logs release additives that dry out and flake stage 2 and stage 3 creosote, turning it into stage 1 dust. However, that dust still remains clinging to the chimney walls. You must still use a mechanical chimney brush to sweep the loosened debris out of the flue.
If you seal the fireplace opening correctly with heavy plastic and painter’s tape, soot should not escape into the room. However, as a precaution against tape failure or an accidental drop of a soot-covered rod, throwing a few drop cloths over the immediate furniture near the hearth is highly recommended.
Standard stiff fiberglass rods will not navigate 45-degree or 90-degree elbows. You must purchase highly flexible nylon rods, often sold with rotary cleaning kits. These can bend around corners while maintaining enough torque to spin or push the brush effectively.
No. You must never use a stiff steel wire brush on a stainless steel liner. The wire bristles will deeply scratch the metal, stripping away its anti-corrosive properties and creating microscopic grooves where highly acidic creosote will pool and eat through the liner. Always use a polypropylene (plastic) brush for metal liners.
Take the brush outside. Knock it firmly against a hard surface (like a piece of scrap wood) to dislodge the heavy soot. For a deeper clean, spray the bristles with a heavy-duty degreaser or warm soapy water, scrub it with a smaller hand brush, and rinse it thoroughly with a hose. Let it dry completely in the sun before storing to prevent rust on the metal stem.
A high-quality DIY chimney brush kit (brush and rods) costs between $50 and $120, and it will last for many years. Hiring a certified chimney sweep typically costs between $150 and $300 per visit, depending on your location and the condition of the chimney. However, the professional fee usually includes a valuable visual safety inspection.
Conclusion & Final Thoughts
Learning how to use a chimney brush transforms a daunting, messy chore into a manageable and highly rewarding DIY project. By understanding the nature of creosote, selecting the perfect brush for your specific flue, and rigorously adhering to the top-down or bottom-up methods with uncompromising safety prep, you protect your family from the terrifying reality of chimney fires and carbon monoxide backdrafts.
Remember, while mechanical brushing removes the bulk of the danger, it does not replace the critical, trained eye of a professional inspector looking for hidden structural damage. Sweep your chimney diligently to save money and ensure clear airflow, but never hesitate to call in the experts if you encounter immovable glaze, drafting problems, or degraded masonry.
Ready to Tackle the Soot?
Equip yourself with the best tools for the job. Do not compromise your safety with cheap, flimsy rods or the wrong bristles.
Shop Top-Rated Chimney Brush Kits on Amazon