The Ultimate Step-by-Step Guide to Cleaning Your Chimney Flue Safely
There is nothing quite like the radiant warmth and hypnotic crackle of a wood-burning fireplace on a frigid winter evening. It is the quintessential heart of a cozy home. However, that beautiful fire produces a dark, hidden byproduct that silently coats the inside of your chimney flue: creosote.
If left unchecked, this highly combustible tar-like substance builds up layer by layer. When it reaches a critical mass, a stray spark from the firebox can ignite it, causing a terrifying and catastrophic chimney fire that burns at upwards of 2,000°F—hot enough to crack masonry, melt metal liners, and spread rapidly to the wooden framing of your home. To prevent this, understanding exactly how often you need to clean your chimney based on your usage is the first step in responsible homeownership.
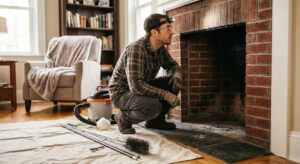
While hiring a certified chimney sweep is always the safest and most thorough option, cleaning a standard, relatively straight chimney flue is a project that a capable, safety-conscious DIYer can tackle. It requires the right equipment, a fearless attitude toward soot, and a strict adherence to safety protocols. In this comprehensive, deep-dive guide, we will walk you through the exact process professionals use to eradicate creosote, protect your living room from soot storms, and ensure your hearth is safe for the burning season.
Understanding the Enemy: The 3 Stages of Creosote
Before you purchase a brush, you must understand what you are sweeping. Creosote is a byproduct of incomplete combustion. When wood burns, it releases smoke, water vapor, gases, and unburned wood particles. As this hot mixture travels up the relatively cooler chimney flue, condensation occurs. The resulting residue that sticks to the flue walls is creosote.
Creosote develops in three distinct stages, and identifying which stage you have determines if a DIY clean is even possible.
- Stage 1 Creosote (Velvety Soot): This is the easiest to remove. It appears as a dusty, velvety black powder. It brushes away effortlessly with a standard chimney brush. If you clean your flue annually and burn well-seasoned wood, this is usually all you will find.
- Stage 2 Creosote (Porous & Crunchy): As Stage 1 creosote bakes under the heat of subsequent fires, it hardens into a porous, crunchy, crust-like substance. It is highly flammable. A standard poly or wire brush can usually remove this, but it requires significant elbow grease and potentially a stiff wire scraper.
- Stage 3 Creosote (Glaze): This is the danger zone. It looks like thick, shiny, black tar poured down the inside of your chimney. It is incredibly dense, highly concentrated fuel. You cannot remove Stage 3 creosote with a standard chimney brush. It requires professional chemical treatments (like rotary chain flails or chemical modifiers) to break down. If you see thick, shiny glaze, put away your tools and call a professional immediately.
⚠️ Warning: The Signs of a Hidden Chimney Fire
Sometimes, chimney fires happen without the homeowner even realizing it. They burn fast and hot, starving themselves of oxygen before escaping the flue. If you notice warped damper metal, cracked flue tiles, or puffy, expanded creosote (which looks like burnt marshmallows), you have had a chimney fire. You must learn the signs of a chimney fire. Do not use the fireplace until a professional inspects it for structural damage.
Should You DIY or Hire a Professional?
DIY chimney cleaning can save you anywhere from $150 to $300 per sweep. However, it is a messy, physically demanding job that involves working on ladders or roofs. Let’s weigh the options.
Pros of DIY Chimney Cleaning
- Significant cost savings over the lifetime of the home.
- You control the schedule; no waiting weeks for an appointment during peak fall season.
- Forces you to closely inspect your own home’s infrastructure annually.
- Highly rewarding hands-on maintenance task.
Cons of DIY Chimney Cleaning
- High risk of falling if utilizing the top-down (roof) method.
- Incredibly messy; a mistake can ruin living room carpets and furniture.
- DIYers cannot perform a Level 2 video inspection to find hidden cracks.
- Standard brushes cannot remove Stage 3 glazed creosote.
The Verdict: If you have a single-story home, a relatively straight flue, Stage 1 or 2 creosote, and you are comfortable with physical labor, DIY is a great option. If you have a steeply pitched roof, a multi-story home, complex flue bends, or thick tar glaze, hire a pro.
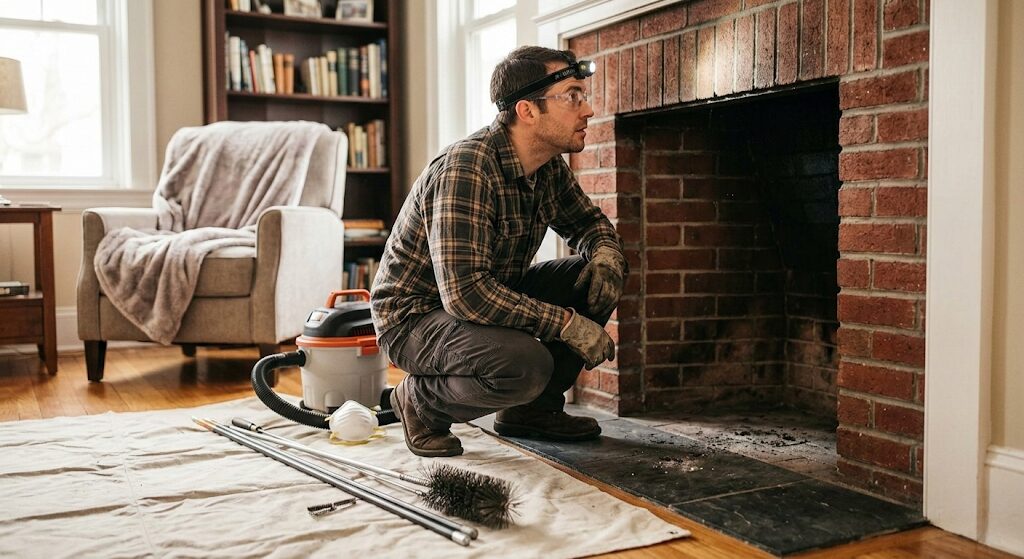
Essential Tools for DIY Chimney Cleaning
Attempting this job without the proper gear will result in a poorly cleaned flue and a ruined living room. The initial investment in tools will pay for itself after the first use.
- The Chimney Brush: Sizing is critical. You must measure the inner dimensions of your flue (e.g., 8×8 inches square, or 6 inches round). Buying a brush that is too small won’t clean the walls; a brush that is too large will get irrevocably stuck. If you have a metal liner, you must read our guide on finding the best chimney brushes for stainless steel liners (hint: use poly brushes, never steel wire, which will scratch and ruin the liner). For clay tile flues, stiff wire brushes are best.
- Flexible Fiberglass Extension Rods: You need enough rods to reach the entire height of your chimney, plus a few feet of slack.
- Heavy-Duty Tarp and Drop Cloths: To protect your hearth, flooring, and furniture.
- Plastic Sheeting and Heavy-Duty Painter’s Tape: To seal the firebox opening.
- A Chimney Vacuum (or Ash Vac): A standard household vacuum will instantly clog and blow fine soot back into the air. You need a vacuum specifically designed to capture microscopic ash particles. Before buying, be sure to compare chimney vacuums for suction capacity and build quality.
- Safety Gear: A high-quality N95 or P100 respirator mask (creosote dust is toxic to inhale), safety goggles that seal around your eyes, and sturdy work gloves.
Equip Yourself for the Job
Don’t cut corners on your cleaning equipment. Proper brushes and rods are the difference between a clean flue and a massive headache.
Shop Top-Rated Chimney Cleaning Kits on AmazonStep 1: Preparation and Ultimate Safety
Preparation is 80% of the work. If you fail to prepare the room, you will be cleaning toxic black soot out of your curtains for months.
-
Wait for a Cold Flue
Never attempt to clean a chimney that has been used within the last 48 hours. Ensure the ashes are completely cold to the touch. Warm drafts will blow soot straight into your face.
-
Clear the Hearth
Remove the grate, and sweep out all loose ash and leftover wood from the firebox using your ash vacuum or a dustpan.
-
Dress the Room
Move rugs and furniture at least 6 to 8 feet back from the fireplace. Lay down heavy canvas drop cloths (plastic tears too easily) over the hearth and surrounding floor.
-
Seal the Firebox (The Most Critical Step)
Take heavy mil plastic sheeting and cut a piece slightly larger than your fireplace opening. Use heavy-duty painter’s tape or duct tape (if it won’t ruin your surround) to completely seal the plastic over the fireplace opening. Leave absolutely no gaps. When the brush moves down the flue, it pushes a massive column of air and soot ahead of it. If the seal isn’t tight, that soot will explode into your living room.
Step 2: Choosing Your Cleaning Method
There are two primary ways to physically sweep the flue: Top-Down or Bottom-Up.
| Method | How It Works | Best For | Safety Level |
|---|---|---|---|
| Top-Down (Roof) | Climbing onto the roof and pushing the brush down the chimney towards the firebox. | Stubborn creosote, homes with safe, walkable roofs. Gravity works with you. | Low. Working on a sloped roof carrying equipment is inherently dangerous. |
| Bottom-Up (Hearth) | Standing in the living room and pushing the rods up the flue through a small slit in the plastic sheeting. | Steep roofs, multi-story homes, or homeowners who fear heights. | High. You remain safely on the ground indoors. |
For the purpose of this DIY guide, we strongly recommend the Bottom-Up Method. It is significantly safer for the average homeowner and eliminates the risk of fatal roof falls.
Step 3: The Sweeping Process (Bottom-Up Method)
Now that the room is sealed and you are wearing your respirator and goggles, it is time to scrub.
- Create an Access Slit: Cut a small slit in the center of the plastic sheeting covering your fireplace. The slit should be just large enough to push the fiberglass rod through, but tight enough to prevent major dust blowback.
- Assemble the Brush: Attach the chimney brush to the first fiberglass rod securely.
- Insert and Scrub: Push the brush up through the damper opening and into the flue. Begin a vigorous up-and-down scrubbing motion. Do not just push it up; you must scrub the walls as you go.
- Add Rods Systematically: Once you have scrubbed the first few feet, attach the second rod to the end of the first. Push the assembly higher and repeat the vigorous scrubbing. Continue adding rods and scrubbing until you feel the brush pop out the top of the chimney (or hit the chimney cap).
- The Descent: Do not just pull the assembly down quickly. Scrub the flue again on the way down, detaching the rods one by one as they emerge from the plastic slit.
Pro Tip: The Rotary Sweeping Alternative
If manual scrubbing sounds exhausting, consider a rotary sweeping system. These kits feature specialized whip heads that attach to a standard power drill. The drill spins the whips at high speeds, violently knocking creosote off the walls with significantly less manual effort. They navigate bends much easier than stiff traditional brushes.
Step 4: The Smoke Shelf & Damper (The Messiest Part)
Once you have swept the entire vertical flue, a massive pile of toxic soot and creosote will have cascaded down and piled up on top of your damper plate and the smoke shelf (the flat area directly behind the damper).
Wait at least 30 to 45 minutes after sweeping for the microscopic dust to settle inside the sealed firebox. Do not rush this, or you will breathe it in.
Carefully peel back the top half of the plastic sheeting. Reach up (wearing gloves and long sleeves) and use a smaller wire brush to scrub the metal damper plate, the hinges, and the surrounding brickwork of the smoke chamber. The smoke chamber is an inverted funnel shape that leads to the flue; it often collects the thickest creosote and must be scrubbed thoroughly by hand.
Step 5: Cleanup and Final Inspection
Carefully roll up the plastic sheeting, trapping as much dust inside it as possible, and throw it away. Use your industrial ash vacuum to suck up the massive pile of creosote on the firebox floor. Never use a standard shop-vac, as the fine soot will blow right through the paper filter and coat your house.
Once clean, take a powerful flashlight and look up the flue. The walls should be mostly clean brick or metal. If you see large patches of shiny glaze remaining, your brush failed to remove Stage 3 creosote, and you must call a professional.
Finally, test the damper. It should open and close smoothly without binding on leftover soot.
Do Creosote Sweeping Logs Actually Work?
You have likely seen “Creosote Sweeping Logs” (CSLs) at the hardware store. They claim to clean your chimney just by burning them. Do not rely on these as a replacement for physical sweeping.
These logs contain chemicals that, when burned, release a vapor that attaches to Stage 2 and Stage 3 creosote. The chemicals dry out the sticky tar, turning it into a flaky, brittle crust. Over the next few weeks, some of this crust may fall down into your firebox on its own.
However, they do not physically remove the bulk of the hazard. They are best used as a pretreatment. Burning a CSL a week or two before you plan to physically sweep the flue will make the sweeping process significantly easier by loosening the stubborn crust.
Frequently Asked Questions (FAQs)
You must climb to the roof or look up through the damper and physically measure the inside dimensions of the flue opening with a tape measure. Buy a brush that matches those exact dimensions. Do not guess; an oversized brush will get stuck.
If you have a traditional clay tile flue or bare masonry, use a stiff wire brush to aggressively remove creosote. If you have a stainless steel chimney liner, you must use a poly (plastic) brush. Wire brushes will scratch the stainless steel, causing it to rust and voiding its warranty.
Yes, the bottom-up method is generally safer for DIYers as it keeps you off the roof. You simply feed the brush up through the damper, attaching extension rods as you push it higher until it reaches the top.
The NFPA (National Fire Protection Association) recommends an annual inspection. However, if you burn a cord of wood (a stack 4’x4’x8′) or more per season, or if you frequently burn unseasoned/wet wood, you should clean it at least once a year, possibly twice.
Failure to clean the flue results in a buildup of highly flammable creosote. Eventually, a stray spark will ignite this buildup, causing a chimney fire that can easily spread to the wooden structure of your home, resulting in catastrophic property damage or loss of life.
A strong campfire odor during the summer or humid days is a prime indicator that your flue is coated in creosote. The humidity mixes with the creosote, causing it to off-gas into the home. A thorough sweeping usually resolves this issue.
No. Standard shop vac filters are not fine enough to trap microscopic soot particles. The vacuum will simply pull the soot in and blow it immediately out the exhaust, covering your entire living room in a layer of black dust. You must use a specialized ash vacuum with HEPA filtration.
Stage 3 creosote is a thick, shiny, tar-like glaze that coats the flue. It is incredibly dense and highly flammable. It cannot be removed with standard DIY chimney brushes and requires a professional sweep using specialized chemical modifiers or rotary chains.
While gas fireplaces do not produce creosote, their flues should still be inspected annually. Birds, squirrels, or debris can block the vent, which can lead to deadly carbon monoxide backing up into your home.
No. Creosote sweeping logs contain chemicals that dry out and loosen sticky tar, making it flaky. While they are an excellent pretreatment to make physical brushing easier, they do not physically remove the massive volume of debris from the flue on their own.
Conclusion & Final Safety Check
Cleaning your own chimney flue is a dirty, labor-intensive job, but it is entirely manageable for a well-prepared homeowner. By utilizing the bottom-up method, investing in the correct sized brushes and fiberglass rods, and meticulously sealing your firebox, you can dramatically reduce the risk of a devastating chimney fire.
However, remember that a DIY sweep is not a replacement for a professional Level 2 video inspection. A brush will remove creosote, but it cannot tell you if the intense heat of past fires has cracked your clay flue tiles, exposing your home’s framing to extreme heat. If you sweep your chimney yourself, it is still highly recommended to have a certified professional inspect the structural integrity of the system every few years.
Stay safe, respect the soot, and enjoy the peace of mind that comes with a clean, roaring fire this winter.
Ready to Tackle the Soot?
Ensure you have the right tools before you start. A proper brush and rod kit makes the job infinitely easier and cleaner.
Shop Complete Chimney Cleaning Kits on Amazon