
There’s something deeply satisfying about a pellet stove humming quietly on a cold winter evening, filling the room with even, radiant heat without you ever having to split a log or haul firewood. But that seamless, push-button warmth comes with a trade-off: pellet stoves have more moving parts, more electronic systems, and more precision engineering than a traditional wood-burning fireplace. And all of that sophistication demands consistent, attentive care.
The good news is that maintaining a pellet stove isn’t complicated—it just requires developing the right habits. Whether you fire yours up daily through a long northern winter or use it as a seasonal supplement in milder climates, a structured cleaning and maintenance routine is the single most important thing you can do to protect your investment, preserve heating efficiency, and keep your household safe from carbon monoxide hazards and exhaust leaks.
This guide is the most comprehensive pellet stove cleaning and maintenance checklist you’ll find anywhere. We cover every frequency—from what needs attention every single burn cycle to what should only be handled once a year by a certified technician. We’ll explain the why behind each task, not just the what, so you truly understand your stove rather than just following steps blindly. By the end, you’ll have a complete system that takes the guesswork out of pellet stove ownership entirely.
1. Why Pellet Stove Maintenance Matters More Than You Think
Most pellet stove owners understand that their appliance needs cleaning. What far fewer appreciate is exactly how much neglect costs them—in efficiency, in repair bills, and sometimes in safety. A pellet stove running on a dirty burn pot with clogged heat exchangers and a partially blocked exhaust can lose 20–35% of its rated heating efficiency. You’re burning the same amount of pellets for substantially less heat. That cost adds up quickly over a heating season.
Beyond efficiency, there’s safety. Unlike wood-burning fireplaces and stoves, pellet stoves are sealed combustion systems that use electric motors and fans to manage airflow. If the exhaust pathway becomes restricted—through ash buildup, a partially blocked vent cap, or deteriorating gaskets—combustion gases can be pushed back into the living space. Carbon monoxide is odorless, invisible, and can be fatal before most people realize anything is wrong. This is why having a reliable carbon monoxide detector is non-negotiable in any home with a pellet stove.
Pellet stoves also present a unique maintenance challenge because they burn compressed pellets that have been manufactured from wood sawdust, agricultural byproducts, or other biomass. The quality and ash content of those pellets varies dramatically between brands and even between batches. A bag of premium hardwood pellets may produce less than half the ash of a budget softwood blend. Choosing the right fuel and storing it properly is itself a maintenance task—one that directly determines how often you’ll need to clean the burn pot and how much residue accumulates in the firebox, heat exchanger, and exhaust system.
Finally, the comparison between pellet stoves and their wood-burning counterparts matters here. If you’re weighing the long-term commitment of pellet stove ownership, it’s worth reading our detailed breakdown of wood stove vs. pellet stove efficiency and output. Understanding what you own and what it demands is the first step toward maintaining it well.
2. Understanding How a Pellet Stove Works (So Maintenance Makes Sense)
Before diving into the checklist itself, it’s worth taking a few minutes to understand the mechanical and combustion systems inside your pellet stove. Many owners follow cleaning instructions mechanically without knowing why each component matters—and that means they often miss early warning signs of failure or skip maintenance that seems optional but isn’t.
The Core Components
A pellet stove has several distinct systems working in concert. The hopper is the storage bin—typically holding 40–80 lbs of pellets—that feeds fuel into the combustion system. An auger (a motorized screw conveyor) moves pellets from the hopper into the burn pot at a controlled rate determined by your heat setting. The burn pot sits at the base of the firebox and is where combustion actually occurs, assisted by a combustion (or exhaust) blower that draws fresh air in and pushes exhaust gases out through the vent pipe.
Heat generated in the firebox is transferred to the room through heat exchanger tubes or baffles. A separate convection blower (also called the room air blower) pushes room-temperature air past these hot surfaces and back out through the front grille as warm air. Finally, an igniter—a heated rod similar to a car’s glow plug—starts combustion automatically when you turn the stove on, without requiring a match or lighter.
Where Problems Hide
Ash and partially combusted residue accumulate in the burn pot after every firing. If that residue builds up, it restricts the airflow holes in the burn pot’s perforated base, starving combustion of oxygen. The result is incomplete combustion: more smoke, more unburned carbon particles, reduced heat, and dramatically increased residue production—a vicious cycle that accelerates further buildup.
The heat exchanger tubes collect a layer of fly ash with every burn. Even a thin coating of ash is a highly effective insulator. Studies of industrial heat exchangers consistently show that even a 1mm ash deposit can reduce heat transfer efficiency by 10–15%. Over a season of daily burns without cleaning, that layer gets thick enough to seriously compromise your stove’s heating output.
The exhaust venting pathway—from the combustion chamber through the blower, the exhaust vent fitting on the back of the stove, the horizontal vent pipe, and the exterior vent cap—is where chimney effect dynamics play a critical role in maintaining proper draft and preventing backdrafting. Any restriction in this pathway shifts the pressure balance and can force exhaust back toward the living space, particularly during startup and shutdown cycles.
3. Tools and Supplies You Need Before You Start
Having the right tools doesn’t just make pellet stove maintenance easier—it makes it safer and more effective. Using improvised or inappropriate tools can damage precision components, spread fine ash through your home’s air, or leave cleaning jobs incomplete. Here’s a comprehensive list of everything you should have on hand before beginning any maintenance task.
Essential Cleaning Tools
- Ash vacuum with HEPA filter (dedicated to pellet stove)
- Metal ash bucket with lid
- Small metal scoop or ash brush
- Heat-resistant gloves
- Dust mask (N95 minimum)
- Stove glass cleaner (non-ammonia)
- Lint-free cleaning cloths
- Soft-bristle detail brushes
- Pellet stove vent cleaning brush kit
- Inspection mirror or flashlight
- Safety glasses / goggles
- Nitrile or heat-resistant gloves
- Protective coveralls or old clothes
- Carbon monoxide detector (test before each season)
- Stove owner’s manual (keep accessible)
- Maintenance log or journal
- Error code reference sheet
- Technician’s contact information
Replacement Parts to Keep on Hand
Smart pellet stove owners keep a small stock of consumable parts so a mid-season failure doesn’t leave them without heat for days waiting on a delivery. The parts most likely to need unplanned replacement include:
- Igniter rods — Typically last 3–5 years but can fail unexpectedly. A universal replacement or OEM part for your stove model is worth having.
- Door gaskets — The fiberglass rope seal around the door and ash pan deteriorates with heat cycles. A failing gasket disrupts combustion air control.
- Exhaust gaskets — The gaskets between vent pipe sections seal the combustion pathway. Inspect annually; replace if cracked or compressed.
- Burn pot — Burn pots warp and crack over time, particularly in stoves that run at maximum output frequently. A spare prevents a mid-season shutdown.
- Fuses — Most pellet stoves have one or more fuses protecting the electrical system. Know the rating for yours.

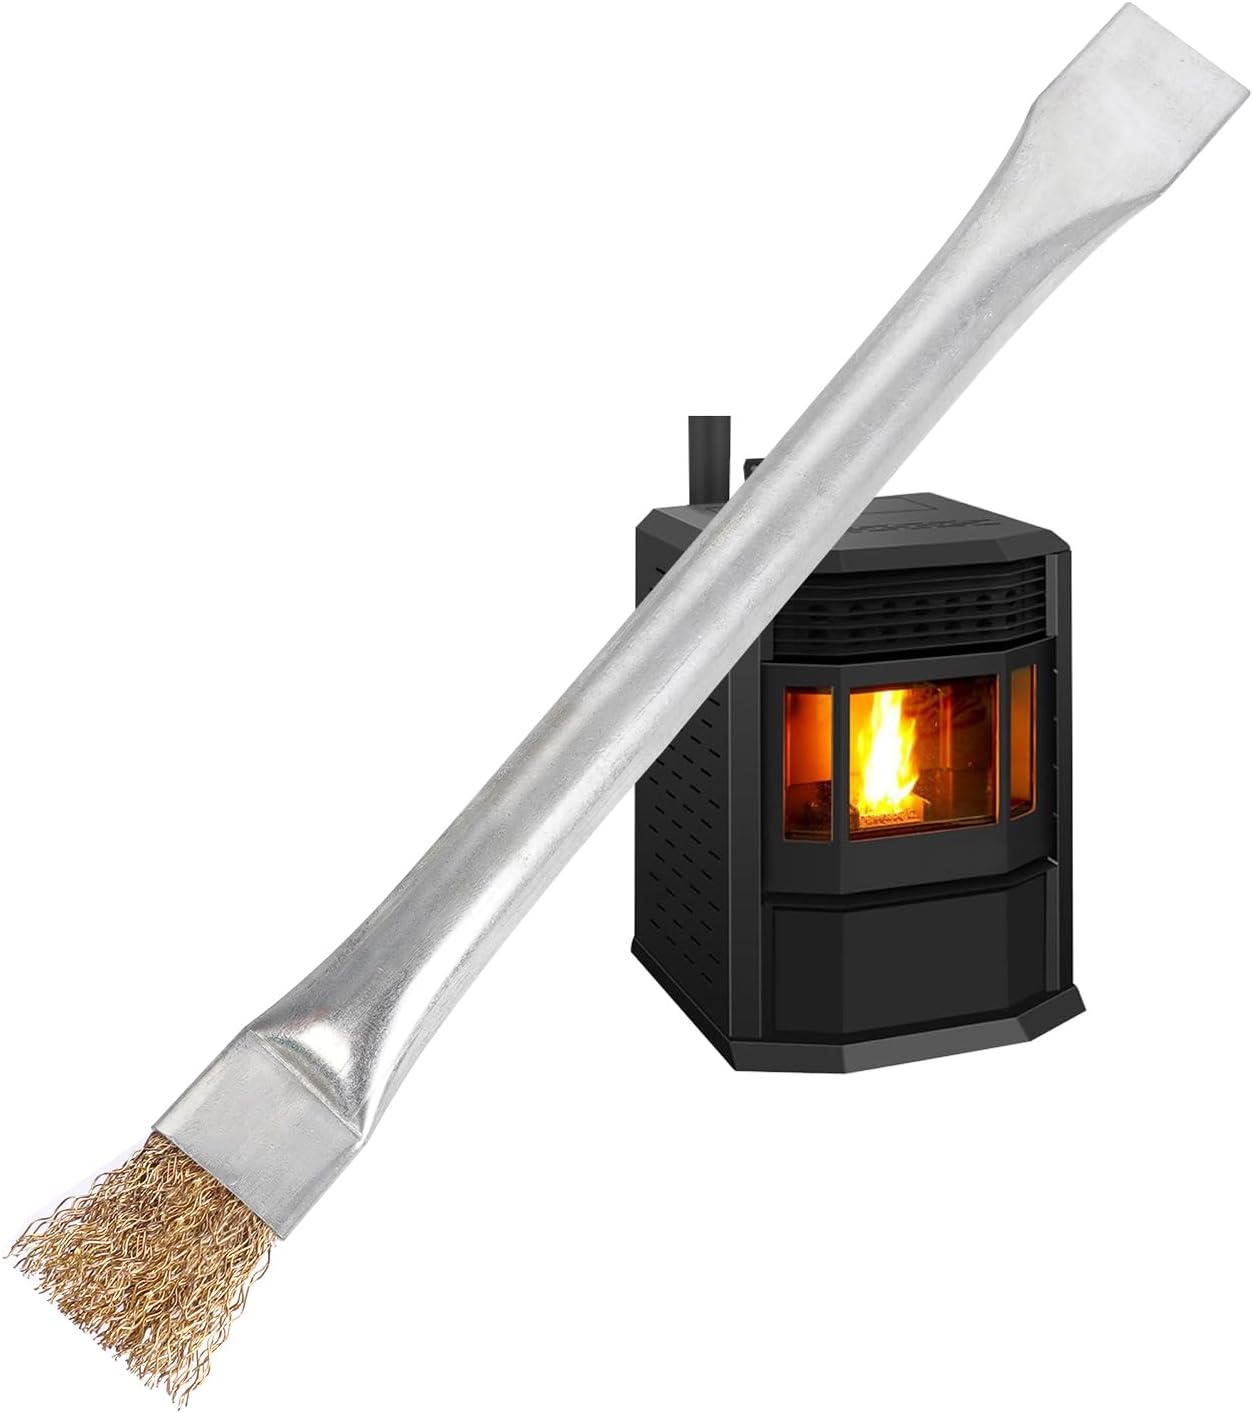
Complete Pellet Stove Cleaning Kit
Ash vacuum, burn pot brush, vent cleaning rods, and gasket rope included — everything you need for a full seasonal service.
Check Price on Amazon →4. Daily Pellet Stove Cleaning Tasks
Daily maintenance is the foundation of pellet stove care. These tasks take only a few minutes but dramatically reduce the workload of weekly and monthly cleaning, and—more importantly—they keep every burn cycle running at full efficiency from start to finish.
1. Clean the Burn Pot
This is the single most critical daily maintenance task. The burn pot—the perforated metal cup or tray where pellets actually ignite—accumulates ash, clinkers (fused ash and mineral deposits), and unburned carbon after every burn cycle. The airflow holes in the bottom of the burn pot are what allow combustion air to reach the fuel; block them, and combustion deteriorates rapidly.
Using the small brush or scraper that came with your stove (or a stiff-bristle detail brush), remove all loose ash and debris from inside the burn pot. Inspect the airflow holes and use a small pick or toothpick to clear any that are blocked. If clinkers—rock-hard gray or black deposits—have formed, remove them completely. Some burn pots have a self-cleaning mechanism; even so, check daily and manually clear anything the mechanism missed.
2. Empty the Ash Pan
The ash pan, located below the burn pot, catches falling ash during operation. Most pellet stoves can run for several days before the ash pan becomes critically full, but checking and emptying it daily prevents overflow ash from reaching the combustion blower or other mechanical components. Use a metal scoop to transfer ash to your metal ash bucket, seal it, and store it outdoors away from combustible materials until fully cool.
3. Inspect the Glass
A quick visual inspection of the viewing glass takes seconds and tells you a great deal about combustion quality. Healthy combustion produces minimal glass soiling—a faint haze at most. Heavy, rapid discoloration indicates incomplete combustion, which often means a dirty burn pot, low-quality pellets, or incorrect feed rate settings. You don’t need to clean the glass daily, but checking its condition gives you early feedback on combustion performance.
4. Check the Hopper Level
Confirm the hopper has enough pellets for your anticipated runtime. Running out mid-cycle—especially during a cold night—forces the stove to execute an error shutdown and restart sequence, which stresses the igniter. Most hopper windows are frosted or opaque over time; use a flashlight to check fuel level directly.
5. Listen and Observe During Startup
During the ignition and warm-up cycle, pay attention to sound and visual cues. The combustion blower and convection blower should both sound smooth and consistent—not rattling, squealing, or intermittent. The flame should establish cleanly within 3–5 minutes and burn with a steady, upright character. Weak, lazy flames or ignition failures that require multiple attempts are early indicators that cleaning or component inspection is overdue.
5. Weekly Pellet Stove Cleaning Tasks
Weekly cleaning builds on daily habits by addressing components that accumulate significant residue over the course of several burn cycles. These tasks typically require 20–40 minutes and should be performed with the stove cold and unplugged from the electrical supply.
Clean the Heat Exchanger Tubes
Heat exchanger tubes—the vertical or angled tubes running through the firebox that transfer heat to the convection air stream—are among the highest-impact components to clean regularly. Most pellet stoves include a dedicated scraping tool that fits inside the tubes, often accessible through a port on the front or top of the unit. Insert the rod and work it up and down through each tube to dislodge ash buildup. Collected debris will fall into the firebox and can be vacuumed out with the ash vacuum.
Given that even a thin ash deposit substantially reduces heat transfer efficiency, weekly attention to the heat exchangers is one of the fastest ways to keep your stove’s output where it should be. If you notice a gradual decline in how warm the room gets at the same heat setting, the heat exchangers are typically the first place to look.
Vacuum the Firebox Interior
With the ash vacuum—not a household vacuum—thoroughly vacuum all surfaces inside the firebox, including the walls, base, and any baffles or heat shields. Pay particular attention to areas where fly ash accumulates in corners and along the bottom edges. Fine ash that’s allowed to pack down and absorb moisture can become corrosive to the stove’s steel and cast iron components over time.
Clean the Stove Glass
The viewing glass deserves a proper weekly clean. After ensuring the stove is completely cold, apply a small amount of stove glass cleaner to a lint-free cloth—or use a pinch of the white ash from your firebox on a damp cloth, which works surprisingly well due to its mild abrasive and alkaline properties. Rub gently in circular motions, then wipe clean with a dry cloth. Never use steel wool, abrasive pads, or standard window cleaners on stove glass; the ceramic glass used in modern pellet stoves is chemically sensitive and can be permanently damaged by ammonia-based cleaners.
Check and Clean Door Seals
The fiberglass rope gasket running around the door perimeter creates a critical air seal that allows the combustion blower to maintain proper draft. Press the door firmly against a piece of paper: you should feel significant resistance when pulling the paper out. If it slides freely, the gasket has compressed and lost its sealing ability. A failed door gasket can cause combustion air control issues, smoke spillage, and error codes. Wipe the gasket area clean with a dry cloth to remove accumulated ash and debris that can prevent a proper seal.
Inspect the Exhaust Vent Fitting
The collar or fitting where the exhaust pipe connects to the back of the stove is a common point of ash accumulation and gasket deterioration. Inspect it weekly—or at least every two weeks during heavy use—to confirm the pipe is seated securely, the gasket is intact, and no discoloration or residue is present on surrounding surfaces (which can indicate minor exhaust leakage).

Stove Glass Cleaner — Ammonia-Free Formula
Safe for ceramic stove glass. Dissolves creosote haze and fly ash with minimal scrubbing — works on both pellet and wood-burning stoves.
Check Price on Amazon →6. Monthly Pellet Stove Maintenance Tasks
Monthly maintenance tasks go deeper than daily and weekly cleaning, addressing components and systems that don’t need attention after every burn but that can develop serious problems if left unattended for an entire season. Block 60–90 minutes for monthly maintenance and plan to do it on a mild day so your household isn’t cold while the stove is out of service.
Deep-Clean the Firebox
A full monthly firebox cleaning involves removing all accessible components—the burn pot, the heat shields, any baffles—and thoroughly vacuuming every surface before reassembling. This is also the time to inspect the firebox walls, floor, and ceiling for cracking, warping, or excessive corrosion. Small surface rust patches on steel components are generally normal and can be addressed with a light application of stove black. Significant warping or cracking in the firebox liner indicates heat stress and should be evaluated by a technician.
Clean the Combustion Blower
The combustion blower (exhaust fan) is responsible for maintaining draft through the entire combustion system. Its impeller blades accumulate a fine coating of fly ash and oil deposits over time, which unbalances the fan and reduces its airflow capacity. With the stove unplugged and fully cooled, access the combustion blower according to your owner’s manual—typically through a rear access panel or by removing the exhaust vent fitting. Use a soft brush and compressed air or a vacuum to clean the blades thoroughly. A visually clean combustion blower moving the same volume of air as designed is fundamental to safe, efficient operation.
Clean or Inspect the Convection Blower
The convection blower (room air fan) doesn’t contact combustion gases directly but still accumulates household dust, pet hair, and fine particles on its impeller. A dusty convection blower runs hotter, moves less air, and wears out faster. Monthly cleaning—typically accomplished with a vacuum and soft brush through the front grille access—keeps it running quietly and efficiently.
Check the Auger and Feed System
The auger motor and feed tube should be inspected monthly for pellet dust accumulation, jams, or signs of wear. Pellet dust—the fine powder that settles to the bottom of the hopper—can pack into the auger tube and cause feed inconsistencies or jams if allowed to accumulate. Most stoves can be vacuumed through the hopper with an ash vacuum to remove excess dust before it creates problems.
Listen carefully to the auger motor during operation. It should run smoothly and consistently. A grinding, squealing, or intermittent sound indicates a bearing issue or potential jam developing. Catching this early prevents a complete auger failure, which is one of the more expensive pellet stove repairs at $200–$600+ for parts and labor.
Inspect All Gaskets and Seals
Beyond the door gasket, pellet stoves have gaskets at the ash pan, around the glass, at the exhaust collar, and sometimes around inspection ports. Monthly, press gently on these gaskets to assess their compression. They should feel firm and springy, not flat and hard. Replace any gaskets that have compressed to less than half their original thickness—a task most homeowners can handle themselves with rope gasket kits available for most stove models.
Full Maintenance Checklist by Frequency
| Task | Daily | Weekly | Monthly | Annual |
|---|---|---|---|---|
| Clean burn pot | ✅ | ✅ | ✅ | ✅ |
| Empty ash pan | ✅ | ✅ | ✅ | ✅ |
| Inspect glass | ✅ | — | — | — |
| Clean glass | — | ✅ | ✅ | ✅ |
| Scrape heat exchanger tubes | — | ✅ | ✅ | ✅ |
| Vacuum firebox | — | ✅ | ✅ | ✅ |
| Check door seals | — | ✅ | ✅ | ✅ |
| Clean combustion blower | — | — | ✅ | ✅ |
| Clean convection blower | — | — | ✅ | ✅ |
| Inspect auger system | — | — | ✅ | ✅ |
| Check all gaskets | — | — | ✅ | ✅ |
| Clean exhaust vent pipe | — | — | — | ✅ |
| Inspect wiring & connections | — | — | — | ✅ |
| Test igniter function | — | — | — | ✅ |
| Full draft/combustion analysis | — | — | — | ✅ |

HEPA Ash Vacuum for Pellet & Wood Stoves
Fine-filtration ash vacuum designed specifically for hot and cold fine ash removal. Prevents fine particles from recirculating into room air — essential safety tool for pellet stove owners.
Check Price on Amazon →7. The Annual Pellet Stove Service Checklist
Annual service is the most comprehensive maintenance event in the pellet stove calendar. Ideally scheduled in late spring or early summer—after the heating season ends and before the next one begins—it gives you time to address any issues discovered without the pressure of needing the stove for heat. It’s the combination of a thorough DIY deep clean and a professional inspection and tune-up.
Annual DIY Component: What You Should Do
The homeowner’s portion of annual service builds on monthly cleaning tasks but goes deeper and covers components you may have skipped during the season.
-
1Full disassembly of accessible interior components. Remove the burn pot, heat shields, and any removable baffles. Inspect each for warping, cracking, or excessive corrosion. Clean thoroughly before reinstalling.
-
2Thorough vacuum of the entire firebox and all passageways. Use the ash vacuum with a crevice tool to reach every corner, behind heat shields, and along every surface. Remove and vacuum the ash drawer completely.
-
3Complete exhaust pathway cleaning. Disconnect and clean the exhaust pipe from stove to exterior vent cap. See Section 8 for detailed instructions.
-
4Deep-clean both blowers. Remove and clean the combustion blower impeller and the convection blower wheel, inspecting each for bearing wear and blade condition.
-
5Replace all gaskets. Annual gasket replacement—door, ash pan, glass, exhaust collar—is cheap insurance. A complete gasket kit for most stove models costs $25–$60 and takes less than an hour to install.
-
6Clean and inspect the hopper. Vacuum all pellet dust from the hopper interior and inspect the hopper walls for cracks or moisture intrusion. Check the hopper lid seal.
-
7Test all safety functions. With a fully serviced stove, run a complete startup cycle and observe ignition quality, blower ramp-up, heat production, and shutdown sequence. Note any error codes and consult your owner’s manual.
Annual Professional Service: What a Technician Should Do
Even meticulous homeowner maintenance doesn’t replace the value of an annual professional inspection. A certified hearth appliance technician brings diagnostic equipment, deep technical knowledge of your stove’s specific model, and the ability to safely test systems that homeowners shouldn’t attempt to service themselves.
Professional annual service should include a combustion efficiency analysis (using a flue gas analyzer to measure CO, CO₂, O₂, and temperature in the exhaust stream), thorough inspection and testing of the igniter, auger motor current draw analysis to detect early motor failure, examination of wiring harnesses and control board for heat damage or corrosion, full inspection of the exhaust system including the exterior vent cap, and documentation for warranty compliance purposes.
8. Pellet Stove Exhaust and Venting Maintenance
The exhaust venting system is the most safety-critical component of your pellet stove installation—and often the most neglected. Unlike a wood-burning fireplace with a tall masonry chimney that naturally drafts by thermal buoyancy, a pellet stove’s power-vented exhaust system relies entirely on its combustion blower to push gases out. If the pathway is even partially blocked, exhaust gases don’t simply back up slowly—they can be pushed into the living space almost immediately when the blower runs.
Understanding Your Vent Configuration
Most pellet stoves use 3″ or 4″ diameter single-wall or double-wall vent pipe, run horizontally through a wall to an exterior vent cap. Some installations also include a vertical section running to a roof cap. Longer horizontal runs and multiple elbows increase the static pressure the combustion blower must overcome, which is why manufacturers specify maximum vent lengths and number of bends—and why exceeding these specifications causes performance problems.
The principle of the chimney effect, where warm air rises naturally creating draft, is less critical in pellet stoves than in natural-draft wood appliances—but it still plays a role in vertical vent sections and affects overall system efficiency. Understanding how draft works in your specific installation helps you interpret combustion quality and diagnose venting problems correctly.
How to Clean Pellet Stove Vent Pipes
-
1Turn off, unplug, and allow full cooling. The vent pipe retains heat longer than the firebox. Wait at least 2–3 hours after the last burn before beginning vent cleaning.
-
2Protect the work area. Lay a drop cloth under and around the stove. Fine ash from vent cleaning is airborne and will settle on every surface in the room if you don’t contain it.
-
3Disconnect the vent pipe at the stove. Remove the pipe section-by-section, being prepared for ash fallout when each section is removed. Immediately seal open ends with rags to prevent ash spillage.
-
4Clean each pipe section. Take sections outdoors and use a pellet stove vent brush—sized to your pipe diameter—to brush ash from the interior walls. Shake sections, then vacuum interiors thoroughly. Inspect for cracks, holes, or excessive corrosion at joints.
-
5Clean the exterior vent cap. The vent cap is particularly prone to blockage from ash accumulation, insects, and debris. Remove it if possible (many are designed for tool-free removal) and clean thoroughly. Check the screen mesh if present.
-
6Reassemble with attention to gaskets. When reassembling, ensure each joint’s gasket or seal is intact and properly seated. The exhaust pathway must be completely airtight.
9. Pellet Quality, Selection, and Storage
The pellets you choose and how you store them are maintenance decisions that directly affect how much cleaning your stove requires. This is one of the most underappreciated aspects of pellet stove ownership—many people meticulously clean their stoves while using low-quality pellets that force the burn pot to need attention twice as often.
Understanding Pellet Grades
| Pellet Grade | Ash Content | BTU/lb (Approx.) | Moisture | Best For |
|---|---|---|---|---|
| Premium (PFI Certified) | <1% | 8,000–8,500 | <8% | Most pellet stoves; best efficiency |
| Standard Grade | 1–2% | 7,500–8,000 | 8–10% | Stoves with more frequent burn pot cleaning |
| Utility/Blend | >2% | 6,500–7,500 | >10% | Not recommended for most residential stoves |
Premium-grade pellets—look for the PFI (Pellet Fuels Institute) certification mark on the bag—have an ash content below 1% and moisture content below 8%. Using these consistently can reduce burn pot cleaning frequency significantly and produces noticeably less fly ash throughout the stove. You’ll typically pay $5–$15 more per ton for premium pellets, but the savings in maintenance time, improved efficiency, and reduced wear on components more than justify the difference.
Hardwood vs. Softwood Pellets
The debate between hardwood and softwood pellets largely comes down to ash production and burn characteristics. Hardwood pellets generally produce slightly less ash per pound burned and have a somewhat denser, longer-lasting flame. Softwood pellets—particularly those made from Douglas fir or pine—tend to ignite more easily and may have a slightly higher BTU output due to natural resins. For most homeowners, a premium-grade pellet regardless of wood species will outperform a standard-grade pellet of the other type.
Pellet Storage: A Critical Maintenance Factor
Pellets must be stored dry. This seems obvious, but it’s violated constantly—bags of pellets left on garage floors where they wick ground moisture, bags stored against uninsulated exterior walls in humid climates, or bulk pellets in bins without proper covers. Pellets that absorb moisture expand and soften. In the hopper, they can swell enough to jam the auger—a repair that starts at $150 and can run much higher. In the firebox, wet pellets produce incomplete combustion, heavy smoke, and rapid creosote-like residue buildup.
Store your pellets in a dry, climate-controlled space on a pallet or wooden boards to keep them off concrete floors. If you take bulk deliveries, invest in a proper pellet storage bin with a sealed lid and moisture barrier lining. Never store more pellets indoors than you can burn within a few weeks—moisture from indoor air is also a risk in humid climates.

Moisture-Proof Pellet Storage Container
Designed specifically for wood pellets. Keeps moisture out, preserves pellet quality, and prevents the swelling that causes auger jams and feed inconsistencies.
Check Price on Amazon →10. Troubleshooting Common Pellet Stove Problems
Even well-maintained pellet stoves occasionally present problems. Knowing how to diagnose and address the most common issues quickly can save you from a service call and help you determine when a problem is beyond DIY resolution. Here’s a systematic approach to the most frequent complaints pellet stove owners report.
| Symptom | Most Likely Cause | DIY Solution | Call Pro? |
|---|---|---|---|
| Stove won’t ignite | Failed igniter; dirty burn pot | Clean burn pot; test/replace igniter | If igniter replacement doesn’t resolve |
| Poor heat output | Dirty heat exchangers; dirty combustion blower | Clean exchangers and blower | If output still low after cleaning |
| Excessive smoke from stove | Blocked vent; dirty burn pot; wet pellets | Clean vent; check pellet quality | If smoke enters room |
| Loud rattling or vibration | Loose blower impeller; dirty blower blades | Inspect and clean blowers | If bearing failure suspected |
| Auger jams / error code | Wet/swelled pellets; pellet dust packing | Clear jam; vacuum hopper and tube | If jam recurs or motor damaged |
| Glass soiling rapidly | Dirty burn pot; wrong air-to-fuel ratio | Clean burn pot; adjust settings | If settings adjustment doesn’t help |
| Smoke smell in room | Exhaust leak; failed door gasket | Check gaskets; inspect vent fittings | Yes — immediately |
| Error codes on display | Various — consult manual | Look up code; perform indicated service | If code persists after service |
When Pellet Stove Problems Indicate Larger Issues
Some symptoms aren’t maintenance issues at all—they’re signs of component failure, installation problems, or system design issues. If cleaning and basic troubleshooting don’t resolve persistent ignition failures, repeated auger jams, or consistently poor combustion, the problem may lie in control board failure, motor burnout, or venting that was undersized or incorrectly installed from the start.
It’s also worth noting that some pellet stove performance issues are caused by the fuel rather than the appliance. Inconsistent pellet size, high fines content (pellet dust), and variable moisture content can all cause symptoms that look like stove malfunctions but resolve immediately when switching to a premium-grade pellet. Always rule out pellet quality as a variable before assuming the stove has a mechanical fault.
11. Pellet Stove Safety Protocols Every Owner Should Follow
Safety in pellet stove ownership isn’t just about avoiding fires—it encompasses carbon monoxide hazards, electrical safety, burn and fall risks during maintenance, and the safe disposal of ash. This section consolidates the most important safety practices that should be standard in every pellet stove home.
Carbon Monoxide Safety
Carbon monoxide (CO) is the most serious safety hazard associated with pellet stoves, and it’s one that many owners underestimate because they believe their stove is “enclosed” and therefore safe. The reality is that any fault in the exhaust pathway—a cracked vent joint, a failed door gasket, a blocked exterior cap—can allow CO to enter the living space. Combustion problems caused by a dirty burn pot, dirty combustion blower, or degraded vent restriction also increase CO production at the point of combustion.
Every home with a pellet stove must have working carbon monoxide detectors. Place one on each level of the home and one near sleeping areas. Test them monthly when you clean your stove. Carbon monoxide detectors should be replaced every 5–7 years regardless of whether they’ve alarmed.
Ash Disposal Safety
Pellet stove ash retains heat for far longer than it appears to. Ash that looks gray and cold can harbor live coals buried deep within the pile—hot enough to ignite combustible materials hours after being removed from the stove. Always transfer ash to a metal container with a tight-fitting lid. Store the container outdoors on a non-combustible surface—concrete, brick, or bare ground—away from buildings, vehicles, and combustible storage. Wait a minimum of 48–72 hours before final disposal. For detailed guidance on safe disposal methods, our article on safe wood ash disposal methods for fireplaces and stoves provides step-by-step guidance applicable to pellet stove ash as well.
Electrical Safety During Maintenance
Pellet stoves are electrical appliances. Before performing any internal cleaning or maintenance, unplug the stove from the wall outlet—not just turn it off with the control panel, but physically disconnect the power cord. Even with the stove “off,” some control boards remain powered. Working inside an energized pellet stove with metal tools creates shock hazards and risks causing control board damage through accidental short circuits.
- Always unplug before internal maintenance
- Allow full cooling (2+ hours) before opening stove
- Use metal ash containers exclusively
- Test CO detectors monthly
- Keep 36″ clearance around stove
- Store pellets dry, away from stove
- Know your stove’s error codes
- Using a standard household vacuum on ash
- Cleaning with stove warm or powered
- Using plastic or cardboard ash containers
- Ignoring CO alarms (“must be a false alarm”)
- Burning wet or non-approved pellets
- Ignoring exhaust smell in the room
- Skipping annual professional service
12. DIY Maintenance vs. Professional Service: What’s the Right Balance?
One of the most common questions pellet stove owners ask is how much they can and should handle themselves versus when to call in a professional. The answer depends on your mechanical comfort level, the age and complexity of your stove, and what specific tasks are involved. Here’s a clear framework for making that judgment call.
What Most Homeowners Can Safely Do Themselves
The vast majority of pellet stove maintenance is designed to be owner-serviceable. Manufacturers know that the stove needs frequent cleaning to function properly, so they design access panels, removable components, and cleaning tools with the end user in mind. Daily, weekly, and monthly cleaning tasks are all well within the ability of an average homeowner who takes the time to read the owner’s manual and follows safety precautions.
Beyond routine cleaning, most homeowners can also handle gasket replacement, burn pot replacement, vent pipe cleaning, and even igniter replacement with basic tools and the correct replacement parts. Online video resources for specific stove models make many of these tasks very approachable even for those without mechanical experience.
When You Should Always Call a Professional
Certain tasks should only be performed by a certified technician. These include combustion efficiency analysis and adjustment (requires specialized test equipment), control board diagnostics and replacement, auger motor replacement, convection or combustion blower motor replacement (if bearings are failing), any work involving the electrical wiring within the stove cabinet, and comprehensive annual inspections for warranty documentation purposes.
Additionally, if your stove produces a persistent CO alarm, if you smell exhaust in the living space, or if you discover cracks in the firebox walls or exhaust pipe, stop using the stove immediately and call a professional before relighting. These situations represent active safety hazards that go beyond routine maintenance.
Cost Comparison: DIY vs. Professional Maintenance
| Service | DIY Cost | Professional Cost | Recommended Approach |
|---|---|---|---|
| Daily/Weekly cleaning | $0 (tools already owned) | N/A | Always DIY |
| Full gasket replacement kit | $25–60 in parts | $80–150 + parts | DIY if comfortable |
| Vent pipe cleaning | $20–40 in tools | $75–150 | DIY with brush kit |
| Igniter replacement | $30–80 in parts | $150–300 | DIY (common repair) |
| Annual inspection/tune-up | N/A | $100–250 | Always professional |
| Auger motor replacement | $60–120 in parts | $300–600 | Professional recommended |
| Combustion analysis | N/A (requires equipment) | Included in annual service | Always professional |
Pellet Stove Vent Pipe Cleaning Brush Kit
Fits 3″ and 4″ pellet stove vent pipe. Flexible rod sections reach through elbows and long horizontal runs — everything you need for DIY annual vent cleaning.
Check Price on Amazon →13. Frequently Asked Questions About Pellet Stove Maintenance
How often should I clean my pellet stove? +
Can I use a regular vacuum to clean my pellet stove? +
What happens if you don’t clean a pellet stove? +
How do I clean the glass on my pellet stove? +
When should I call a professional to service my pellet stove? +
How do I clean pellet stove exhaust pipes? +
What type of pellets should I use for minimal maintenance? +
How do I clean the heat exchanger tubes in my pellet stove? +
Can pellet stove ash be used in the garden? +
How long does a pellet stove last with proper maintenance? +
Conclusion: Your Pellet Stove Rewards the Attention You Give It
Pellet stoves offer some of the most convenient, efficient, and controllable home heating available today. But that convenience is earned through consistent, attentive care. The maintenance checklist in this guide—from cleaning the burn pot every morning to scheduling your annual professional service each spring—creates a system that keeps your stove performing at its rated efficiency, protects every component in the system, and ensures that carbon monoxide and exhaust hazards remain exactly where they belong: outside your home.
None of these tasks are complicated or time-consuming in isolation. The daily burn pot clean takes three minutes. The weekly glass wipe takes five. The monthly deep clean takes an hour. Against the backdrop of a stove that heats your home reliably for twenty years, that time investment is one of the best returns in home maintenance. And for the annual professional service, the relatively modest cost of a technician’s visit is money that earns itself back many times over in avoided repairs, extended component life, and the peace of mind that comes from knowing your combustion system has been verified by a trained expert.
Start with today’s burn pot. Build the habit. Consult this checklist through every season. Your pellet stove—and your home—will reward you for it.
Read: How Often Should You Clean Your Heating System? →