
The Best Chimney Starters: A Grill Master’s Complete Review
Picture this: it’s a perfect Saturday afternoon. The sun is shining, friends are on their way over, and you’ve got a cooler full of drinks and a platter of perfectly marinated steaks. You head to the grill, ready to create some charcoal-fired magic. You douse the briquettes in lighter fluid, toss in a match, and… WHOOSH. A plume of acrid, chemical-smelling smoke fills the air. An hour later, your burgers have a faint, unmistakable taste of petroleum.
If this sounds familiar, I’m here to tell you there is a better way. As someone who has spent countless hours tending to smokers and grills, let me introduce you to the single most important tool for any serious charcoal enthusiast: the chimney starter. This simple metal cylinder is the key to lighting charcoal quickly, evenly, and without any of the nasty chemical aftertastes of lighter fluid. It’s a small investment that pays massive dividends in flavor, consistency, and pure grilling joy.
But not all chimney starters are created equal. They vary in size, materials, and design. In this comprehensive guide, we will compare five of the top chimney starters on the market, break down exactly how to choose the right one for you, cover the great lump charcoal vs. briquettes debate, explain how to dial in your heat zones, troubleshoot common lighting problems, and provide a step-by-step guide to using it like a seasoned pitmaster. Let’s fire it up!

📋 In This Guide
- How a Chimney Starter Works
- How to Choose the Right Chimney Starter
- Material Guide: Galvanized vs. Aluminized vs. Stainless Steel
- Top 5 Chimney Starters: In-Depth Reviews
- Comparison Table
- Lump Charcoal vs. Briquettes: The Definitive Answer
- How Much Charcoal Do You Actually Need?
- Best Kindling Options Beyond Newspaper
- Step-by-Step Guide: How to Use a Chimney Starter
- Setting Up Two-Zone Cooking with a Chimney Starter
- The Afterburner Method: Steakhouse-Quality Sears at Home
- Using a Chimney Starter for Offset Smokers & Kamados
- Lighting Charcoal in Wind, Cold, and Rain
- Chimney Starters for Camping & Portable Grilling
- 7 Common Chimney Starter Mistakes to Avoid
- Troubleshooting: Why Won’t My Charcoal Light?
- Chimney Starter Alternatives
- Maintenance & Storage Tips
- Frequently Asked Questions
- Final Verdict
How a Chimney Starter Works (The Magic of Convection)
Before we dive into the reviews, let’s quickly cover the science. A chimney starter is a testament to the power of convection. It’s a metal cylinder with an upper chamber for charcoal and a lower chamber for kindling (like newspaper or wax cubes). When you light the kindling, the flames heat the air inside the cylinder. Hot air rises, pulling fresh, oxygen-rich air through the vents at the bottom. This constant, concentrated airflow acts like a bellows, causing the charcoal at the bottom to ignite rapidly. The fire then climbs up through the rest of the charcoal, creating a column of perfectly lit, white-hot coals in about 15–20 minutes. It’s simple, brilliant, and incredibly effective.
This convection-driven draft is why taller chimneys outperform shorter ones — a longer column creates more powerful upward airflow, meaning faster, more uniform ignition. The internal grate (sometimes cone-shaped, sometimes flat mesh) suspends the charcoal above the kindling chamber, allowing air to flow freely around every briquette or lump. The result is an even, consistent fire every single time — something that is virtually impossible to replicate with lighter fluid and a match.
How to Choose the Right Chimney Starter for Your Setup
Shopping for a chimney starter can feel surprisingly complex once you start reading specs. Here’s what actually matters and what you should think about before clicking “Add to Cart.”
🔥 Capacity
Match your chimney to your grill size. A standard 22-inch kettle needs a full chimney’s worth (roughly 5–6 quarts / 80–100 briquettes). Large smokers may need two loads. Small tabletop grills need far less.
🛠️ Build Quality
Look for heavier-gauge steel. Thin metal warps over time, affecting the seal and airflow. Aluminized steel resists rust better than plain galvanized; stainless steel is the gold standard for longevity.
✋ Handle Design
A dual-handle system — one insulated main handle plus a secondary wire or loop handle — dramatically improves safety when pouring a load of 800°F coals. This is a feature worth paying for.
🌬️ Airflow Vents
More vents and larger vents = faster ignition. Look for perforations around the bottom sides of the chimney body, not just at the very base. This allows a consistent draft from multiple angles.
🍖 Charcoal Type
If you primarily use lump charcoal (which is larger and more irregular), opt for a wider-diameter chimney. Lump can jam in narrower cylinders and pieces can fall through smaller grates.
💰 Price vs. Value
A cheap chimney at $10–$15 works fine but may warp within a season. A $25–$35 chimney from a quality brand can last a decade. Amortized over years of use, the premium model is almost always the better investment.
Material Guide: Galvanized vs. Aluminized vs. Stainless Steel
The material your chimney is made from dictates how long it lasts, how it handles extreme heat cycles, and whether you’ll be shopping for a replacement next season. Here’s a breakdown of the three most common materials:
Galvanized Steel
Galvanized steel is coated with a thin layer of zinc to prevent rust. It’s the most common and affordable option, used in brands like Lodge and Char-Griller. The zinc coating provides a decent barrier against moisture, but it will gradually wear away with repeated heat exposure. Over time, galvanized chimneys can develop rust spots, particularly at weld seams. They’re perfectly serviceable for a few seasons of regular use. Store them out of the rain and they’ll last longer.
Aluminized Steel
This is Weber’s material of choice for the Rapidfire, and it’s genuinely superior for chimney applications. Aluminized steel has a thin aluminum-silicon alloy coating that reflects radiant heat, resists oxidation at high temperatures, and is far more corrosion-resistant than galvanized steel. The aluminum coating actually performs better under repeated heat cycling than zinc does, meaning the chimney holds its shape and integrity through hundreds of uses. If longevity matters to you, aluminized steel is the sweet spot of performance and price.
Stainless Steel
Stainless steel chimneys are the most durable option available, essentially immune to rust and capable of handling thousands of heat cycles without degradation. They’re heavier, more expensive, and frankly overkill for most casual grillers — but if you’re firing up charcoal five days a week for a catering operation or competition circuit, stainless is the investment that makes sense. For home use, aluminized steel offers nearly the same longevity at a much lower cost.
The Top 5 Chimney Starters: In-Depth Reviews
I’ve put these starters to the test, evaluating them on speed, capacity, durability, and safety features. Here’s the breakdown of the best options you can buy today.

E500 Larger Chimney Starter + 60 Fire Starters
Price: $29.99 | Capacity: Large | Bonus: 60 Fire Starters
The E500 is all about value and volume. If you’re running a large kettle grill or a smoker, this is your workhorse. Its oversized capacity means you can get a large batch of charcoal roaring in a single go, saving you time when you’re cooking for a crowd. The defining feature is the inclusion of 60 fire starter squares, which immediately solves the “what do I light it with?” question. These starters are far more effective and less messy than newspaper. The airflow is fantastic, thanks to ample side holes, leading to a consistent and reliable light every time. The only real trade-off is its size; it’s a bit bulky to store if you have a small patio or limited space.
- Generous bundle with 60 included charcoal starters
- Excellent airflow from numerous side holes ensures a fast, even light
- Its large size can make it cumbersome for storage in tight spaces

Best Overall: Weber Rapidfire Chimney Starter
Price: $24.99 | Material: Aluminized Steel | Size: Standard
The Weber Rapidfire is the undisputed icon of chimney starters, and for good reason. It’s the Toyota Camry of the grilling world: reliable, well-designed, and it just works, every single time. Its cone-shaped grate at the bottom provides more surface area for your kindling, leading to an incredibly fast ignition—it consistently lives up to the “Rapidfire” name. The two-handle design is a critical safety feature; the main thermoplastic handle stays cool, while the secondary wire handle lets you use your other hand to guide the hot coals with precision and control. While it might hold slightly less charcoal than the biggest models, its capacity is perfect for the vast majority of backyard grilling sessions on standard 22-inch kettle grills. Made from durable aluminized steel, it resists rust better than cheaper galvanized models.
- The industry benchmark, trusted by millions for its reliability and performance
- Dual-handle design offers superior control and safety when pouring hot coals
- Capacity is perfect for most grills but might be small for large smokers
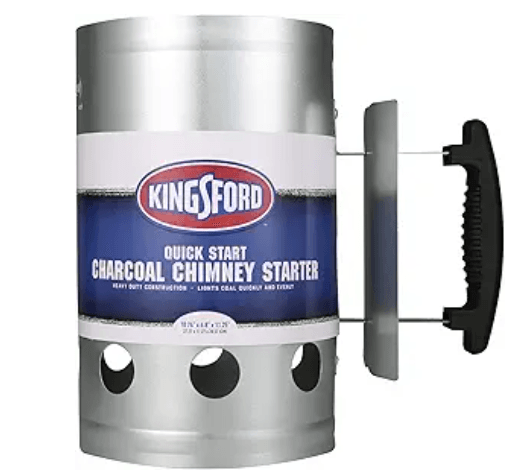
Best Budget Pick: KINGSFORD Heavy Duty Deluxe Chimney Starter
Price: $14.98 | Handle: Stay-cool | Build: Rust-resistant zinc coated
When it comes to charcoal, Kingsford is a household name, and their chimney starter delivers solid performance at a price that’s impossible to beat. This is the perfect entry point for anyone looking to ditch lighter fluid without a big investment. It’s lightweight, compact, and gets the job done efficiently. The rust-resistant zinc coating provides a decent level of durability for the price point, and the stay-cool handle with a heat shield is a feature you’d expect on more expensive models. The main drawback is that the thinner metal construction means the body of the starter can get extremely hot during use, and it may not have the same long-term durability as a Weber. But for casual grillers or those on a tight budget, its value is unmatched.
- Exceptional performance for a rock-bottom price, making it highly accessible
- Lightweight and compact design is great for camping or small spaces
- The body can get very hot, and long-term durability may be a concern

Most Durable: Lodge 12-inch Chimney Starter
Price: $29.73 | Material: Galvanized Steel | Bonus: Wooden handle
Lodge is famous for its cast iron cookware that lasts for generations, and they bring a similar philosophy of simple, rugged durability to their chimney starter. Made from heavy-gauge galvanized steel, this thing is built to withstand years of use and abuse. It feels substantial in your hand. The classic wooden handle is a nice aesthetic touch and provides a comfortable, secure grip. Its 12-inch height gives it a large capacity, rivaling the E500, making it another excellent choice for big cookouts. The one significant oversight is the lack of a secondary helper handle. This makes pouring a full load of blazing-hot coals a one-handed affair, which can feel a bit precarious. However, for those who prioritize build quality above all else, the Lodge is a fantastic, long-lasting option.
- Built from heavy-gauge steel for maximum durability and a long lifespan
- Large capacity is ideal for big grills, smokers, and long cooking sessions
- The absence of a secondary helper handle makes pouring less stable

Most Innovative: Char-Griller 19586 Chimney Starter
Price: $20.88 | Feature: EZ-start release | Material: Galvanized Steel
The Char-Griller starter tackles the final, and sometimes trickiest, step of the process: pouring the coals. It features a patented EZ-start trigger release that opens a trapdoor at the bottom, allowing you to dump the coals precisely where you want them without any tipping or shaking. This is a brilliant feature for setting up two-zone cooking fires or for those who are nervous about handling a chimney full of hot embers. It heats quickly and performs well, delivering a full load of lit coals reliably. The main concern raised by some users is the long-term durability of the trapdoor mechanism, which can sometimes warp or fail after extensive use. But for those who value convenience and precision, this innovative design is a game-changer.
- Innovative quick-release trapdoor allows for precise and safe coal placement
- Offers fast heating and reliable performance at a competitive price
- The trapdoor mechanism can be a potential point of failure over time
Chimney Starter Comparison Table
| Product | Material | Capacity | Key Feature | Pros | Cons | Link |
|---|---|---|---|---|---|---|
| E500 Starter | Metal | Large | Includes 60 Fire Starters | Great value, Large capacity | Bulky to store | View |
| Weber Rapidfire | Aluminized Steel | Standard | Dual Handles | Fast ignition, Ergonomic design | Slightly smaller size | View |
| KINGSFORD Deluxe | Zinc-Coated Steel | Standard | Budget Price | Affordable, Lightweight | Body gets very hot | View |
| Lodge 12-Inch | Galvanized Steel | Large | Heavy-Duty Build | Extremely durable, Large capacity | No side handle | View |
| Char-Griller 19586 | Galvanized Steel | Standard | Quick Release Trapdoor | Precise dumping, Fast lighting | Mechanism durability | View |
Lump Charcoal vs. Briquettes: The Definitive Answer
This is arguably the most hotly debated topic in backyard grilling. Every pitmaster has an opinion, and most of them will argue it as passionately as their preferred football team. So let’s cut through the noise and get to the facts — because understanding this distinction will make you a dramatically better griller and help you get the most out of your chimney starter.
What Is Lump Charcoal?
Lump charcoal is exactly what it sounds like: irregular chunks of hardwood (oak, hickory, mesquite, maple, cherry) that have been burned in a low-oxygen kiln until almost all moisture, sap, and volatile compounds have been driven out, leaving behind near-pure carbon. Nothing is added. No binders, no accelerants, no fillers. What you’re getting is essentially fossilized hardwood fire.
Because it’s pure carbon, lump charcoal lights faster in a chimney starter, reaches higher peak temperatures, produces noticeably less ash than briquettes, and imparts a cleaner, more natural smoke flavor. The downside is variability — every bag contains pieces of wildly different sizes, from dust and pea-sized chips to thick 7-inch slabs. The very small pieces can fall through your chimney starter’s grate or your grill grates, and they’ll burn through faster than the large ones, making temperature management slightly trickier.
What Are Charcoal Briquettes?
Briquettes start as charred wood byproducts — often sawdust and wood scraps — that are ground into a fine powder, combined with binders (traditionally cornstarch, though older formulas used coal dust, sodium nitrate, or borax), compressed into their characteristic pillow shape, and dried. The binders are what give briquettes their uniform, predictable shape. Henry Ford and Thomas Edison were actually instrumental in popularizing mass-produced briquettes in the 1920s as a way to monetize wood scraps from Ford’s auto factories.
The binding agents do have one downside: as fresh briquettes ignite, those binders burn off and produce a brief window of unpleasant-smelling smoke and mild off-flavor. This is why you should always wait until briquettes are fully ashed over before placing food on the grill — and it’s yet another reason the chimney starter is indispensable. The enclosed chimney burns off those binders before the charcoal ever reaches your grill, so you never taste them in your food.
🔴 Lump Charcoal
- Pure wood — no additives
- Lights faster in a chimney
- Burns hotter (peak temps)
- Less ash produced
- Better for high-heat searing
- Easier to adjust temperature
- More expensive per bag
- Irregular sizes = inconsistent pieces
- Burns faster / less efficient
🔵 Charcoal Briquettes
- Uniform, predictable shape
- Burns longer and more consistently
- More forgiving for beginners
- Better for long, low-and-slow cooks
- Produces more ash
- Contains binders (burn off in chimney)
- More affordable per bag
- Widely available everywhere
- Heavier than equivalent volume of lump
Which Should You Use?
For high-heat grilling — steaks, chops, burgers, searing fish — lump charcoal is the enthusiast’s choice. The higher peak temperatures and lower ash production mean a cleaner, hotter cooking surface. For low-and-slow smoking — brisket, ribs, pork shoulder — briquettes are the workhorse. Their uniform density means they burn at a more consistent rate, holding a steady temperature over many hours without the rapid spikes and drops you sometimes see with lump. The honest answer for most people? Keep both on hand. Use lump when you want blistering sear heat. Use briquettes when you’re running a long smoke and want “set it and (mostly) forget it” temperature stability.
How Much Charcoal Do You Actually Need? A Heat Level Guide
One of the biggest advantages of a chimney starter is that it turns your charcoal amount into a reliable measuring tool. The chimney itself becomes your “measuring cup,” allowing you to replicate fire conditions from one cook to the next with genuine consistency. Here’s a practical guide to chimney fill levels and the cooking temperatures they produce:
| Chimney Fill | Approximate Temp (22″ Kettle) | Best For | Heat Level |
|---|---|---|---|
| Full Chimney (80–100 briquettes) | 450–550°F | Searing steaks, burgers, chops, brats | 🔥🔥🔥🔥🔥 |
| Three-Quarter Chimney | 400–450°F | Chicken pieces, pork chops, hot dogs | 🔥🔥🔥🔥 |
| Half Chimney (40–50 briquettes) | 350–400°F | Fish, vegetables, indirect cooking | 🔥🔥🔥 |
| Quarter Chimney | 250–325°F | Low-and-slow ribs, smoking, warming | 🔥🔥 |
| Partial (for smokers) | 225–275°F | Offset smoker ignition, brisket, pork butt | 🔥 |
Keep in mind that these temperatures are approximate and affected by variables including ambient temperature, wind, altitude, your specific grill model, and whether you’re cooking with the lid open or closed. Lump charcoal will generally run 50–100°F hotter for the same fill level, since it’s a denser fuel source by weight. Always invest in a reliable instant-read thermometer — both for your food and a grill surface thermometer for your cooking grate — to remove guesswork from the equation entirely.
Best Kindling Options Beyond Newspaper
Newspaper is the classic kindling choice, and it works just fine. But there’s a whole world of more effective, more convenient, and often cleaner-burning alternatives worth knowing about. The type of kindling you use can meaningfully affect how quickly your chimney gets going and whether any unpleasant smoke finds its way into your early cooking.
Wax Fire Starter Cubes
These small compressed cubes of wax-coated sawdust or wood shavings (brands like Rutland, Weber, and Fatwood) are the most popular upgrade from newspaper and for good reason. A single cube burns for 8–12 minutes with a steady, hot flame that is almost wind-resistant. They don’t flare up, they don’t blow out, and they don’t produce the chemical-smelling smoke that some paraffin-heavy options do. Two cubes placed at the bottom of your chimney is more than enough to guarantee ignition even on a cold or breezy day. The E500 bundle in our review comes loaded with 60 of these — that’s a season’s worth right out of the box.
Tumble Weed / Natural Wood Fiber Starters
These are loosely-spun bundles of wood fibers that often look like small birds’ nests. They’re extremely lightweight, catch a spark almost instantly, and produce a clean, hot flame with minimal smoke. They’re particularly popular with the natural charcoal crowd because they contain zero chemicals — just compressed wood fibers, sometimes dipped in a thin coat of vegetable wax. One “tumbleweed” per chimney is typically sufficient in calm weather.
Newspaper (The Classic)
If you’re using newspaper, the technique matters. Don’t wad it into a tight ball — you’ll smother the flame before it can spread. Instead, loosely crumple one or two sheets so there’s plenty of air space between the layers, creating a structure that burns slowly from the inside out. Some pitmasters twist the sheets into a loose donut shape with a hollow center, which creates an even better draft. Avoid using glossy paper or magazine pages — the inks and coatings can produce acrid smoke and unpleasant residue.
Electric Charcoal Starters
An electric charcoal starter is a metal coil connected to a power cord that you bury in the base of your charcoal. It heats the charcoal through direct contact. These work without any paper or wax cubes and can be effective, but they do require proximity to a power outlet, they’re slow (often 12–15 minutes just to create a small hot spot), and they’re prone to burning out over time. The chimney starter is generally faster, more reliable, and far more versatile.
Kindling Wood Sticks
Small sticks of dry fatwood (resin-rich pine heartwood) are an excellent natural kindling that catches quickly and burns very hot. They’re popular with purists who want a completely all-natural fire-starting experience. A small handful placed at the bottom of the chimney and lit with a match will have your coals glowing in under 20 minutes.
How to Use a Chimney Starter Like a Pro: A Step-by-Step Guide
- Prepare Your Grill: Open the bottom vents of your grill fully and remove the cooking grate. Clear out any old ash from previous cooks — blocked vents starve the fire of oxygen and will cause problems even with the best chimney starter.
- Add Kindling: Lightly crumple one or two sheets of newspaper and place them in the bottom chamber of the chimney starter. Alternatively, use one or two wax cubes or tumbleweed fire starters for a cleaner, longer burn. Remember: loose, not packed tight.
- Fill with Charcoal: Place the chimney starter on the grill’s charcoal grate (or a fire-safe surface like a concrete patio). Fill the top chamber with your desired amount of charcoal briquettes or lump charcoal. Reference the heat level guide above to calibrate the right amount for your cook.
- Light It Up: Light the newspaper or fire starters through the bottom vents of the chimney starter in two or three spots. A long-reach barbecue lighter makes this much easier and keeps your hands away from the heat.
- Step Back and Be Patient: You’ll see smoke at first, then visible flames licking up the sides. Resist the urge to poke or prod. In about 15–20 minutes, the coals at the top should be partially covered with a fine white-gray ash, and you’ll hear the fire roaring inside like a miniature jet engine — that’s the sound of a perfect draft doing its job.
- Check for Readiness: The coals are ready when the top layer has at least started to gray. For maximum heat (searing), wait until the top coals are fully covered in gray ash. For a more moderate fire, pour them a couple of minutes earlier.
- Pour with Caution: Put on heat-resistant gloves — this is non-negotiable. Grasp the main handle firmly with your dominant hand and use the secondary wire handle or a folded towel for your non-dominant hand to guide the chimney as you tilt and pour. Direct the coals where you want them — all on one side for two-zone cooking, or spread across the grate for direct heat.
- Start Grilling: Place the top cooking grate back on the grill, let it preheat for 3–5 minutes, scrub it clean with a grill brush, oil the grates lightly, and start cooking.
Setting Up Two-Zone Cooking with Your Chimney Starter
Two-zone cooking is one of the most powerful and underused techniques in backyard grilling, and a chimney starter makes it easy to execute perfectly. The concept is simple: you arrange your hot coals so that one side of the grill is screaming hot (direct heat) and the other side has no coals at all (indirect heat). This gives you two dramatically different cooking environments within one grill — the charcoal equivalent of having both a searing pan and an oven running simultaneously.
Why Two-Zone Matters
When you cook a thick chicken thigh or a pork chop over direct heat alone, the outside often chars and burns before the interior reaches a safe temperature. With two zones, you can finish the food through on the cooler, indirect side, then move it to the inferno side for a final sear. This is also the technique behind the famous “reverse sear” method for thick steaks — cook low and slow on the indirect side until the internal temperature is 10–15°F below your target, then blitz it over the direct coals for a magnificent mahogany crust.
How to Set It Up
After your chimney starter has delivered a full load of glowing coals, use your tongs to push them all to one side of the grill’s charcoal grate, creating a coal “zone” that’s about half the grill’s width. The other side remains bare. If your grill has a built-in coal grate divider, use it. Some grillers build a “vee” or C-shape arrangement of coals to create a very hot direct zone, a moderate transition zone, and a cool indirect zone — essentially three temperature environments in one kettle.
Snake Method for Low and Slow
For long, low-temperature cooks, use the “snake method.” Arrange unlit briquettes in a C-shaped curve around the inside perimeter of the charcoal grate. Light just 10–12 briquettes in your chimney starter and pour them at one end of the snake. The lit coals will slowly burn through the unlit ones, like a fuse, maintaining a steady 225–275°F for many hours without any need to add more charcoal. The chimney starter’s precision here is essential — you want a small, controlled starting point, not a full chimney dump.
The Afterburner Method: Steakhouse-Quality Sears at Home
Here’s a technique that sounds insane until you try it — and then you’ll never go back. The “afterburner method” (also called chimney searing) uses the chimney starter itself as a direct cooking surface. It produces the most intense, screaming-hot sear you can achieve outside of a commercial kitchen, and it takes under 60 seconds per side.
How It Works
Fill your chimney starter with lump charcoal and light it as normal. Once the coals are fully lit and roaring — when you can see orange glow through every vent hole and flames are licking above the rim — place a small wire grate across the very top of the chimney. The temperature directly above the chimney opening at this stage is in the range of 800–1,000°F. That’s not a typo. You are essentially turning your chimney into a blast furnace.
Place your pre-seasoned, room-temperature steak (a ribeye or NY strip works beautifully) on the small grate above the chimney. Cook for 45–90 seconds, flip, repeat. You’ll get a magnificent, deep brown Maillard crust — the kind that takes professional steakhouses a $20,000 broiler to achieve. The interior will still be a perfect medium-rare because the cook time is so brief. Always do this step outdoors, on a non-flammable surface, and with a pair of long heat-resistant gloves. Do not lean over the chimney.
The afterburner technique is also excellent for getting a quick char on skewered vegetables, charring peppers for salsa, or finishing bone-in chicken after a low-and-slow cook on the grill. It’s one of those techniques that makes people at parties stare and ask questions — keep it in your arsenal.
Using a Chimney Starter for Offset Smokers & Kamado Grills
A chimney starter isn’t just for kettle grills. It’s an essential tool for virtually every style of charcoal cooking, and understanding how it integrates with different types of smokers will open up a world of possibilities.
Offset Smokers
Offset smokers — the classic barrel-shaped smokers with a separate firebox attached to one side — require a significant amount of charcoal to get up to temperature. The firebox is large, the draft is long, and you often need two full chimney loads just to bring the cooking chamber to your target temperature of 225–275°F for a brisket or pork shoulder.
The technique for offset smokers differs from kettle grilling. Pour your first chimney load of fully-lit coals into the firebox and let the smoker come up to temperature over 30–45 minutes with the exhaust vent wide open. Once you’ve reached your target temp, add wood chunks directly to the lit coals for smoke flavor, then throttle the intake vent to regulate airflow. Have a second chimney ready to go — as the cook progresses over 10–14 hours, you’ll light additional chimneys of coals to replenish the firebox every 2–3 hours. Never add raw, unlit charcoal directly to a running offset smoker; always use the chimney to pre-light it, so you’re adding hot coals rather than cold fuel that temporarily crashes your temperature.
Kamado Grills (Big Green Egg, Kamado Joe)
Kamado grills are ceramic cookers with extraordinary heat retention and airtight lids. They’re incredibly efficient with charcoal but require a careful approach. Because kamados are so well-sealed, they can spike temperature dramatically fast. Many experienced kamado users recommend not using a full chimney load — instead, use a half chimney or even just a quarter chimney, then let the kamado’s vents do the work of building temperature slowly and steadily. Pouring a full chimney of 500°F coals into a kamado and immediately closing the lid is a fast track to an 800°F inferno inside. Load the kamado with unlit charcoal, use a chimney to light just 10–15 briquettes, add them to the center of the unlit bed, and let the kamado’s airflow control system manage the rest.
Lighting Charcoal in Wind, Cold, and Rain
The chimney starter is vastly superior to lighter fluid in challenging weather conditions, but it still has its quirks. Here’s how to adapt your technique for less-than-ideal conditions.
Windy Conditions
A breeze is actually your friend in moderate amounts — it increases the oxygen supply and can speed up ignition. However, a strong, gusty wind can blow out your kindling before it has a chance to ignite the charcoal. Position your chimney so the bottom vents are on the windward side (facing into the wind), then light your kindling quickly using a torch-style lighter rather than matches. Cupping your hand around the bottom vents as you light can shelter the initial flame long enough to get it established. If the wind is severe, do the lighting step in a sheltered corner or inside a garage with the door partially open, then carry the lit chimney to the grill.
Cold Weather Grilling
Cold air is denser than warm air, which means your chimney’s draft is actually stronger in cold weather — the convection principle works in your favor. However, cold charcoal takes longer to reach ignition temperature, and cold metal conducts heat away from the coals faster. Use three wax fire starter cubes instead of one in sub-freezing temperatures, and expect ignition to take 20–25 minutes rather than 15. Also account for the fact that your grill itself will be cold and will absorb heat rapidly, so preheat time after pouring the coals should be extended by several minutes.
Rainy or Humid Conditions
Wet charcoal is the enemy. Moisture-soaked charcoal produces thick, white, acrid smoke and takes dramatically longer to light — or won’t light at all. Always store your charcoal in a dry location with the bag tightly sealed or transferred to an airtight container. In light rain, you can still use your chimney; just work quickly and keep the top covered with a sheet of foil while it’s lighting to prevent raindrops from extinguishing the kindling. In heavy rain, move the whole operation under a covered area or postpone the cook entirely.
Chimney Starters for Camping & Portable Grilling
The chimney starter isn’t just for the backyard. It’s one of the most useful tools you can pack for a camping trip, a tailgate, or a beach cookout — provided you’re using a charcoal grill or fire ring at your destination. The Kingsford Deluxe in our review is a particularly good travel companion: it’s compact, lightweight, and does a perfectly competent job lighting a smaller portable grill.
What to Look for in a Portable Chimney
For travel, look for a compact chimney starter in the 8-inch range (as opposed to the full 12-inch models). These smaller versions hold 40–60 briquettes — plenty for a portable 14- to 18-inch grill. Make sure it has a solid, heat-resistant handle that won’t conduct heat to your palm; on a camping trip you’re less likely to have heavy gloves on hand. Some smaller travel chimney starters have folding handles or compact designs that pack efficiently in a grill bag alongside your tongs and spatula.
Campfire Alternative
If you’re camping without a portable grill and need to light a wood fire, a chimney starter works brilliantly as a miniature fire-starter for kindling and small logs. Stack small dry sticks in the chimney, stuff newspaper below, light it, and in a few minutes tip the lit kindling into your fire ring as a perfect base. It’s a vastly more reliable method than trying to build a fire from scratch in windy or damp conditions.
7 Common Chimney Starter Mistakes to Avoid
Even experienced grillers make these errors. Avoid them and you’ll be getting a perfectly lit grill every single session.
- Packing the newspaper too tightly. This is the number-one chimney failure. Tightly wadded paper smothers itself before it has a chance to light the coals. Loose, airy crumples only — think of it like building a tiny campfire inside the chamber.
- Not opening grill vents before pouring. Closed bottom vents kill airflow and slow down your coal temperature. Open all vents fully before you pour the lit coals in. You can throttle them down later to control cooking temperature.
- Pouring the coals too early. Impatience is the enemy. Partially lit coals that still have dark spots will take forever to finish lighting once they’re spread out in the grill. Wait until at least the top layer is showing gray ash before you pour.
- Setting the chimney on flammable surfaces. The bottom of your chimney gets incredibly hot. Never set it on wood decking, a plastic surface, a picnic table, or grass. Use the grill’s charcoal grate, a paving stone, concrete, or a dedicated metal chimney stand.
- Neglecting to wear heat-resistant gloves. A full chimney of lit coals weighs several pounds and is superheated to over 500°F. Dropping it is not an option. Proper silicone or leather barbecue gloves are a non-negotiable safety item.
- Using lighter fluid as a kindling “boost.” Never add lighter fluid to a chimney starter, even if it seems slow to light. The enclosed design concentrates any flame dangerously, and you risk a serious flare-up. Use an extra wax cube instead.
- Forgetting to clean the chimney regularly. Old ash and carbon buildup inside the chimney can restrict airflow and slow ignition times. After every few uses, let it cool completely and shake or knock out the loose ash from the lower chamber.
Troubleshooting: Why Won’t My Charcoal Light?
If your chimney starter consistently fails to produce a full load of lit coals in under 25 minutes, one of the following is usually the culprit:
Problem: Thick, white smoke but no fire climbing the coals
Cause: The kindling burned out before the charcoal caught, or the charcoal is damp. Fix: Re-light with a fresh wax cube and check that your charcoal hasn’t absorbed moisture. Old charcoal left in a half-open bag can absorb enough humidity to dramatically slow ignition.
Problem: The bottom coals light but the top ones stay black
Cause: Insufficient airflow. This often happens with a very full chimney of large lump charcoal that’s jammed together, blocking the draft. Fix: Tap the side of the chimney gently to shift the coals, or use a skewer to open a channel through the middle of the charcoal stack. Also check that your bottom vents aren’t blocked by ash from a previous session.
Problem: The chimney smokes heavily and smells like chemicals
Cause: You’re burning briquettes with fresh binders that haven’t been purged. This is normal for the first two minutes. Fix: Wait it out. Once the binders burn off, the smoke will clear and become thin and nearly invisible. If the chemical smell persists beyond five minutes, you may have charcoal that’s been treated with accelerants — swap to a different brand.
Problem: Coals are ready but cool down before I finish cooking
Cause: Your grill lid was left open too long, or external temperature is very cold. Fix: Keep the lid closed as much as possible. Have a second half-chimney of fresh coals ready to pour when the fire starts dropping below your target temperature. With a chimney, relighting mid-cook takes just 15 minutes — always start one when you notice the temperature beginning to drop, not after it’s already crashed.
Chimney Starter Alternatives (And Why You Should Still Get a Chimney)
For completeness, let’s look at the other methods of lighting charcoal — because understanding the alternatives will reinforce just how good your chimney starter really is.
Lighter Fluid
The most common method in American backyards. You soak the charcoal in petrochemical fluid and light it. The pros: it’s cheap and widely available. The cons: it leaves a chemical aftertaste on food if you don’t wait long enough (and most people don’t wait long enough), it produces noxious black smoke, and there’s a genuine fire safety risk when people add more fluid to coals that are already lit. The chimney starter beats lighter fluid in every meaningful category.
Electric Charcoal Starter (Looftlighter / Firestarter Wand)
The Looftlighter and similar heat-gun style electric fire starters use a superheated air stream — like a hair dryer on steroids — to ignite charcoal directly. They work well, produce no chemical taste, and require no kindling. The downsides: they need a power outlet, they can’t light a full grill’s worth of charcoal uniformly (you get a hot spot in the center), and they cost significantly more than a chimney starter. They’re a nice complement to a chimney starter rather than a replacement.
Self-Lighting Charcoal
Some briquettes are pre-treated with accelerants so they ignite with just a match. They are fast and convenient but produce significant chemical smoke and often leave an off-flavor on food. Most experienced grillers avoid them entirely for cooking, reserving them at best for things like outdoor campfires where flavor doesn’t matter.
Propane Torch
A small, handheld propane torch (like those used for plumbing) pointed directly at a pile of charcoal can light a fire in a few minutes. It’s efficient but impractical for getting a uniform, full-grill light without a chimney to concentrate the heat. Some grillers use a torch to light the kindling inside the chimney when wind is an issue — this is actually a great technique.
Maintenance & Long-Term Storage Tips
A well-maintained chimney starter will last many years. Here’s how to keep yours performing like new.
🧹 After Each Use
Once completely cool (wait at least an hour), shake the chimney to knock loose ash out through the bottom vents. Store it somewhere dry. Never store a chimney starter while it’s still warm or you risk a fire hazard.
🔧 Seasonal Cleaning
A few times a season, knock out all internal ash deposits and wipe the inside walls with a dry cloth. Check the bottom grate — a warped or corroded grate will let charcoal fall through, which is both wasteful and a potential fire hazard.
🌧️ Rust Prevention
Galvanized steel chimneys will eventually show rust at weld seams and edges. Light surface rust can be scrubbed with a wire brush. Once the rust penetrates through the metal wall, it’s time for a replacement — a rusted chimney can develop leaks that affect airflow.
📦 Off-Season Storage
At the end of grilling season, clean the chimney thoroughly and store it indoors (a garage or shed) rather than leaving it exposed to winter precipitation. A dry environment is all it takes to extend galvanized and aluminized steel chimneys by several additional seasons.
Frequently Asked Questions (FAQ)
Are chimney starters really better than lighter fluid?
Absolutely, for three reasons: 1) Flavor: There is zero chemical residue or aftertaste on your food. 2) Speed: They are often faster and more reliable than the “pyramid method” with fluid. 3) Safety: You avoid the risk of flare-ups from adding fluid to already lit coals.
How do I know when the coals are ready to be poured?
Look for two signs. First, you should see flames licking the top layer of charcoal. Second, the top layer should be starting to get covered in a light gray/white ash. For a lower temperature cook, you can pour them a bit earlier. For a searing hot fire, wait until they are fully ashed over.
Which is best for a large BBQ setup, like an offset smoker?
For large smokers or grills, capacity is key. The Lodge 12-inch or the E500 Starter are your best bets as they hold the largest volume of charcoal, allowing you to get your smoker up to temperature with a single chimney load.
Can I use lump charcoal and briquettes together in the same chimney?
Yes — and it’s actually a great technique. Place a layer of briquettes at the bottom (they provide stable, long-burning base heat) and lump charcoal on top (for faster ignition and higher initial temperatures). The lump lights first and ignites the briquettes below, giving you a hybrid fire with the benefits of both fuel types.
How long does it take to light charcoal in a chimney starter?
Under typical conditions — calm weather, dry charcoal, good kindling — you can expect a full chimney to be ready in 15–20 minutes. Cold weather, damp charcoal, or very large lump charcoal pieces can push that to 20–25 minutes. If it’s taking more than 30 minutes, something is wrong with either your kindling technique or your charcoal quality.
What size chimney starter do I need for a Weber 22-inch kettle?
A standard chimney starter (approximately 7.5 inches in diameter and 12–13 inches tall) is ideal for a 22-inch kettle grill. The Weber Rapidfire is perfectly sized for this grill, holding 80–100 briquettes — enough for a full, hot fire across the entire grill. For smaller portable grills, a compact 8-inch tall chimney is the right fit.
Can I use a chimney starter on a gas grill?
A chimney starter is designed exclusively for charcoal. You don’t need one for a gas grill since gas ignites with the push of a button. However, some grillers use a small chimney to add a charcoal or wood chip smoking element to a gas grill by lighting just a handful of coals or chunks, then placing them in a smoker box or foil pouch on the grate — it’s a clever hybrid technique for adding smoke flavor to gas-grilled food.
Is it safe to use a chimney starter on a wooden deck?
Absolutely not. The bottom of a chimney starter reaches extremely high temperatures during use — high enough to instantly scorch, char, or ignite wood decking. Always place your chimney on the grill’s cast iron grate, on concrete, on a paving stone, or on a dedicated metal chimney stand designed for this purpose. Many grill fires start from this exact mistake.
How should I clean out my grill after using a chimney starter?
Once the grill is completely cool (usually the next day), you can clean out the ash. While a simple scoop works, some enthusiasts use a dedicated ash vacuum. This is much simpler than cleaning a house fireplace, which often requires the best chimney sweep vacuum for professional results.
My chimney starter is producing a lot of white smoke. Is that normal?
Yes, for the first few minutes. White smoke indicates moisture evaporating and binder compounds in briquettes burning off. As the charcoal fully catches, this white smoke will thin out and become nearly invisible. Thin, wispy smoke or no visible smoke from the top of the chimney is the signal that your coals are nearly ready. Persistent thick white smoke after 10 minutes is a sign of insufficient airflow or damp charcoal.
What’s the best way to extinguish a chimney starter after use?
If you have leftover lit coals in the chimney after pouring most of them out, you can either dump them into the grill (they’ll continue to provide useful heat) or carefully place the chimney upright on a fire-safe surface and cover the top with a piece of aluminum foil to starve it of oxygen. Never pour water on a hot metal chimney — the rapid cooling can cause warping and may send up a dangerous burst of steam. Let it cool naturally.
Final Verdict: The Ultimate Grilling Upgrade
A chimney starter is more than just a tool; it’s a declaration that you care about flavor, quality, and the craft of cooking over fire. It’s the fastest and cleanest way to get your charcoal glowing, and any one of the starters on this list will be a massive upgrade from lighter fluid. While the Weber Rapidfire takes our top spot for its perfect balance of design, safety, and performance, you can’t go wrong with any of these excellent options.
Here’s the bottom line: if you’re grilling with charcoal and you don’t own a chimney starter, you are making your life harder than it needs to be. For $20–$30, you get faster ignition, cleaner flavor, greater temperature control, and a tool that will serve you faithfully for years — possibly decades if you choose a quality model. Pair it with the right charcoal for your cooking style (lump for high-heat grilling, briquettes for long smoking sessions), nail the two-zone setup technique, and you’ll be producing restaurant-caliber food in your own backyard every single weekend.
So, do yourself a favor: invest the $20–$30, grab a bag of your favorite charcoal, and rediscover how amazing grilled food is supposed to taste. This is one chimney that’s meant for making delicious food, not for wondering how does Santa get in without a chimney! Happy grilling!