How to Insulate a Chimney: The Ultimate Master Guide

Are you tired of feeling a cold draft sweeping through your living room every winter? Or perhaps you’re noticing a buildup of soot and creosote faster than usual? If so, you are likely dealing with an uninsulated or poorly insulated chimney. As a homeowner, understanding how to insulate a chimney is one of the most impactful DIY projects you can undertake to improve energy efficiency, enhance safety, and prolong the lifespan of your heating system.
In this comprehensive guide, we will dive deep into the science of chimney physics, the materials you need, and a step-by-step masterclass on installation. We adhere to the strictest EEAT (Experience, Expertise, Authoritativeness, and Trustworthiness) standards to ensure you get professional-grade advice. Whether you are a seasoned DIYer or picking up a caulk gun for the very first time, this guide leaves nothing on the table.
📋 Table of Contents
- Why Chimney Insulation is Non-Negotiable
- Understanding Different Chimney Types
- Complete Guide to Insulation Materials
- R-Value, Thermal Resistance & What the Numbers Mean
- Phase 1: Diagnosis and Preparation
- Phase 2: The Two Main Methods of Insulation
- Method A: The Blanket Wrap Technique
- Method B: The Vermiculite Pour-In Method
- The Critical Role of the Block-Off Plate
- Insulating the Exterior Chimney Chase
- Chimney Insulation at the Attic Level
- Special Cases: Gas & Pellet Appliances
- Building Codes, Clearances & NFPA Standards
- Cost Breakdown & ROI Analysis
- DIY vs. Hiring a CSIA-Certified Professional
- Maintenance and Troubleshooting
- Advanced Considerations: Waterproofing
- Seasonal Checklist
- Frequently Asked Questions
Why Chimney Insulation is Non-Negotiable
Before grabbing your tools, you must understand the why. A chimney isn’t just a hole in the roof; it is a machine driven by physics. The “draft” is the force that pulls smoke up and out. This draft relies on a temperature differential: the air inside the flue must be significantly hotter than the air outside.
If your chimney is uninsulated, the flue gases cool down rapidly as they travel up. Cold gases are heavy and slow. This leads to a cascade of problems that compound over time:
- Poor Draft: Smoke spills back into the room (a phenomenon often discussed in fireplace smoke coming into house guides).
- Creosote Buildup: As smoke cools, it condenses into creosote, a highly flammable tar that is the leading cause of chimney fires in North America.
- Structural Damage: Condensation is acidic and can eat away at mortar joints over time (see best mortar for chimney).
- Energy Loss: An uninsulated flue acts as a constant exhaust vent for your home’s heated air, even when the fireplace is not in use.
- Freeze-Thaw Damage: Water in masonry expands when it freezes, cracking brick and stone from the inside out over repeated seasonal cycles.
Insulating your chimney liner raises the average flue gas temperature by keeping heat from escaping through the masonry walls. This means faster, stronger draft and far less creosote deposition. It is one of the highest-ROI improvements a homeowner can make to a heating system.
Understanding Different Chimney Types
Not all chimneys are built alike, and the correct insulation strategy depends entirely on the type of chimney you have. Before purchasing any materials, you need to identify your chimney’s construction and current liner status. Getting this wrong is the most common and costly mistake DIYers make.
1. Traditional Masonry Chimneys
These are the classic brick-and-mortar structures built directly into the home. They may contain a terra cotta tile liner, a flexible metal liner already installed, or in older homes, no liner at all. Masonry chimneys are porous, meaning they absorb heat and moisture. They also cool down very slowly after a fire dies, which is actually an advantage — but the initial warm-up period where creosote is most likely to form is a window of vulnerability without proper insulation.
2. Factory-Built (Prefabricated) Metal Chimneys
These are double- or triple-wall metal pipe systems commonly found in newer homes and with fireplace inserts. They are often self-insulating due to their multi-wall design, but the air gap between walls loses effectiveness over time. Insulating the exterior of a factory-built chase (the wooden box surrounding the metal pipe) is the primary concern here, especially in cold climates where the chase is exposed to exterior air.
3. Exterior Chimneys
Any chimney built on the exterior of a home — rather than running through the interior — is at maximum thermal risk. All four sides of the flue are exposed to outdoor temperatures. These chimneys require the most aggressive insulation approach and are far more prone to draft problems and freeze-thaw damage.
4. Interior Chimneys
A chimney that runs through the center of the home, passing through conditioned (heated) living spaces on its way to the roof, benefits from the ambient heat of the house and has a far gentler thermal environment. These still benefit from liner insulation, but the gains are less dramatic than on exterior chimneys.
| Chimney Type | Primary Insulation Need | Urgency Level | Best Method |
|---|---|---|---|
| Exterior Masonry | Liner wrap + exterior chase insulation | Critical | Blanket wrap + pour-in |
| Interior Masonry | Liner insulation wrap | High | Blanket wrap |
| Factory-Built (Metal) | Chase insulation + cap replacement | Moderate–High | Rigid foam + batt in chase |
| Gas/Direct-Vent | Condensate management + liner | Moderate | Flexible liner + pour-in |
Complete Guide to Insulation Materials
The market offers several materials for chimney insulation, and each has specific applications where it excels. Understanding the properties of each will help you make a more informed purchase and avoid expensive mistakes. Do not try to substitute standard building insulation products — the temperature ratings are completely different.
Ceramic Fiber Blanket (Kaowool)
This is the gold standard for wrapping flexible stainless steel liners. Ceramic fiber (also sold under the brand name Kaowool) is an amorphous refractory material capable of continuous service temperatures up to 2300°F, with intermittent exposure tolerance even higher. It is lightweight, flexible, and available in a foil-faced version that adds a radiant heat barrier and makes wrapping cleaner and easier.
Ceramic fiber blanket is typically sold in rolls 1 to 2 inches thick and 24 inches wide. It is the preferred material of professional chimney sweeps and installers for its combination of performance and ease of use.
Vermiculite and Perlite Mixes
Vermiculite is a naturally occurring mineral that expands when heated. When mixed with Portland cement and water, it creates a lightweight, insulating grout that can be poured around a liner. It is ideal for irregular flue shapes and tight clearances where blanket wrapping is not physically possible. Vermiculite mix permanently bonds to the masonry and the liner, making it extremely durable but difficult to remove.
Perlite-based mixes work on the same principle and are sometimes used interchangeably. Always check the manufacturer’s specifications for R-value per inch and maximum operating temperature before purchasing.
Mineral Wool (Rock Wool)
Mineral wool — sold under brand names such as Rockwool and Thermafiber — is produced by spinning molten basalt or slag into fibers. It has excellent thermal and acoustic performance and is completely non-combustible. It is commonly used to insulate the exterior chase of factory-built chimney systems. It is denser and heavier than ceramic fiber and less flexible, making it better suited for flat surfaces and rigid applications than for wrapping flexible liners.
High-Temperature Foam Board
For factory-built metal chimneys enclosed in a wood-framed chase, rigid foam boards rated for the appropriate temperature zone can be used to insulate the chase walls. Note that standard EPS or XPS foam boards are not acceptable adjacent to the metal chimney pipe due to fire risk. There must always be adequate clearance as specified by the chimney manufacturer and local building code, typically 2 inches to combustibles minimum.
Calcium Silicate Board
A premium rigid insulation material used in industrial and high-end residential applications, calcium silicate board offers outstanding compressive strength and thermal resistance at very high temperatures. It is used to insulate the area immediately around the liner outlet at the firebox connection, where temperatures are highest and rigid support is needed.
| Material | Max Temp | R-Value per Inch | Application | Permanent? |
|---|---|---|---|---|
| Ceramic Fiber Blanket | 2300°F | ~2.0–2.5 | Liner wrap | No (removable) |
| Vermiculite Mix | ~1800°F | ~2.7–3.0 | Pour-around liner | Yes |
| Mineral Wool | ~1800°F | ~3.0–3.3 | Chase insulation | No (removable) |
| Calcium Silicate | 1832°F | ~1.8 | High-heat zones | No |
R-Value, Thermal Resistance & What the Numbers Mean
When shopping for insulation, you will encounter the term R-value constantly. R-value is a measure of thermal resistance — how well a material resists heat flow. The higher the R-value, the better the insulation. However, for chimney applications, R-value alone does not tell the complete story. Temperature rating matters just as much, because a high-R-value material that fails catastrophically at 600°F is dangerously useless in a wood-burning application.
Here is how to think about R-value for chimney insulation:
- Liner Insulation: For wrapping a flexible liner, a 1-inch ceramic fiber blanket typically provides R-2 to R-2.5. A 2-inch wrap doubles this to R-4 to R-5, which is generally sufficient for most applications in cold climates.
- Chase Insulation: Factory-built chimney chases are often large cavities. Standard practice calls for a minimum of R-11 in the chase walls, with R-19 or higher recommended in heating-dominated climates (Climate Zones 5–7).
- Combined Effect: The total thermal performance of a chimney system is the sum of the liner insulation, the air gap (if any), and the outer masonry or chase wall. Each layer contributes to the total.
Phase 1: Diagnosis and Preparation
Insulation methods vary depending on your setup. Are you installing a new stainless steel liner? Or are you trying to stop drafts in an unused fireplace? Proper diagnosis before you spend a single dollar on materials is the difference between a successful project and an expensive do-over.
1. Inspecting the Existing Structure
First, check for existing damage. If you have a masonry chimney, look for cracks in the flue tiles, spalled brick, or deteriorating mortar joints. You might need to know how to fix a leaky chimney before adding insulation. Moisture trapped behind insulation is a disaster waiting to happen — it will saturate the ceramic fiber, reduce the R-value to near zero, and accelerate the very spalling and mortar damage you are trying to prevent.
Use a bright flashlight or a mirror-and-flashlight combination to inspect the flue from both the firebox and the chimney top. For a more thorough inspection, a Level 2 chimney inspection using a video camera system is the professional standard and is strongly recommended before any liner or insulation installation.
2. Measuring the Flue
This step is critical and often skipped by eager DIYers. You need three measurements:
- Flue Height: Total linear footage from the firebox throat to the top of the chimney. This tells you how much liner and insulation material to buy.
- Flue Interior Dimensions: The internal diameter (for round flues) or the width and depth (for rectangular tile-lined flues). This determines the appropriate liner diameter.
- Clearance: The space between the liner and the inner edge of the flue. A clearance of 2 inches or more makes blanket wrapping easy. Less than 1 inch means a pour-in method is required.
3. Choosing the Right Liner Diameter
The liner diameter must be matched to the appliance it serves. An undersized liner creates dangerous back-pressure and incomplete combustion. An oversized liner reduces draft velocity and dramatically increases creosote formation. Use the appliance manufacturer’s specification sheet as the primary guide, then cross-reference with the NFPA 211 sizing tables.
| Appliance Type | Typical Liner Diameter | Notes |
|---|---|---|
| Wood Insert (medium) | 6 inches | Always check insert specs |
| Wood Stove (large) | 6–8 inches | Match to stove collar size |
| Oil Furnace | 6 inches | Positive pressure — use rigid liner |
| Gas Boiler / Furnace | 4–6 inches | Low temp — condensate is major concern |
| Open Masonry Fireplace | 8 inches | Sized to firebox opening area (1:10 ratio) |
4. Tools and Safety Gear
You cannot execute this project without the right equipment. Safety is paramount. Working in and around chimneys exposes you to soot, creosote, glass fibers, and the risk of falls. Do not cut corners here.
- Full-body protective suit (Tyvek or similar): To protect against soot and fiberglass/ceramic wool irritation.
- Respirator (N95 or P100): Essential for lung protection from ceramic fiber and creosote particles.
- Safety goggles: Ceramic fiber is extremely irritating to eyes.
- Chemical-resistant gloves: Ceramic fiber and wet vermiculite mix are hard on skin.
- Chimney Brush: A clean flue is mandatory. Check out the best chimney brush for stainless steel liner.
- Headlamp: It gets dark in there. Hands-free lighting is essential.
- Measuring tape and a plumb bob for accurate measurements.
- Roof safety equipment: Non-slip shoes, roof anchors, and a proper ladder if working from the roof.
- Drop cloths: Cover the firebox and hearth area completely to protect your interior.
Before insulating, you must remove all dangerous creosote. This rotary drill-powered kit makes it easy for DIYers and is compatible with standard electric drills. Clean the flue thoroughly before any liner or insulation work begins.
Check Price on AmazonPhase 2: The Two Main Methods of Insulation
There are two primary ways to insulate a chimney liner, and the choice depends entirely on your flue’s geometry and available clearance. Choosing the wrong method can make installation impossible or create a structurally compromised system. Assess your clearance before ordering materials — this is the most critical decision point in the entire project.
| Method | Best For | Pros | Cons |
|---|---|---|---|
| Blanket Wrap | Straight flues with >2 inches of clearance. | Ensures uniform thickness; easier to remove later; faster installation; no curing time. | Can be bulky; difficult to slide down tight or offset flues; requires stainless mesh jacket. |
| Pour-In Mix | Irregular shapes or tight fits (<1 inch clearance). | Fills every nook and cranny; hardens to rock; best R-value for tight spaces; no liner jacket needed. | Permanent; messy to install; hard to remove; requires multiple pours; needs block-off plate at bottom. |
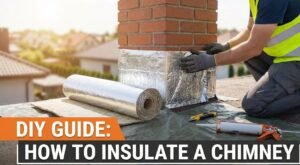
Method A: The Blanket Wrap Technique (Gold Standard)
This is the most common method for gas fireplaces needing a chimney and wood stove inserts. It is preferred by professional installers because it can be removed and replaced if the liner ever needs to be serviced, and because it provides consistent, measurable thermal performance.
Measure and Cut
Lay your flexible stainless steel liner flat on a clean surface. Unroll your foil-faced ceramic wool insulation alongside it. Measure the circumference of the liner and add approximately 1 inch for overlap. Cut the blanket to this width. For the length, cut to match the total liner length, leaving a 6-inch excess at the top to fold over the top plate.
Surface Preparation
Wipe down the outside of the liner with a dry cloth to remove any oils or debris from manufacturing. A clean, dry surface ensures the adhesive bonds properly. If the liner has any sharp edges or protruding seams, sand them lightly to prevent tearing the ceramic fiber.
Apply Adhesive
Spray the liner with a high-heat spray adhesive rated for at least 300°F. Hold the can 10–12 inches from the surface and apply an even coat. Allow it to become tacky per the manufacturer’s instructions — usually 30 to 60 seconds. This adhesive acts as a positioning aid during the initial wrap; the stainless mesh provides the long-term mechanical hold.
Wrap and Tape
Starting at one end of the liner, press the ceramic fiber blanket firmly against the adhesive surface, foil side facing out. Roll the liner slowly while pressing the blanket down, maintaining tension to avoid air gaps. Lap the 1-inch overlap and press firmly. Seal all seams — including the longitudinal seam and any end joints — with aluminum HVAC foil tape. Do not use standard duct tape. It will fail immediately at temperature. Use only purpose-made HVAC foil tape that is rated for at least 250°F continuous use.
Rated for 2300°F continuous service temperature, this is the industry standard for wrapping liners. It withstands extreme heat shock and is available in both 1-inch and 2-inch thicknesses. The foil face simplifies the taping process significantly.
View on AmazonInstall the Stainless Mesh Jacket
Once wrapped, slide a stainless steel wire mesh sleeve over the entire assembly. This mesh jacket is the physical armor that protects the insulation from snagging on brick, mortar protrusions, and offsets as you lower the liner assembly down the flue. Without it, you risk shredding the ceramic fiber during installation, negating all your work. Tie the mesh securely at the top end of the liner.
Lower the Assembly
This step typically requires two people — one on the roof feeding the liner down and one at the firebox to guide it in. Lower slowly and steadily. Never force or jerk the liner. If resistance is felt, raise slightly and re-angle. Communicate clearly with your partner. Have a pull rope attached to the bottom end of the liner so the person at the firebox can assist with guidance.
Connect and Secure
Once the liner is in position, connect the bottom end to the appliance or firebox connector using the appropriate adaptor. Connect the top end to the top plate and chimney cap. Apply high-temperature silicone sealant around all connection points. Torque any set screws to the manufacturer’s specification — not too loose (leak risk) and not too tight (risk of cracking the liner end).
Method B: The Vermiculite Pour-In Method
If you are asking, “How do I insulate a chimney with a bent or offset flue?”, this is your answer. This method involves pouring a mix of vermiculite (a natural mineral) and Portland cement between the liner and the masonry walls of the flue. The result is a lightweight, permanent insulating grout that fills the entire annular space regardless of its shape.
This method is also widely used in renovation scenarios where an existing terra cotta tile liner is cracked or compromised. In many cases, a new flexible liner is dropped into the old tile flue and the vermiculite mix is poured around it, essentially creating a brand-new, insulated liner system inside the old one.
- Install the Liner: Drop the flexible or rigid liner down the flue first. Use spacers — small pieces of ceramic fiber board or mineral wool — at regular intervals (every 3–4 feet) to center the liner in the flue and ensure an even annular gap for the mix.
- Seal the Bottom: You must create a dam at the bottom of the chimney — usually at the smoke shelf or damper level — to prevent the wet mix from flowing into your firebox. Professional installers use a combination of a block-off plate and high-temp silicone caulk, or a proprietary inflatable bag that is removed after the mix sets. If you skip this step, you will spend the next several hours scooping wet vermiculite out of your firebox.
- Mix the Insulation: Combine the vermiculite mix with water according to the package instructions. The correct consistency is similar to damp potting soil — it should hold its shape when squeezed in your fist but should not be dripping wet. A soupy mix will take far longer to set and will have a reduced final R-value.
- Pour in Lifts: From the roof, pour the mix around the liner in increments — pour about 3–4 feet at a time. After each pour, vibrate or tap the liner gently to help the mix flow around spacers and settle into all voids. Check from the firebox with a light to confirm the mix is flowing uniformly. Do not pour the full height in one go; the weight of a full pour can shift or damage the liner.
- Allow to Cure: Vermiculite mix takes 24–48 hours to reach initial set and up to 7 days for full curing strength. Do not operate the appliance during this period. Keep the area dry.
- Cap and Seal: Finish the top with a crown seal and install a quality chimney cap. Apply waterproofing sealant to the crown as a final step.
You will need this to seal the top plate, flashing connections, and any gaps around the liner collar. Essential for chimney flashing sealant applications. This formulation remains flexible through extreme thermal cycling, unlike standard RTV silicone.
Buy NowThe Critical Role of the Block-Off Plate
Insulating the liner is only half the battle. If you have a fireplace insert, you must install a block-off plate. This is a sheet of heavy-gauge steel installed above the fireplace opening that stops room air from going up the chimney and cold air from coming down.
Without a block-off plate, your insulated liner is like wearing a thermal jacket but leaving it completely unzipped. The insulation keeps the liner itself warm, but the enormous open cavity between the liner and the firebox walls acts as an uncontrolled cold-air chimney in its own right. You lose heat, create draft problems, and in the worst case, create a hazard where combustion gases can bypass the liner entirely and enter the living space.
How to Make a Block-Off Plate
Many fireplace insert manufacturers provide a block-off plate as part of the insert kit. If yours did not, you can fabricate one from 24-gauge galvanized steel sheet metal. Cut it to fit snugly across the entire fireplace opening at the throat, centered around the liner. Use aviation snips for straight cuts and a bead of high-temperature silicone around the entire perimeter to seal it to the masonry. The liner collar should pass through a tight-fitting hole in the center of the plate, also sealed with high-temp silicone.
Insulating the Exterior Chimney Chase
In homes with factory-built (prefabricated) chimney systems, the metal flue pipe is enclosed in a framed wooden chase — essentially a tall wooden box on the exterior of the house. These chases are notorious for poor energy performance and are a major source of heat loss and cold-air infiltration in winter.
The problem is a combination of the thin metal pipe inside, which rapidly loses heat to the surrounding air, and the poorly insulated or completely uninsulated chase walls. Left unaddressed, a cold chase creates the same draft problems and creosote hazards as an uninsulated masonry flue.
Step-by-Step Chase Insulation
- Remove the Chase Cover: The metal cover at the top of the chase must be removed first. Many are simply screwed down; others are caulked. Inspect it for rust and distortion — a damaged chase cover is often the source of moisture problems and should be replaced before reinsulating.
- Maintain Clearances: The metal chimney pipe requires a 2-inch clearance to all combustibles. This means insulation cannot be packed directly against the pipe. The insulation goes into the chase walls, not around the pipe itself. Use the pipe manufacturer’s clearance specification as the absolute minimum — do not assume 2 inches is always sufficient.
- Install Mineral Wool Batts: Cut mineral wool insulation batts to fit between the framing studs of all four chase walls. Mineral wool is preferred here over fiberglass because it is non-combustible and does not support mold growth. Fill the full depth of the stud cavity, leaving the required clearance from the pipe.
- Air Seal: Use a can of expanding foam sealant (fire-rated, ASTM E84 Class I or better) to seal all penetrations where the chase framing meets the house. The junction between the chase and the roof, the junction at the house wall, and any electrical or cable penetrations are all prime air leakage points.
- Replace or Upgrade the Chase Cover: Galvanized steel chase covers corrode and fail within a few years in wet climates. Upgrade to a stainless steel or copper chase cover for a permanent solution. Pitch the cover to shed water away from the pipe. Seal the perimeter with polyurethane caulk (not silicone — it does not adhere well to metal).
Chimney Insulation at the Attic Level
One of the most commonly overlooked areas in chimney insulation is the attic pass-through. As the chimney — whether masonry or factory-built — passes through the attic floor and the roof assembly, it creates a thermal bypass that can short-circuit even the best attic insulation below.
The Chimney Chase Air Sealing Problem
Warm, moist air from the living space below rises naturally and finds its way around the chimney into the attic. This causes ice dams on the roof in winter and accelerates moisture damage to roof sheathing and framing. The fix is to create an air-tight dam around the chimney at the attic floor level using rigid mineral wool or calcium silicate board, then seal all gaps with fire-rated caulk or intumescent sealant.
Maintaining Code-Required Clearances
At the attic floor level, the clearance-to-combustibles requirement for masonry chimneys is 2 inches, and for factory-built systems it is as specified by the manufacturer (typically 2 inches but verify your specific model). These clearances must be maintained even when adding insulation. You cannot pile blown insulation against the chimney masonry — instead, build a rigid dam to the required clearance height and maintain the air gap before covering with attic insulation.
A common and code-compliant approach is to cut a piece of 1-inch calcium silicate board or mineral wool board to form a collar around the chimney at the attic floor. Caulk the inner edge to the masonry with fire-rated sealant, and caulk the outer edge to the attic floor framing. This creates a permanent, rigid dam that you can then pile attic insulation against without violating clearances.
Special Cases: Gas & Pellet Appliances
Wood-burning appliances are the most common reason for liner insulation, but gas and pellet appliances have their own insulation requirements — and they differ in important ways. Getting this wrong with a gas appliance is a serious safety issue because the hazards are less visible: carbon monoxide rather than visible smoke.
Gas Appliances and Condensate
Gas appliances — particularly high-efficiency furnaces and boilers — produce combustion gases that are cooler and contain much more water vapor than wood smoke. These cool, wet gases are particularly vulnerable to condensation in the flue, especially if the liner is cold. Condensate is acidic (typically pH 3–4) and extremely corrosive to standard 316-alloy stainless liner, requiring the upgrade to 316L or, in very aggressive cases, to AL29-4C alloy stainless steel.
Insulating a liner used with a high-efficiency gas appliance serves a different primary purpose than with wood: it keeps the flue warm enough to prevent condensation rather than to prevent creosote. The physics are different, but the solution is the same. A properly insulated liner serving a gas appliance also prevents the freeze damage that occurs in the flue when condensate freezes in an uninsulated exterior chimney.
Pellet Stoves and Positive Pressure Systems
Pellet stoves and some gas appliances use a forced-draft blower that creates positive pressure in the flue. This means that any gap or crack in the liner is not a back-draft hazard but an exhaust hazard — flue gases are actively pushed out through any imperfection. For positive-pressure systems, liner integrity is even more critical than in natural-draft systems. Use only liners and fittings that are rated and listed for positive-pressure applications.
🪵 Wood-Burning
- Primary concern: creosote from cool flue gases
- High flue temperatures — requires highest-rated materials
- Natural draft — negative pressure in flue
- 316Ti or 304 stainless liner acceptable
- Blanket wrap is the go-to method
🔥 Gas / High-Efficiency
- Primary concern: condensate corrosion
- Lower flue temperatures — condensation risk is real
- May be positive pressure — requires listed liner
- 316L or AL29-4C liner required for high-efficiency
- Pour-in or heavy blanket wrap recommended
Building Codes, Clearances & NFPA Standards
Chimney insulation and liner installation are not free-form activities. They are governed by specific codes and standards that exist to protect lives. Violating these codes — even inadvertently — can result in a failed inspection, voided insurance, and real danger to occupants.
Key Standards to Know
- NFPA 211 (Standard for Chimneys, Fireplaces, Vents, and Solid Fuel-Burning Appliances): The primary governing document for chimney installation in the United States. It covers liner requirements, clearances, materials, and installation procedures. Your local building code typically references or adopts NFPA 211 by reference.
- UL 1777 (Chimney Liners): The product standard that flexible and rigid liner systems must meet to be sold in the US. Always verify that your liner is listed to UL 1777 for the appropriate fuel type and appliance category.
- Local Building Codes: Many jurisdictions have amendments to NFPA 211 or their own specific requirements. Always call your local building department before starting a liner or insulation project. A permit may be required, and in many areas, the installation must be inspected.
- IRC (International Residential Code) Section R1001–R1005: For single-family residential construction, the IRC provisions for masonry fireplaces and factory-built chimneys establish minimum construction standards that interact with insulation requirements.
Cost Breakdown & ROI Analysis
One of the most common questions about chimney insulation is simply: “Is it worth it?” The answer is almost always yes, but the timeline for return on investment varies based on climate, fuel costs, and the current condition of your chimney system.
| Item | DIY Cost (Approx.) | Professional Cost (Approx.) | Notes |
|---|---|---|---|
| Flexible stainless liner (30 ft) | $200–$400 | Included in labor | 6-inch diameter; varies by alloy |
| Ceramic fiber blanket (30 ft) | $80–$150 | Included in labor | 1-inch foil-faced; sufficient for most applications |
| Stainless mesh jacket | $50–$100 | Included in labor | — |
| Top plate, cap, and hardware | $80–$200 | Included in labor | Quality cap prevents moisture and pest issues |
| High-temp silicone and foil tape | $30–$50 | Included in labor | — |
| Professional labor | — | $500–$1,500 | Varies by region; includes Level 2 inspection |
| Total Estimated Cost | $440–$900 | $900–$2,200 | Depending on chimney height and complexity |
Energy Savings Potential
A properly insulated liner on a wood stove insert can improve the overall thermal efficiency of the system by 10–25%. For a home that spends $800 per heating season on firewood, that is an annual savings of $80–$200. At the DIY cost of $440–$900, the payback period is roughly 3–7 heating seasons — a solid investment with secondary benefits including reduced chimney cleaning frequency and extended liner life.
For gas appliance applications in cold climates, the energy savings from preventing condensation-related damage and maintaining proper draft can be considerably higher, and the cost of ignoring insulation — a failed heat exchanger, a cracked liner, or carbon monoxide infiltration — far exceeds the cost of the insulation project itself.
DIY vs. Hiring a CSIA-Certified Professional
The blanket wrap technique on a straight, interior masonry chimney with good clearances is a manageable DIY project for a reasonably handy homeowner. However, there are several scenarios where professional installation is not just recommended but genuinely necessary.
When to DIY
- The flue is straight with no offsets
- You have confirmed clearance of 2 inches or more for blanket wrapping
- The existing masonry is sound with no structural defects
- You are comfortable with roof work and have proper safety equipment
- A Level 1 or Level 2 inspection has confirmed no hidden damage
When to Hire a Pro
- The flue has offsets or significant bends that make liner insertion challenging
- The masonry is deteriorated, cracked, or shows signs of past chimney fire damage
- You are connecting to a gas appliance — especially a high-efficiency unit
- Local building code requires a permit and inspection
- You have any doubt about the clearances or the liner sizing calculation
- The chimney is on the exterior of the home and access from the roof is particularly dangerous
When hiring a professional, always look for Chimney Safety Institute of America (CSIA) certification. A CSIA-certified chimney sweep has passed a rigorous examination covering NFPA 211, liner installation, and safety protocols. The designation provides meaningful assurance of competence that a general contractor or handyman cannot offer for this specialized work.
Maintenance and Troubleshooting
Once insulated, your chimney needs ongoing care. Regular cleaning is still required, though a properly insulated and correctly sized liner will produce significantly less creosote than an uninsulated system operating with the same fuel load.
Annual Inspection Protocol
The NFPA recommends a Level 1 chimney inspection annually for any chimney in regular use. This involves a visual inspection of all accessible portions of the chimney without the use of specialized tools. If there has been any unusual event — a chimney fire, an earthquake, extended disuse, or a change in the connected appliance — a Level 2 inspection using video equipment is required.
During an annual inspection on an insulated liner system, specifically check: the condition of the foil tape seams on the insulation wrap (look for delamination or gaps), the top plate and its seal to the liner, the chimney cap and its mesh screen (pest exclusion), the crown condition (cracks allow water intrusion), and the firebox connector seal.
How Often to Clean
Consult our guide on how often should you clean a chimney. Even with insulation, neglecting cleaning can lead to fires. As a general rule: inspect at least annually and clean whenever creosote depth exceeds 1/8 inch anywhere in the flue. Wood-burning appliances used as a primary heat source may require two cleanings per season in very cold climates.
Troubleshooting Common Post-Insulation Problems
Problem: Smoky Firebox After Insulation
If you are experiencing back-drafting after installing an insulated liner, the most common cause is an oversized liner. An insulated liner is more efficient at maintaining draft, but if the liner diameter is too large relative to the appliance output, the gas velocity is too low to overcome wind pressure at the cap. Double-check that the liner diameter matches the appliance specification. A secondary cause is a missing or improperly sized block-off plate — cold air cascading down the space around the liner can overwhelm the draft.
Problem: Condensation on Firebox Surfaces
Condensation on the smoke shelf or firebox walls after installing a liner is most common with gas appliances. It indicates that the flue gases are cooling and condensing before exiting the cap. Solutions include increasing the insulation thickness (going from 1-inch to 2-inch blanket), ensuring the top plate is fully sealed to prevent cold air entry from above, and confirming the appliance is properly sized for the flue.
Problem: Odor from the Fireplace When Not in Use
A creosote or smoky odor when the fireplace is not in use is almost always a pressure and draft problem. The house is under negative pressure (due to exhaust fans, a tight building envelope, or the stack effect) and is pulling air — and odor — down the chimney. Solutions include ensuring the damper is fully closed when not in use, installing a top-mount damper that seals at the cap level, and addressing the underlying pressure imbalance by improving makeup air to the area.
Dealing with Pests
An insulated chimney is warm and inviting to wildlife seeking shelter. Be sure to install a quality chimney cap with a wire mesh screen at least 5/8-inch opening to prevent nesting. If you are already dealing with intruders, read our guides on getting a raccoon out of the chimney or how to get a bird out. Never attempt to smoke out an animal — this is both inhumane and a serious fire risk.
Advanced Considerations: Waterproofing
Insulation loses its R-value rapidly when it becomes wet — saturated ceramic fiber may drop to 20–30% of its dry thermal resistance. Water is the single greatest long-term enemy of chimney insulation and liner performance. A comprehensive waterproofing strategy is not optional; it is an integral part of any insulation project.
The Crown
The chimney crown — the concrete cap that covers the top of the masonry chimney around the flue liner — is the first and most important line of defense against water infiltration. A properly formed crown has a wash (slope) away from the liner, extends to a drip edge beyond the chimney face, and is made of reinforced portland cement, not mortar. Inspect it for cracks annually. Small hairline cracks can be sealed with a flexible crown sealant product; larger structural cracks require grinding out and repointing or complete crown reconstruction.
Waterproof Penetrating Sealants
Ensure your chimney crown is crack-free and apply a water repellent penetrating sealer to the crown and, if desired, the full exterior masonry. Learn more at how to waterproof a chimney. Use only a breathable (vapor-permeable) waterproofing sealer specifically formulated for masonry chimneys. Standard concrete sealers trap moisture inside the masonry, accelerating spalling.
Flashing Integrity
The flashing — the metal seal between the chimney masonry and the roof surface — is statistically the most common entry point for water in chimney systems. It requires both a base flashing (step flashing running up the masonry) and a counter flashing (embedded in the mortar joint and lapping over the base flashing). Inspect this junction annually, especially after high-wind events. A properly installed and sealed flashing system is the difference between a dry chimney and a rotting roof deck.
Chimney Painting
Furthermore, if you are painting the exterior masonry, do not use standard latex paint. It traps moisture inside the brick, causing accelerated spalling and freeze-thaw damage. Use the best paint for chimney brick, which is specifically formulated to allow the masonry to “breathe” while providing a weather-resistant surface.
Seasonal Chimney Insulation Checklist
Maintaining a well-insulated chimney is a year-round responsibility. Use this seasonal checklist to stay on top of the key tasks at each time of year.
🍂 Fall (Pre-Season Preparation)
- Schedule or perform annual Level 1 inspection
- Clean the flue if creosote exceeds 1/8 inch
- Inspect chimney cap mesh for nesting material and damage
- Check crown for new cracks from summer heat and UV exposure
- Inspect foil tape on liner insulation from firebox opening
- Test damper operation — it should open and close fully without binding
- Check flashing for lifted edges or cracked caulk
❄️ Winter (In-Season Monitoring)
- After the first 5–10 fires, re-inspect the firebox for unusual odors or smoke behavior
- Monitor the top plate area for ice formation (indicates heat loss past the insulation)
- Check the firebox connector seal for gaps after thermal cycling
- Remove snow accumulation from the crown if it exceeds 6 inches
🌱 Spring (Post-Season Inspection)
- Inspect flashing for any movement caused by freeze-thaw cycles
- Check for mortar joint spalling on the exterior chimney face
- Inspect the liner from the firebox for any deformation or damage from heavy use
- Reapply waterproofing sealer if water-bead test shows sealant has failed
- Clear any debris from the chase cover or cap
☀️ Summer (Off-Season Maintenance)
- Ideal time for any repair work — masonry mortars and sealants cure best in warm, dry conditions
- Repoint any failing mortar joints while the scaffold is available
- Install or upgrade chimney cap if needed
- Consider a Level 2 inspection if the chimney is more than 15 years old or has not had one recently
Frequently Asked Questions
Conclusion
Insulating your chimney is one of the most meaningful investments you can make in your home’s thermal performance, safety, and long-term structural integrity. It reduces the risk of chimney fires, improves the combustion efficiency of your firewood, cuts creosote accumulation, and keeps your home comfortable throughout the heating season. Whether you choose the blanket wrap or the pour-in method, or whether you are insulating the liner of a masonry chimney or the chase walls of a factory-built system, the principles are consistent: keep flue gases hot, maintain proper clearances, use the right materials, and seal against moisture.
The project requires preparation, the right tools, and a clear understanding of the physics involved — but it is well within the reach of a diligent DIYer on a straightforward system. When in doubt, bring in a CSIA-certified professional. The cost of expert installation is almost always less than the cost of correcting a flawed DIY job, and with a system as critical as your chimney, peace of mind is worth every penny.
Recommended Watch
For a visual guide on these techniques, we highly recommend watching this external resource which covers many of the practical steps discussed above: