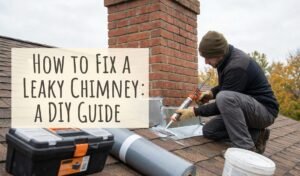
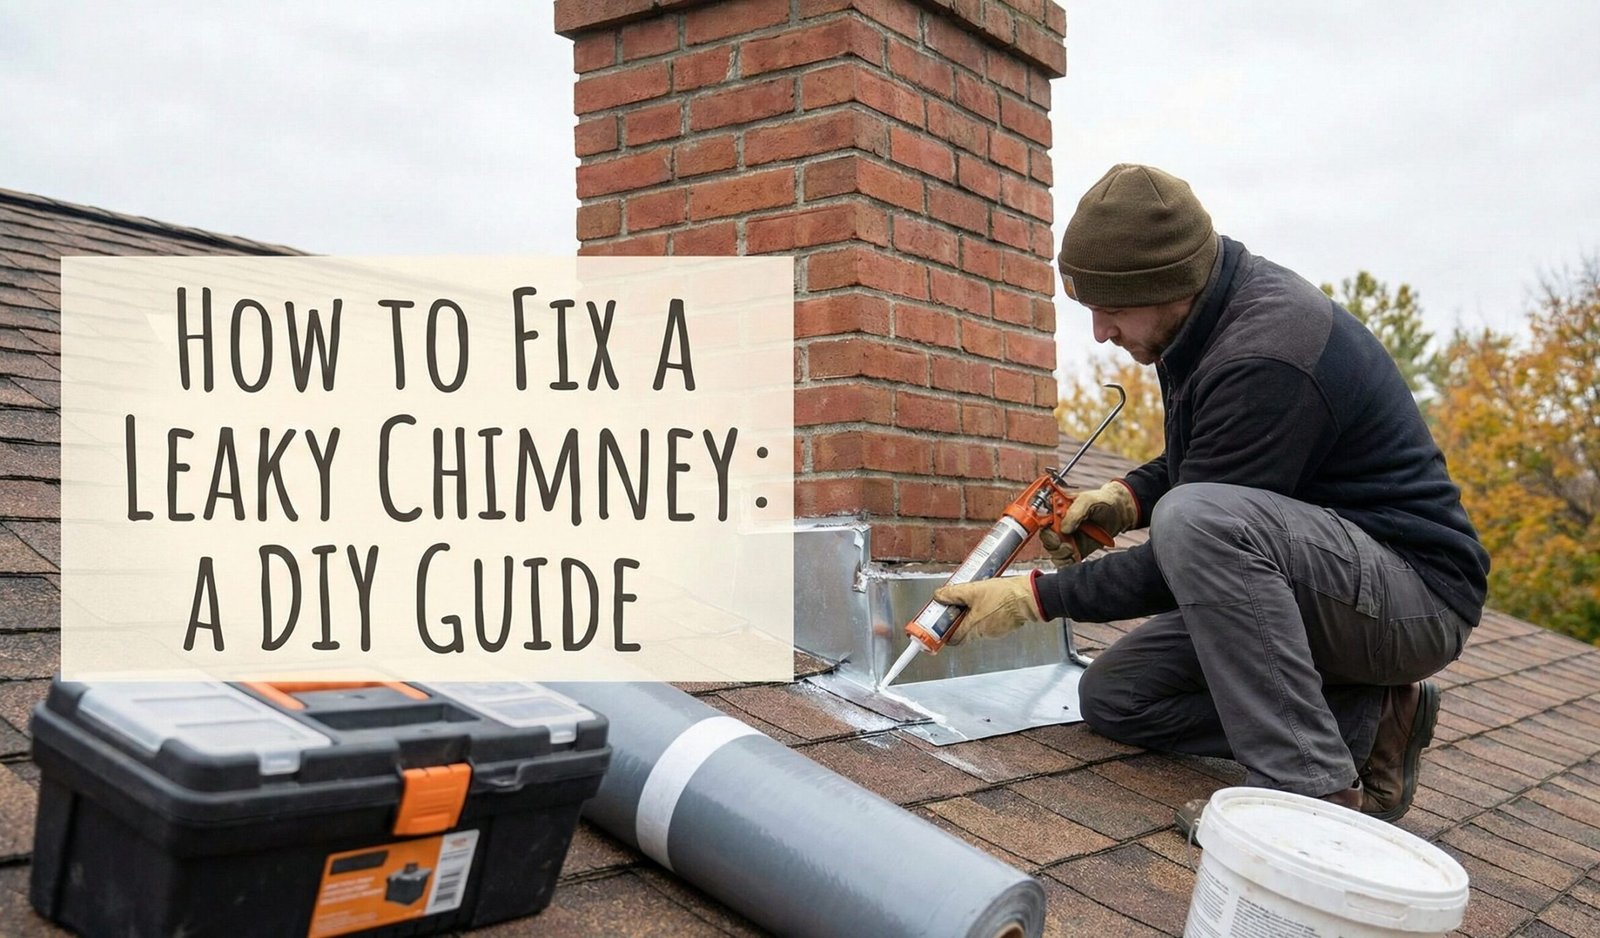
How to Fix a Leaky Chimney: A Step-by-Step Diagnostic & Repair Guide
Before buying tools, identify the source. The 4 most common culprits are:
- Leak at Ceiling/Attic: Usually Flashing failure.
- Water inside Firebox: Usually a missing Cap or cracked Crown.
- Damp/Moldy Walls: Usually porous Brickwork (Spalling).
- White Stains (Efflorescence): Moisture trapped inside masonry.
A leaky chimney is a homeowner’s nightmare. It starts as a drip, but quickly turns into rotted roof decking, mold in the attic, and structural instability. While you might be tempted to grab a bucket of tar, fixing a chimney requires specific materials compatible with masonry — using the wrong product can trap moisture inside the wall and accelerate the exact damage you are trying to stop.
In this comprehensive guide we cover every possible source of chimney water infiltration — not just the obvious ones. From failed flashing and cracked crowns to condensation inside the flue, deteriorated mortar joints, and improper chimney cap sizing, we leave no stone unturned. If you aren’t sure if the issue is structural or just maintenance, check our guide on chimney repair and homeowners insurance. Sometimes, storm damage is covered and a professional repair could cost you nothing out of pocket.
- How Water Enters a Chimney — The Full Picture
- Tools & Materials You Will Need
- Fix #1: Repairing the Chimney Crown
- Fix #2: Sealing the Flashing
- Fix #3: Waterproofing Porous Bricks
- Fix #4: Replacing a Missing or Damaged Cap
- Fix #5: Tuckpointing Deteriorated Mortar Joints
- Fix #6: Repairing Spalling and Damaged Brick
- Fix #7: Fixing the Damper and Throat Seal
- Fix #8: Addressing Condensation and Interior Flue Moisture
- Fix #9: Full Step Flashing Replacement
- Repairing Interior Water Damage from Chimney Leaks
- Long-Term Leak Prevention Strategy
- When to Call a Professional
- Full Cost Breakdown
- Frequently Asked Questions
🔍 How Water Enters a Chimney — The Full Picture
Most homeowners assume a chimney leak has one source. In reality, water infiltration is often a combination of two or three failure points working in concert. Rain hits the crown, soaks into hairline cracks, freezes, widens those cracks, and then the next storm drives water through the now-open gaps while simultaneously saturating the porous brick face. Fixing only one problem while leaving others intact is the single biggest reason chimney leak repairs fail within one or two seasons.
Understanding the full range of entry points empowers you to do a complete repair the first time. Here is a comprehensive breakdown of every pathway water can take to get inside your home through the chimney:
| Entry Point | Symptoms | Season Most Likely | Urgency |
|---|---|---|---|
| Cracked chimney crown | Water in firebox, wet flue tiles | Spring / Fall | High |
| Failed step or counter flashing | Ceiling stains near chimney, attic moisture | Any heavy rain | Critical |
| Missing or damaged chimney cap | Water directly on damper or logs | Any rain | Critical |
| Deteriorated mortar joints (tuckpointing) | Damp interior walls, white efflorescence | Winter / Spring | High |
| Spalling brick face | Flaking brick, brick fragments at base | Winter | Medium–High |
| Open or stuck damper | Draft, water on smoke shelf | Any rain | Medium |
| Condensation (flue) | Rust stains on damper, damp firebox | Winter | Medium |
| Porous brick face (no sealant) | Damp wall surface, mold smell | Heavy rain | Medium |
| Cracked flue liner tiles | Staining on exterior masonry, smell | Any | Critical (fire risk) |
| Failed saddle / cricket | Water pooling behind wide chimney | Heavy rain, snow melt | High |
Performing Your Own Visual Inspection
Before purchasing any repair materials, spend 30 minutes on a thorough inspection. Work from the top down — roof to firebox. Here is the sequence a professional inspector follows:
- Chimney exterior from ground: Using binoculars, scan the crown, cap, mortar joints, and brick face for visible cracks, missing pieces, or white staining.
- Roof level: Examine flashing, step flashing, counter flashing, and the saddle (if present) for lifted edges, rust, or open gaps.
- Attic: Look for water staining, active moisture, mold, or daylight around the chimney penetration in the roof deck.
- Firebox interior: Shine a flashlight up the flue. Look for rust on the damper, water staining on the smoke shelf, cracks in the liner, and any debris from the crown or cap.
- Adjacent interior walls: Check drywall and plaster surfaces near the chimney breast for bubbling paint, staining, or mold.
Document everything with photos before you start any repair work. The photos serve as your before/after record and are invaluable for insurance claims if storm damage is involved.
🛠 Tools & Materials You Will Need
Having the right tools on-site before starting prevents frustrating mid-project hardware store runs and ensures every repair step can be completed properly. This is the full master list — your specific project may require a subset of these items depending on which repairs are needed.
🔧 Tools
- Cold chisel and hammer (or angle grinder)
- Stiff wire brush and drill wire brush attachment
- Caulk gun (heavy duty, for thick sealants)
- Pointing trowel and margin trowel
- Stiff-bristle masonry brush
- Garden sprayer (for applying waterproofer)
- Pry bar (for lifting flashing)
- Aviation snips (for cutting flashing metal)
- Tin snips and sheet metal brake (for new flashing)
- Rubber mallet
- Safety glasses, N95 respirator, heavy gloves
- Roof anchors and non-slip footwear
- Drop cloths and painter’s tape
- Bright flashlight or headlamp
🧰 Materials
- Elastomeric crown repair coating
- Fabric-reinforced flashing sealant (FlashSeal or equivalent)
- Breathable siloxane masonry waterproofer (ChimneySaver or equivalent)
- Type S masonry mortar or pre-mixed tuckpointing mortar
- Portland cement (for crown reconstruction)
- Hydraulic cement (for active water intrusion)
- High-temp RTV silicone sealant (600°F rated)
- Stainless steel chimney cap (correct flue size)
- Lead or aluminum counter flashing (for replacement)
- Step flashing shingles (for full flashing replacement)
- Roofing nails and screws (stainless)
- Butyl tape (for flashing bedding)
- Mold-resistant primer and paint (for interior repairs)
🏠 Fix #1: Repairing the Chimney Crown
The crown is the concrete slab at the very top of the chimney, surrounding the flue liner. It takes the hardest beating from sun, rain, freeze-thaw cycles, and UV exposure. When it cracks, water pours directly into the flue walls and can saturate the masonry from the inside out. A properly formed crown is one of the most important waterproofing elements in the entire chimney system.
What a Proper Crown Looks Like
Many older chimneys have crowns that were formed incorrectly by masons who did not understand their function. A proper chimney crown must have a slight downward slope from the liner collar to the edge, a drip edge overhang of at least 2 inches past the chimney face, and must be made of reinforced portland cement — not mortar. Mortar crowns crack rapidly and are one of the leading causes of chimney leaks in homes more than 20 years old.
Diagnosing Crown Damage
- Hairline cracks: Visible fine cracks running across the crown surface. Caused by thermal cycling and UV degradation. Repairable with elastomeric coating.
- Structural cracks: Cracks wider than 1/4 inch, especially those running through the full crown thickness. Require grinding out and filling before coating.
- Missing or crumbling sections: Areas where the crown material has spalled away entirely. Require patching with hydraulic cement or mortar before coating.
- Mortar crown (not portland cement): Soft, sandy texture that crumbles when probed with a screwdriver. Requires full removal and reconstruction.
The Solution: Flexible Elastomeric Sealant
Do not use standard mortar to patch cracks; it will crack again during the next freeze-thaw cycle. You need an elastomeric coating that moves with the thermal expansion and contraction of the crown. These products cure into a rubber-like membrane that bridges small cracks and prevents water infiltration for many years.

ChimneyRx Brushable Crown Repair
A flexible, waterproof membrane that you paint over the cracks. Cures into a rubber-like seal that bridges movement cracks and remains flexible through extreme temperatures.
Check Price
Sashco Mor-Flexx Repair
Textured caulk specifically designed to look like mortar but stretch like rubber. Ideal for filling structural cracks before applying the elastomeric top coat.
Check PriceStep-by-Step Crown Repair Process
Use a stiff wire brush to remove all loose material, dirt, and old sealant from the crown surface. Blow off the dust with compressed air or a brush. The surface must be completely clean and structurally sound for the repair material to bond properly.
Lightly mist the crown with water before applying repair products. This prevents the dry masonry from drawing moisture out of the repair material too rapidly, which reduces bond strength and causes premature cracking.
Use Sashco Mor-Flexx or a similar flexible mortar caulk to fill any cracks wider than 1/8 inch. Overfill slightly and tool smooth. Allow to cure per the product instructions — typically 24 hours minimum before overcoating.
Using a paintbrush, apply ChimneyRx or equivalent product in a generous, even first coat over the entire crown surface, lapping up onto the flue collar by at least 1 inch. Work the material into all surface texture.
While the first coat is still wet, press fiberglass mesh tape over any visible cracks and work it into the coating with the brush. This bridges the crack and prevents future re-opening. Use 4-inch mesh tape for best results.
Allow the first coat to dry to a tack-free surface (1–4 hours depending on temperature and humidity). Apply a second full coat, ensuring uniform thickness and no skips. Two-coat application extends service life dramatically.
The gap between the flue liner and the crown is a critical sealing point. Use a high-temperature silicone sealant (rated for 600°F minimum) to seal this joint after the crown coating has cured. This prevents water from wicking down between the liner and the crown.
🔧 Fix #2: Sealing & Repairing the Flashing
The flashing is the metal strip connecting the chimney masonry to the roof surface. If you see water stains on your ceiling or attic decking near the fireplace, flashing failure is the cause in the overwhelming majority of cases. This is the most common repair in chimney maintenance — and also one of the most misunderstood.
We have a detailed review on the best chimney flashing sealants, but the short version is: use a fabric-reinforced system for anything more than a hairline gap. A properly executed fabric-reinforced flashing seal will outlast standard caulk by a factor of 5 or more.
Understanding the Two-Part Flashing System
Most homeowners do not realize that a chimney flashing system consists of two distinct components that work together. Confusing them leads to incomplete repairs that fail quickly:
- Base (Step) Flashing: Individual L-shaped metal pieces that alternate with the roof shingles, running up the sides of the chimney. Each piece overlaps the one below. This is the primary water-shedding element and is integrated directly into the shingle course during roof installation.
- Counter (Cap) Flashing: Strips of metal that are embedded into the mortar joints of the chimney masonry and lap down over the top of the step flashing. The counter flashing is the weather seal. When counter flashing pulls out of the mortar joint or gaps open, water runs between the two layers and into the roof deck.
Repair Approach A: Caulk & Fabric Seal (Minor Gaps)
For counter flashing that is still embedded in the mortar but has developed small gaps at the masonry interface, a fabric-reinforced sealant repair is the correct approach.
- Step 1: Clean the metal flashing and adjacent masonry with a wire brush. Remove all rust, old caulk, and debris.
- Step 2: Apply a base coat of fabric-reinforced flashing sealant (such as Henry’s FlashSeal or Karnak 229) generously along the flashing-to-masonry joint.
- Step 3: While wet, embed a strip of reinforcing polyester fabric into the sealant, pressing it firmly with a brush.
- Step 4: Apply a full top coat over the fabric, encapsulating it completely. Feather the edges to shed water away from the joint. This system lasts 7–10 years.
Repair Approach B: Re-Pointing the Counter Flashing (Pulled-Out Flashing)
If the counter flashing has pulled completely out of the mortar joint or the mortar joint itself has deteriorated, the flashing must be re-anchored before any sealant is applied. Follow this process:
- Use a cold chisel or oscillating tool to rake out the old mortar in the reglet (the saw-cut or raked joint in the masonry where the flashing is embedded) to a depth of at least 1 inch.
- Clean out all debris with compressed air or a brush.
- Re-fold the top of the counter flashing if it has deformed, ensuring the flange is straight and will sit flush in the joint.
- Insert the flashing flange into the raked joint and pack the joint with a Type S masonry mortar or a purpose-made flashing cement. Tool smooth and slightly slope the mortar surface to shed water outward.
- After the mortar cures (minimum 48 hours), apply a bead of high-temperature silicone at the top edge of the flashing-to-mortar interface as a secondary seal.
When Is Full Flashing Replacement Required?
Sealant repairs are maintenance solutions for serviceable flashing. In the following situations, full flashing replacement is the only correct approach:
- The step flashing has corroded through (visible holes or perforations)
- The step flashing is not properly woven with the shingle courses
- A galvanized flashing system is heavily rusted — replacement with aluminum or lead flashing is warranted
- The roof is being replaced — always install new flashing with a new roof
- The chimney has been rebuilt or repointed and the original flashing is too damaged to reuse
💧 Fix #3: Waterproofing Porous Bricks
Bricks are porous, like sponges. In heavy rain, the face of a chimney can absorb a significant volume of water. When that water freezes inside the brick, it expands and physically pops the face of the brick off — a process called spalling. Over several seasons, this progressively destroys the brick, and eventually the mortar joints and structural integrity of the entire chimney.
You must use a breathable water repellent. Never use standard silicone or Thompson’s Water Seal on a chimney; these products are film-formers that seal the surface and trap moisture vapor inside the masonry. As moisture vapor pressure builds behind the film, it causes far worse spalling than the original water absorption. Read our full guide on how to waterproof a chimney correctly for the full science.
What “Breathable” Actually Means
A breathable (vapor-permeable) masonry water repellent penetrates into the pores of the brick or mortar and coats the individual mineral particles without bridging the pore openings. Liquid water cannot enter because the treated surfaces have very low surface energy — the water beads and runs off. But water vapor (smaller molecules in gaseous form) can still pass through the treated pores. This is critical because masonry naturally releases moisture vapor from the inside out; if this vapor cannot escape, it condenses under the treatment and causes delamination and spalling.

ChimneySaver Water Repellent
Siloxane-based penetrating formula that repels liquid water while allowing vapor to escape. The industry standard product used by CSIA-certified professionals. Rated to reduce water absorption by up to 99.9%.
Buy on AmazonHow to Apply Masonry Water Repellent
Complete all tuckpointing and crack repairs before applying waterproofer. The sealant cannot bridge structural gaps — it is a water repellent, not a caulk. Apply to sound, dry masonry only.
Apply a masonry cleaner or diluted muriatic acid solution (follow product instructions carefully, wear full PPE) to remove dirt, efflorescence, and biological growth. Rinse thoroughly and allow to dry completely — typically 24–48 hours of dry weather.
Starting from the bottom and working up (to prevent runs on dry masonry), apply the water repellent generously. Work section by section, keeping a wet edge. Ensure full saturation — the masonry should be visibly wet with the product.
The second coat must be applied before the first coat dries — typically within 5 minutes on hot days, up to 20 minutes in cool conditions. This wet-on-wet technique ensures deep penetration and eliminates any runs or skips from the first application.
Masonry water repellent will stain roofing shingles, painted wood, and glass. Mask or cover all adjacent surfaces before application, and rinse any overspray immediately with water.
🧢 Fix #4: Replacing a Missing or Damaged Cap
If water is dripping directly onto your damper, logs, or gas insert, your chimney cap is missing or damaged. A chimney cap is the single most cost-effective moisture control measure available — it costs $30–$300 depending on size and material, takes 20 minutes to install, and prevents not just water but animals, debris, and downdraft embers.
Related: How to get a raccoon out of your chimney (often the direct result of having no cap). Ensure you buy stainless steel. Galvanized caps rust through within a few years, especially in humid climates. Check our list of the best chimney caps for rain to match your flue size.
Choosing the Right Cap
| Cap Type | Best Application | Material | Approximate Life |
|---|---|---|---|
| Single-flue cap | One liner; most common residential use | 304 or 316 stainless | 20+ years |
| Multi-flue cap | Covers the entire chimney top; multiple liners | Copper or stainless | 25–50+ years |
| Top-mount damper cap | Replaces both damper and cap; best draft seal | Cast aluminum / stainless | 15–20 years |
| Wind-directional cap | Areas with persistent downdraft problems | Galvanized or stainless | 10–15 years |
Top-Mount Damper: The Upgrade Worth Considering
If your throat damper (the metal plate just above the firebox) is rusted, warped, or no longer sealing properly, consider replacing it with a top-mount damper cap. This device mounts at the top of the chimney and replaces both the cap and the throat damper. It provides a superior energy seal when the fireplace is not in use (a silicone-gasket seal versus the leaky cast-iron plate of a throat damper), protects the full flue opening from rain, and eliminates the primary cause of birds and animals entering the chimney. The energy savings from a well-sealing top-mount damper often pay for the cost of installation within a single heating season.
🧱 Fix #5: Tuckpointing Deteriorated Mortar Joints
Mortar joints are the soft material between the bricks. Unlike the brick itself, mortar is designed to be the sacrificial element of masonry — it is slightly softer than the brick so that as the structure moves and weathers, the mortar cracks and erodes rather than the brick. This is intentional: mortar is repairable; brick is not (once spalled, it must be replaced). But when mortar joints erode sufficiently, they become a direct water infiltration pathway — and the freeze-thaw cycle then begins attacking the brick itself.
How Bad Is Too Bad? Assessing Mortar Erosion
- Surface weathering (0–1/4 inch erosion): The mortar surface is rough or slightly pitted but structurally intact. Monitor and treat with waterproofer; no immediate repair needed.
- Moderate erosion (1/4 to 1/2 inch recession): Water is entering the joint. Tuckpointing required within one season to prevent brick damage.
- Deep erosion or missing mortar (greater than 1/2 inch): Urgent tuckpointing required. The joint may be providing virtually no structural support or weather seal.
- Hollow or crumbly mortar: Tap joints with a screwdriver handle. A hollow sound indicates the mortar has delaminated from the brick face. This requires complete removal and replacement.
How to Tuckpoint Chimney Joints
Use a cold chisel and hammer, or an oscillating multi-tool with a carbide blade, to rake out deteriorated mortar to a minimum depth of 3/4 inch. Deeper is better — fresh mortar bonds poorly to a thin key. Do not use an angle grinder along the face of the brick; it invariably damages the brick arris (edge).
Blow out all dust and debris with compressed air or a stiff brush. Dampen the joint with water — but do not saturate. The damp joint prevents the brick from drawing too much moisture out of the fresh mortar, which reduces bond strength.
This is the most critical and most frequently ignored step. For chimneys, use Type S mortar — never Type N or Type M. Type S provides the right combination of strength, flexibility, and freeze-thaw resistance. Using the wrong type creates an incompatibility between old and new mortar that causes premature failure. Also match the mortar color using pigmented additives to maintain aesthetics.
Using a pointing trowel, pack fresh mortar firmly into the raked joint in small increments, pressing to eliminate voids. Fill the joint to be slightly proud of the brick face, then tool it to the desired profile (usually a slightly concave “rodded” joint or a “weathered” joint that sheds water outward) using a jointing iron. The joint profile is not just aesthetic — a proper outward-sloping profile sheds more water than a flat or “bucket handle” profile.
Mist the freshly pointed joints with water twice a day for 3 days to slow the curing process. Rapid drying causes shrinkage cracks. In hot weather or direct sun, hang a damp burlap cover over the work area. Do not allow the fresh mortar to freeze within 7 days of application.
🧱 Fix #6: Repairing Spalling and Damaged Brick
Spalling is the physical breaking away of the face of a brick — from a small chip to the loss of the entire face in sheets. It is caused by water infiltrating the porous brick, freezing, and expanding. Once a brick has spalled significantly, it is compromised: the protective hard outer face is gone, exposing the softer inner material to direct weathering. Spalling bricks must be replaced.
Replacing Individual Spalled Bricks
- Using a cold chisel and hammer, carefully remove the damaged brick by chipping away the surrounding mortar joints on all four sides. Work patiently — aggressive hammering can crack adjacent bricks.
- Clean out the opening thoroughly, removing all old mortar from the cavity walls.
- Source a replacement brick that matches the original in size, texture, and color as closely as possible. Check architectural salvage yards for historic brick matches.
- Dampen the cavity walls and the replacement brick.
- Apply a 3/4-inch bed of Type S mortar to the bottom of the cavity and to the top and sides of the new brick.
- Slide the new brick into the opening and tap gently to bed it flush with the surrounding course. Check for level and plumb.
- Point all four joints with fresh mortar, tool to match the existing joint profile, and cure as described in the tuckpointing section above.
Brick Veneer vs. Structural Masonry
Most residential chimneys are structural masonry — multiple wythes (layers) of brick bonded together. If spalling has penetrated more than one layer, or if you find hollow areas, exposed steel reinforcement, or large sections of missing brick, this is beyond DIY territory. Extensive brick replacement on a structural chimney requires a qualified masonry contractor and in many cases a structural engineer’s assessment.
🔩 Fix #7: Fixing the Damper and Throat Seal
The throat damper is the cast-iron or steel plate that sits just above the firebox opening. Its job is to seal off the flue when the fireplace is not in use, preventing heat loss and cold-air infiltration. A damaged, warped, or rusted damper that cannot close fully is both an energy problem and a secondary water infiltration pathway — though its contribution to actual water leaks is minor compared to crown, flashing, and cap issues.
Diagnosing Damper Problems
- Warped plate: The damper closes but does not seal flat. You can feel cold air around the edges when it is “closed.” Solution: replace with a new throat damper or upgrade to a top-mount damper.
- Rust and pitting: Light rust is cosmetic. Heavy rust that has eaten through the plate or the frame is a structural failure. Replace the damper.
- Stuck or frozen damper: Accumulated creosote, rust, or debris prevents the mechanism from operating. Clean thoroughly with a wire brush. If the mechanism is broken, replacement is necessary.
- Cracked damper frame: The cast-iron frame has cracked from thermal cycling. Typically requires professional repair or top-mount damper upgrade.
The Top-Mount Damper Advantage
Rather than replacing a failed throat damper with another throat damper, the smarter upgrade is a top-mount damper that also serves as the chimney cap. These devices use a silicone rubber gasket that compresses to create a near-airtight seal when the cable handle inside the firebox is pulled closed. They reduce chimney-related heat loss dramatically compared to even a perfect throat damper and completely eliminate water entry through the open flue top.
💨 Fix #8: Addressing Condensation and Interior Flue Moisture
Not all chimney moisture is rain water. In many cases — particularly with gas appliances and high-efficiency heating systems — the “leak” is actually condensation forming inside the flue. This is a fundamentally different problem with a different solution, and misdiagnosing it leads to expensive and ineffective repairs.
How to Tell Condensation from a Rain Leak
☁️ Condensation Signs
- Moisture appears after running the appliance, not during rain
- Rust staining on the damper and smoke shelf
- Acidic smell (not musty/earthy)
- White crystalline deposits on flue tiles
- Problem worsens in winter cold snaps
- Connected appliance is high-efficiency gas or oil
🌧️ Rain Leak Signs
- Moisture appears during or shortly after rain events
- Water pools on smoke shelf or firebox floor
- Musty or earthy smell
- Staining on firebox walls corresponds to exterior entry points
- Problem is seasonal, related to storm events
- Open fireplace or wood-burning appliance
Solving Condensation Problems
Condensation in a chimney flue occurs when warm, moist combustion gases contact a cold flue surface and the temperature drops below the dew point. The solutions are: insulate the liner (keep flue gases hot enough to exit before condensing), resize the liner (an oversized liner has low gas velocity and long residence time — both increase condensation risk), or switch to a direct-vent appliance that does not use the masonry chimney at all.
For gas appliances specifically, the condensate is acidic (pH 3–4) and highly corrosive to standard stainless steel liner alloys. If you have a high-efficiency gas furnace or boiler connected to a stainless liner, verify the liner is rated for Category IV (positive pressure, condensing) service. If it is not, liner failure may be imminent regardless of the moisture source.
🔨 Fix #9: Full Step Flashing Replacement
When a patch repair is no longer sufficient — or when re-roofing is being done — a complete step flashing and counter flashing replacement is the definitive solution for chimney-to-roof water infiltration. This is a moderately complex project that involves roofing and masonry skills and ideally requires at least two people.
Materials Required for Full Flashing
- Step flashing: Pre-bent aluminum or lead-coated copper L-flashing, typically 4×4-inch pieces. One piece per shingle course on each side of the chimney.
- Counter flashing: Continuous strip of lead, aluminum, or copper that is embedded in the mortar joint and laps over the step flashing. Width should be sufficient to lap at least 3 inches over the step flashing top.
- Saddle (cricket): A peaked metal structure built behind (upslope of) wide chimneys to divert water around the chimney. Required by most building codes when the chimney width exceeds 30 inches.
🏚 Repairing Interior Water Damage from Chimney Leaks
Fixing the chimney leak is only half the job. The water that entered before you made the repair may have caused significant damage to interior materials — drywall, framing, insulation, and paint. Leaving this damage in place without remediation creates a persistent mold risk even after the exterior leak is resolved.
Assessing the Scope of Interior Damage
- Drywall: Probe with a screwdriver — soft or crumbly drywall is saturated and must be removed. Stained but firm drywall can sometimes be treated with a mold-inhibiting primer and repainted after drying.
- Framing lumber: Surface mold on framing can be treated with a biocide and allowed to dry. Structural framing with deep mold penetration or signs of rot requires replacement.
- Insulation: Fiberglass batts that have been wet must be removed and replaced — they do not recover their R-value after drying and are a mold substrate. Rigid foam insulation can typically be dried and reused.
- Plaster: Saturated plaster should be sounded (tap with a knuckle) — a hollow sound indicates delamination from the lath. Delaminated plaster must be replaced. Firm, stained plaster can be treated with a shellac-based primer after drying to seal the stain.
Drying and Mold Remediation Protocol
Before rebuilding any interior surfaces, the structural elements must be fully dry. Use a combination of dehumidifiers and fans for 3–7 days after removing wet materials. Monitor moisture content with a pin-type moisture meter — wood should be below 16% before enclosing. Apply a biocide-containing primer to all surfaces before installing new drywall or insulation. Use mold-resistant drywall (paperless or fiberglass-faced) for the repair area.
🛡 Long-Term Leak Prevention Strategy
The most cost-effective approach to chimney leaks is systematic prevention. A well-maintained chimney costs far less over time than a cycle of emergency repairs. The following strategy, applied consistently, will dramatically extend the service life of every component in your chimney system.
The Prevention Priority Hierarchy
- Annual inspection: Catch problems early, when they are inexpensive. A Level 1 inspection costs $75–$150 and can identify a $30 crown sealant job before it becomes a $2,000 crown rebuild.
- Crown maintenance: Reapply elastomeric crown coating every 5–7 years. This is the most proactive chimney maintenance step available.
- Waterproof re-treatment: Penetrating siloxane sealants have a service life of 5–10 years depending on exposure. Re-apply when the water-bead test fails (pour water on the brick — if it absorbs rather than beads, re-treatment is due).
- Keep the cap in service: Inspect and clean the chimney cap screen annually. Replace when damaged. Never operate the chimney without a cap.
- Maintain the flashing: Inspect flashing seals annually and re-caulk any gaps before they become full failures. The cost of a tube of flashing sealant is trivial versus the cost of a roof deck replacement.
| Maintenance Task | Frequency | DIY Cost | Consequence of Skipping |
|---|---|---|---|
| Annual inspection | Every year | $0 (self) / $75–$150 (pro) | Problems go undetected until expensive |
| Crown sealant reapplication | Every 5–7 years | $30–$60 | Crown cracking, full rebuild ($800–$2,000) |
| Waterproof re-treatment | Every 5–10 years | $50–$100 | Spalling brick, structural failure |
| Flashing caulk touch-up | Every 2–3 years | $15–$30 | Ceiling and attic water damage |
| Cap inspection / cleaning | Every year | $0 | Animal entry, water in firebox |
| Mortar joint inspection | Every 3–5 years | $0 (visual) | Structural instability, water infiltration |
👷 When to Call a Professional
Most of the repairs in this guide are within reach of a capable DIYer with patience and the right materials. But there are specific situations where professional involvement is not just recommended — it is essential for safety and code compliance.
✔ DIY-Friendly Repairs
- Applying crown elastomeric coating
- Caulking and sealing counter flashing gaps
- Applying masonry water repellent
- Replacing a chimney cap
- Minor tuckpointing on accessible sections
- Cleaning the firebox and smoke shelf
- Installing a top-mount damper
✘ Call a Pro
- Cracked or damaged flue liner (fire safety)
- Structural brick or mortar failure
- Full crown reconstruction
- Full step flashing replacement
- Any work on steep roofs without proper safety equipment
- Chimney rebuilding above the roofline
- Resolving active carbon monoxide issues
When hiring a professional, look for CSIA (Chimney Safety Institute of America) certification. For masonry repairs, ask for a licensed masonry contractor with specific chimney experience. Get at least three quotes and ask for written documentation of the scope of work and the materials to be used.
💰 Full Cost Breakdown
Understanding cost ranges helps you budget accurately and identify when a quote is unreasonable. The following data reflects typical contractor pricing — DIY costs are generally 70–85% lower for materials only.
| Repair | DIY Material Cost | Pro Labor + Material | Notes |
|---|---|---|---|
| Crown coat (elastomeric) | $30–$60 | $150–$400 | Easy DIY; 2 hours of work |
| Flashing caulk re-seal | $20–$50 | $200–$500 | Fabric system recommended |
| Masonry waterproofer (full chimney) | $50–$100 | $200–$500 | Re-apply every 5–10 years |
| Chimney cap replacement | $30–$250 | $100–$400 | Stainless steel recommended |
| Top-mount damper | $80–$200 | $200–$500 | Best energy upgrade available |
| Tuckpointing (minor) | $20–$50 | $300–$800 | Materials cheap; labor intensive |
| Crown rebuild (portland cement) | $50–$100 | $800–$3,000 | Scaffold required; pro recommended |
| Full flashing replacement | $100–$300 | $600–$2,500 | Involves roofing work; permit may be needed |
| Spalled brick replacement (per brick) | $5–$20 | $20–$75 | Match color carefully |
Not Comfortable on the Roof?
Finding and fixing a chimney leak can be dangerous. If you have a steep roof, complex masonry issues, or a cracked flue liner, let our certified partners handle it safely.
*Providing your zip code helps us match you with a local, CSIA-certified expert.
❓ Frequently Asked Questions
This usually indicates “saturation.” Your bricks are soaking up water until they can’t hold anymore, and then it leaks through. Light rain events allow the moisture to evaporate before saturation is reached, while heavy sustained rain pushes the brick past its absorption capacity. This requires a waterproofing treatment rather than a patch. Also check mortar joints — deteriorated joints significantly increase the absorption rate of the masonry system.
Rarely. Most chimney leaks originate on the exterior — at the roof, crown, or flashing. Sealing the inside of the masonry only traps the water in the wall cavity, leading to hidden mold, further masonry damage, and eventual structural failure. Interior treatments such as hydraulic cement are appropriate for stopping active water flow from a confirmed point-source crack while exterior repairs are being arranged, but they are not a permanent solution to any moisture problem.
A simple flashing reseal might cost $200–$400 via a professional. A crown elastomeric coating runs $150–$400 professionally, or as little as $40 in materials for a confident DIYer. If you need extensive tuckpointing, costs can run $500–$2,500+ per chimney face depending on height and scaffold requirements. A full flashing replacement involving roof work typically runs $600–$2,500. Check our guide on best chimney services for pricing estimates by region.
The location of the water intrusion is your primary clue. Flashing leaks typically appear as water stains on the ceiling or roof deck adjacent to the chimney, or in the attic space near the chimney penetration. Crown leaks and missing-cap leaks typically produce water inside the firebox itself — on the smoke shelf, damper, or firebox floor — because the water enters at the top and falls straight down the flue. In difficult cases, a roof inspection after a rain event with a helper in the attic is the most direct diagnostic approach.
Efflorescence is the white, chalky or crystalline deposit that appears on the surface of brick and mortar when water moves through the masonry and carries soluble salts to the surface, where they crystallize as the water evaporates. It is not structurally harmful in itself, but it is a reliable diagnostic indicator that liquid water is moving through your masonry. Treat it as a warning sign: identify and fix the source of water entry, then clean the efflorescence with a dilute muriatic acid solution and apply a breathable waterproofer. Efflorescence will recur indefinitely if the moisture source is not eliminated.
Yes — a fabric-reinforced flashing sealant repair is a very manageable DIY project if the flashing is still structurally sound and embedded in the mortar. Use a product like Henry’s FlashSeal or a comparable fabric-reinforced system rather than standard caulk, which will fail within 2–3 years on a chimney. Clean the flashing thoroughly before application, use the fabric reinforcing layer, and apply two full coats. On a low-slope or accessible section of roof, this is typically a 2–3 hour project.
This depends heavily on the repair type and product quality. An elastomeric crown coating lasts 5–10 years with proper preparation and two-coat application. A fabric-reinforced flashing sealant lasts 7–10 years. A breathable masonry waterproofer lasts 5–10 years. Tuckpointing with proper Type S mortar lasts 20–30 years. A stainless steel chimney cap lasts 20+ years. Full flashing replacement with lead or copper lasts the life of the roof or longer. Galvanized steel is the shortest-lived material in all applications and should be avoided when stainless or lead alternatives are available.
Mold in a home is always a health concern, though the severity varies significantly by mold species and the extent of colonization. Common mold species found in chimney-related water damage include Cladosporium, Penicillium, and Aspergillus, which cause respiratory symptoms in sensitive individuals. Stachybotrys (black mold) is less common but more hazardous and typically indicates long-term, sustained water intrusion. Any visible mold covering more than 10 square feet should be remediated by a certified mold remediation contractor rather than a DIYer. Fix the water source first — without eliminating moisture, mold remediation is only temporary.