The Ultimate Guide: Finding the Best Chimney for Your Kitchen
A clean, smoke-free kitchen isn’t just a luxury—it’s an absolute necessity for a healthy home environment and an enjoyable cooking experience. Every time you sear a steak, fry spices, or boil pasta, you release a cocktail of grease, airborne particulate matter, steam, and even harmful VOCs (Volatile Organic Compounds) into your breathing space. Without proper ventilation, this microscopic grime settles onto your beautiful cabinets, permanently discolors your walls, and degrades the indoor air quality of your entire house.
This is where the right kitchen chimney (also known as a range hood or exhaust hood) steps in. It serves as the mechanical lung of your culinary space, silently whisking away noxious smoke, pungent odors, and microscopic grease before they can spread. However, the market is overwhelmingly saturated. Should you buy a ducted or ductless model? Do you need baffle filters or mesh? What is auto-clean technology, and is it worth the premium?
This comprehensive guide has been meticulously crafted by our home appliance experts to demystify the buying process. We have evaluated dozens of models based on suction power (CFM), motor durability, noise levels, filter efficiency, and real-world user feedback to bring you the definitive list of the best kitchen chimneys available today. Whether you are outfitting a compact apartment or a professional-grade chef’s kitchen, we have the perfect solution for you.
Our Top 3 Kitchen Chimney Picks
After rigorous testing and market analysis, we have narrowed down the saturated market to these three exceptional models. Each serves a distinct purpose, ensuring there is a perfect fit for your specific cooking habits and kitchen layout.

1. Cosmo COS-63175S Wall Mount Range Hood
The Cosmo COS-63175S reigns supreme as our “Best Overall” pick because it hits the sweet spot between high-end performance, striking European aesthetic design, and an incredibly reasonable price tag. Built with premium 430-grade, 20-gauge brushed stainless steel, this 30-inch wall-mounted chimney is designed to withstand the harsh realities of daily cooking without showing wear.
What truly sets the Cosmo apart is its highly efficient airflow system. At 380 CFM, it easily handles standard four-burner gas and electric stoves. It utilizes heavy-duty permanent baffle filters—the same style found in commercial restaurant kitchens. These filters are masterfully engineered to force grease-laden air to rapidly change direction, causing the heavy grease droplets to condense onto the steel blades while clean air flows through. Best of all? They are 100% dishwasher safe, eliminating the need for tedious manual scrubbing.
- Suction Power: 380 CFM (Ideal for 30″ ranges)
- Noise Level: Max 65 dB (Quiet operation)
- Filter Type: Arc-Flow® Permanent Baffle Filters
- Lighting: 2-Watt Energy Efficient LEDs
- Convertible: Can be converted to ductless (carbon filter kit sold separately)
Pros
- Exceptional build quality and brushed finish
- Baffle filters trap grease efficiently and never need replacing
- Push-button controls are tactile and highly durable
- Bright, energy-efficient LED lighting illuminates the cooktop perfectly
Cons
- The protective film applied for shipping can be tedious to peel off
- The chimney flue cover may not reach ceilings taller than 9 feet without an extension kit
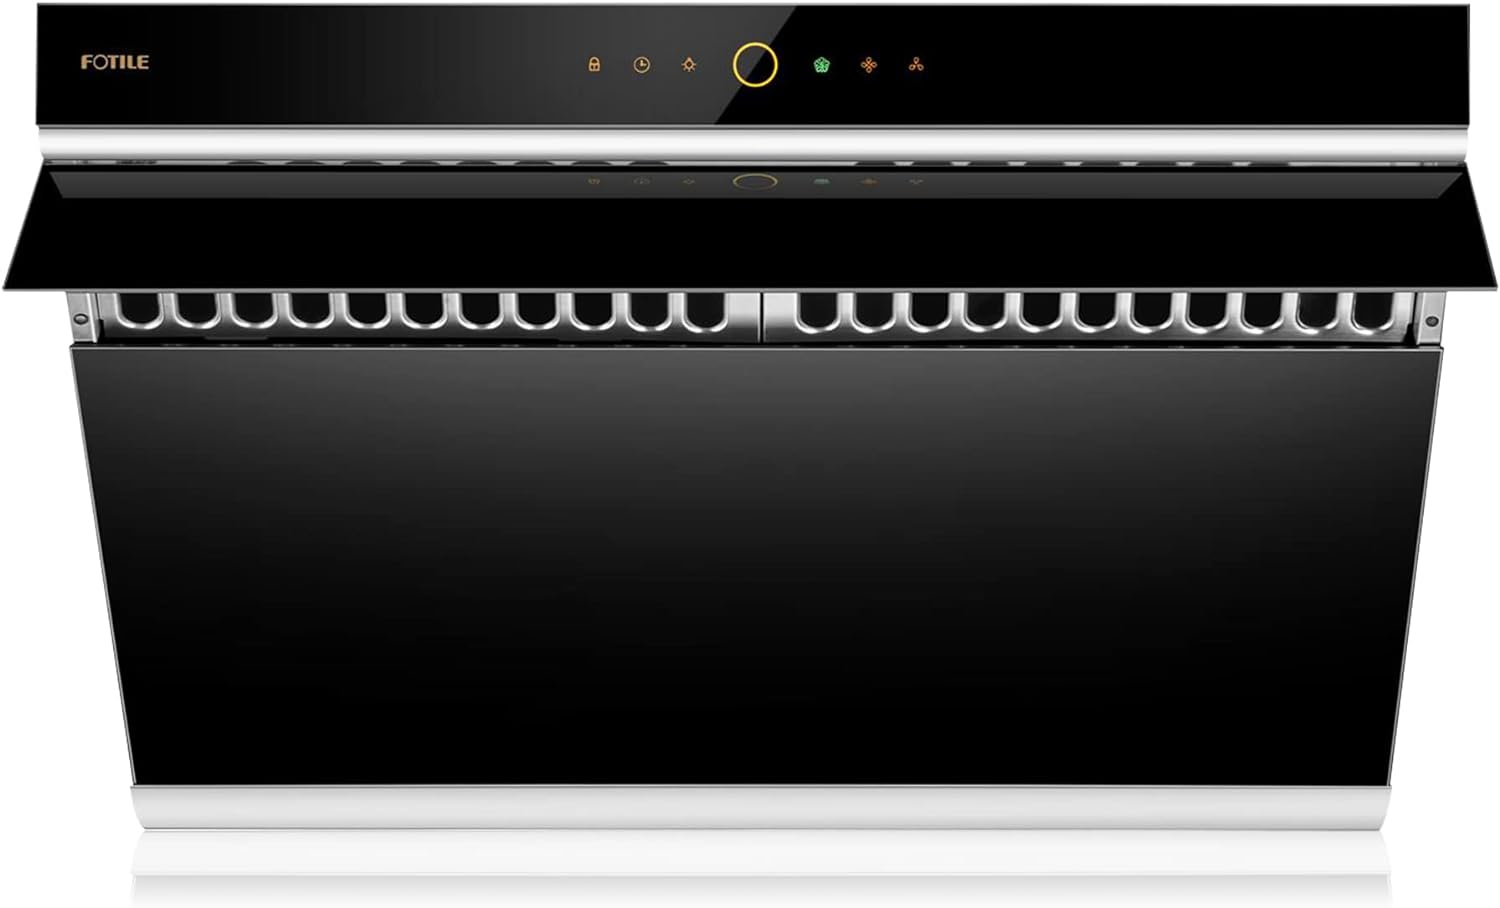
2. FOTILE JQG7505 Under-Cabinet Range Hood
If your culinary style involves heavy stir-frying, deep-frying, blackening spices, or cooking heavily aromatic dishes, standard chimneys will simply choke. You need industrial-grade extraction power, and the FOTILE JQG7505 is the undisputed king of the hill. This isn’t just a chimney; it’s a meticulously engineered smoke extraction system.
The FOTILE utilizes a unique 90-degree automatic open baffle plate. Instead of sitting flat above the stove, the dual-DC motors draw smoke from a side-slant angle. This closer proximity to the pans prevents smoke from spreading horizontally across your kitchen. Generating a massive 850 CFM, it creates a “smoke safe zone” that captures fumes before they even reach your face. Furthermore, despite its hurricane-like suction, the dual-centrifuge motor is shockingly quiet, maxing out at just 54 dB on normal settings. It also features futuristic motion-activated controls—just wave your hand in front of the unit to power it on when your hands are covered in dough or oil.
- Suction Power: 850 CFM (Dual DC Motors)
- Noise Level: Max 54 dB (Whisper-quiet for its class)
- Filter Type: Filter-less design with an oversized grease collection tray
- Features: Infrared Motion Activation, Touchscreen Lock
- Design: 30-inch Side-Draft / Slant Design
Pros
- Unrivaled suction power; literally catches smoke before it spreads
- Motion gesture controls are incredibly convenient and keep the glass clean
- Slanted design prevents you from bumping your head while cooking
- Oversized oil cup reduces maintenance frequency
Cons
- Premium price point (an investment piece)
- Requires precise installation; professional help is recommended due to its weight

3. Broan-NuTone 413004 Non-Ducted Under-Cabinet Hood
Not every kitchen has the architectural capability to vent air through the roof or out a side wall. For apartment renters, condo owners, or anyone with a kitchen located on an interior wall, running ductwork is either impossible or prohibitively expensive. Enter the Broan-NuTone 413004—the absolute best ductless (recirculating) value on the market today.
Broan-NuTone is a legendary name in home ventilation, and this 30-inch under-cabinet unit provides reliable, no-frills performance. Since it doesn’t vent outside, it utilizes a highly effective charcoal filter system. The internal fan pulls the greasy, smoky air upward, passes it through a combination aluminum mesh and carbon filter matrix (which chemically neutralizes odors and traps grease), and recirculates the freshly scrubbed air back into the kitchen. While it won’t remove heat or moisture like a ducted unit, it is incredibly effective at eliminating lingering cooking smells and preventing grease buildup on your cabinetry.
- Installation Type: Ductless / Non-Vented (Recirculating)
- Lighting: Incandescent (Bulb not included, fits up to 75W)
- Filter Type: Replaceable Charcoal/Aluminum Mesh Combo
- Size: 30-inch (Fits standard cabinet widths)
- Switch: 2-Speed Rocker Switch
Pros
- Extremely budget-friendly price point
- Incredibly easy DIY installation; simply mount to the cabinet and plug it in
- Slim profile doesn’t eat up valuable head space over the stove
- Durable stainless steel finish matches modern appliances
Cons
- Does not remove heat or humidity from the room
- Charcoal filters must be actively replaced every 3-6 months
- Not suitable for heavy frying or indoor grilling
Deep Dive: The Anatomy of Kitchen Chimneys
To truly understand which chimney fits your needs, you must understand the underlying technology. A kitchen hood isn’t just a fan in a metal box; it is a complex intersection of aerodynamics, filtration science, and motor engineering.
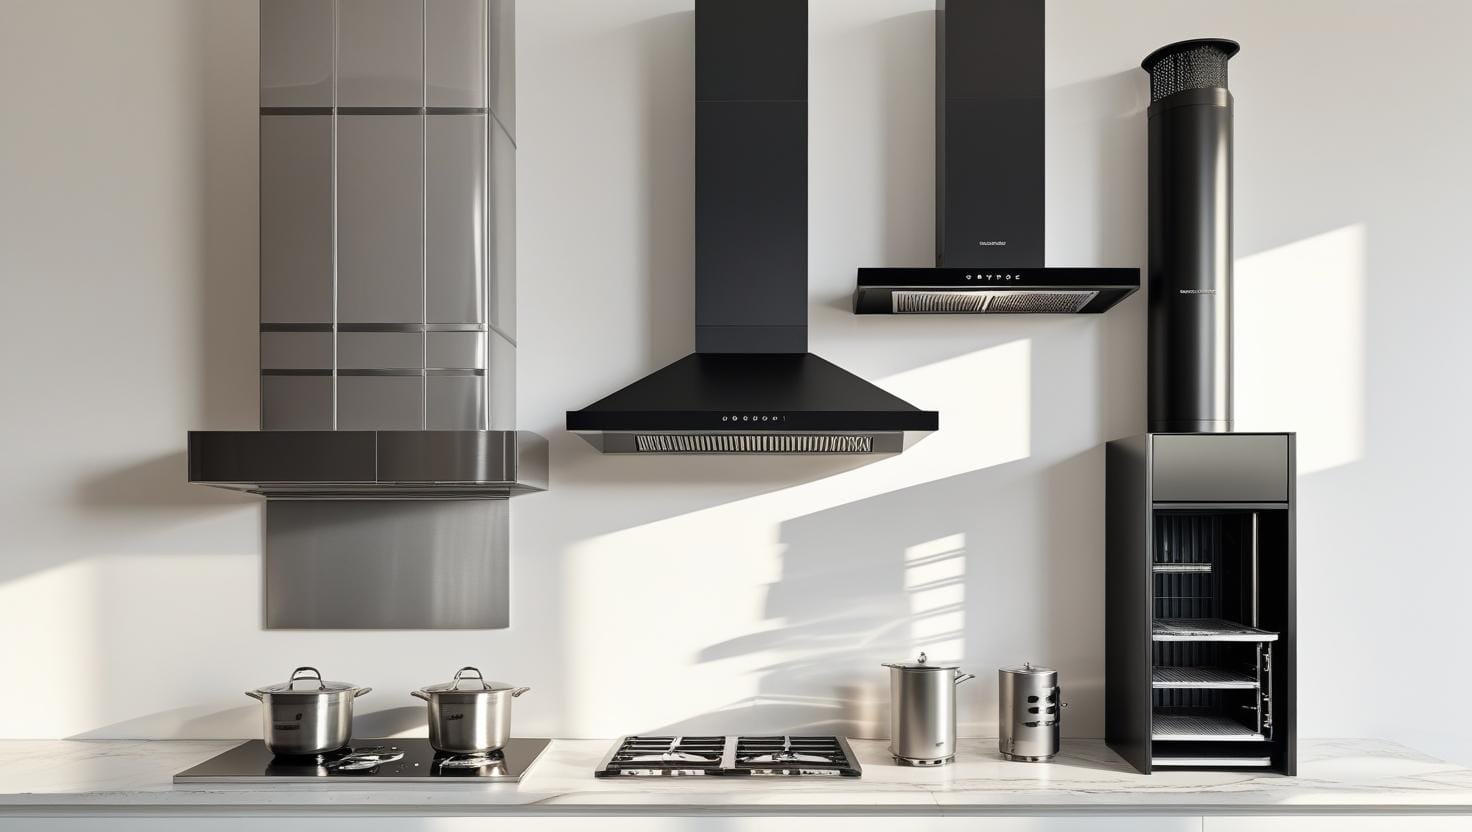
Types of Kitchen Chimneys Explained
Your kitchen’s layout dictates the structural style of the chimney you must purchase. Attempting to force the wrong type of chimney into your kitchen design will result in poor performance and a disastrous aesthetic.
- Wall-Mounted Chimneys: The most prevalent design. If your cooktop sits against a bare wall, this is your go-to. They feature a wide canopy to catch smoke and a tall vertical “flue” that hides the ducting going up to the ceiling. They make a grand, modern statement in the kitchen.
- Under-Cabinet Hoods: Ideal for compact kitchens where storage space is at a premium. These units mount directly to the bottom of the cabinetry positioned above your stove. The ductwork is either routed up through the cabinet (sacrificing some storage) or vented directly out the back wall.
- Island Mount Chimneys: If your stove is located on a central kitchen island, wall mounts are useless. Island chimneys are suspended directly from the ceiling. Because there are no walls to help guide the smoke upward, island chimneys must have significantly higher CFM (suction power) to catch drafts that might blow the smoke sideways.
- Downdraft Extractors: A hidden, minimalist marvel. These are built directly into the countertop behind or beside the stove. When you cook, they pop up mechanically and pull the smoke downward into a vent hidden beneath the floor. They are aesthetically stunning but generally less efficient than overhead hoods because heat naturally rises.
- Insert / Liner Range Hoods: Designed to be installed inside a custom wooden or stone enclosure built by your contractor or cabinet maker. You only see the enclosure; the hood itself is hidden inside. This is the go-to choice for high-end custom kitchen renovations where seamless integration with cabinetry is the priority.
- Ceiling-Mounted (Flush) Hoods: Similar to island mounts but designed to sit completely flush against the ceiling. They are an architectural feature as much as an appliance, creating a sleek, uninterrupted ceiling line. These require professional installation and are most commonly found in high-end open-plan homes.
The Great Debate: Ducted vs. Ductless Chimneys
This is the most critical structural decision you will make. It determines how the polluted air is ultimately handled.
Ducted (Vented) Chimneys: The Gold Standard
A ducted chimney connects to heavy-gauge aluminum or PVC piping that runs through your walls or ceiling, exhausting the air entirely out of your house.
The Advantage: It is 100% effective. It removes smoke, microscopic grease particles, pungent odors, and most importantly, it removes the intense heat and humidity generated by boiling pots and open flames.
The Disadvantage: Installation can be highly invasive and expensive. You have to cut holes in your home’s exterior, and the routing must adhere to strict local building codes.
Ductless (Recirculating) Chimneys: The Problem Solver
If you live in a high-rise apartment or renting a space where modifying the exterior wall is forbidden, ductless is your only option.
The Advantage: Zero exterior venting required. You can install them anywhere. They pull air in, pass it through dense carbon filters to scrub the grease and odors, and blow the cleaned air right back into the kitchen.
The Disadvantage: They are fundamentally incapable of removing heat or moisture. Furthermore, the suction power is slightly reduced because the air faces heavy resistance pushing through the dense charcoal blocks. Maintenance costs are also higher, as carbon filters cannot be washed—they must be thrown away and replaced 2-3 times a year.
The Expert Buying Guide: Technical Specifications Decoded
When you browse for kitchen chimneys, you will be bombarded with technical jargon. Here is how to translate those specifications into real-world performance metrics so you can buy exactly what you need without overpaying.
1. Calculating Your Required Suction Power (CFM)
CFM stands for Cubic Feet per Minute. It measures the raw volume of air the chimney’s motor can displace in 60 seconds. Buying a chimney with too low CFM is like trying to drain a swimming pool with a straw. Buying one with too much CFM will suck the heated or air-conditioned air out of your home, raising your energy bills, and may require a “makeup air” system by law.
| Stove Type | The Professional Formula | Example Calculation |
|---|---|---|
| Electric / Induction Cooktop | Measure the width of your stove in inches. Multiply that number by 10. | A standard 30-inch electric stove requires: 30 x 10 = 300 CFM minimum. |
| Gas Range / Gas Cooktop | Gas produces far more heat. Find the total BTU output of all burners combined. Divide that total by 100. | A gas stove with four burners producing a total of 60,000 BTUs requires: 60,000 / 100 = 600 CFM minimum. |
| Kitchen Size Rule (Alternative) | The chimney should be able to exchange the entire air volume of the kitchen 15 times per hour. Formula: (Room L x W x H) / 4. | A 10ft x 10ft kitchen with 8ft ceilings: (10 x 10 x 8) = 800 cubic feet. 800 / 4 = 200 CFM absolute minimum baseline. |
💡 Expert Tip: Always buy a chimney with a maximum CFM slightly higher than your calculation. It is better to run a powerful chimney quietly on its “Low” setting than to run a weak chimney loudly on its maximum setting.
2. Filter Type: The Battle of Baffle vs. Mesh vs. Carbon
The filter is the frontline soldier of your chimney. If the filter fails, grease reaches the motor, significantly shortening the appliance’s lifespan and creating a massive fire hazard.
- Cassette / Aluminum Mesh Filters: These look like multiple layers of aluminum window screens sandwiched together. As air passes through the microscopic holes, grease gets snagged on the aluminum threads.
Best for: Light cooking.
Drawback: The tiny holes clog incredibly fast with thick grease, suffocating the motor’s suction. They require weekly soaking in hot soapy water and degreaser. - Baffle Filters: This is the modern standard for high-quality hoods. Instead of holes, baffle filters use heavy stainless steel curves (U-shaped panels). The air is forced to rapidly chop and change direction. Because grease is heavier than air, it cannot make the sharp turns; it gets flung against the steel walls and slides down into a collection tray.
Best for: Heavy cooking, Indian cooking, frying.
Drawback: They are heavier, but they rarely clog completely and are 100% dishwasher safe. - Carbon / Charcoal Filters: Used exclusively in ductless models. They look like thick black sponges containing activated charcoal, a highly porous material that chemically binds with odor molecules and grease particles.
Best for: Eliminating smells in ductless setups.
Drawback: They cannot be washed. Once the pores are full, the filter is useless and must be thrown away and replaced.
3. Auto-Clean Technology: Is it a Gimmick?
If you despise cleaning greasy appliances, Auto-Clean chimneys are a revelation. But how do they work? They are not entirely “magic,” but they do utilize clever engineering to drastically reduce your manual labor.
Over time, even with the best baffle filters, some vaporized oil makes its way to the internal turbine/motor housing. In a standard chimney, this oil solidifies, slowing down the motor and creating a foul smell.
Thermal Auto-Clean: When you press the auto-clean button, a dedicated heating element wrapped around the internal motor housing activates for about 10 to 15 minutes. It heats up to a specific temperature that liquefies the stubborn, sticky, solidified grease. Centrifugal force then spins this liquid grease outwards, where it travels down a specialized funnel into a removable oil collector tray located at the bottom of the chimney. All you have to do is empty and wash the small plastic tray once a month. It vastly extends the life of the motor.
4. Sizing the Chimney to the Cooktop
A common mistake is buying a chimney that matches the exact width of the stove. Smoke does not travel straight up; it expands outward in a cone shape as it rises. To capture all the fumes, your chimney should ideally be one size larger than your stove.
- If you have a 30-inch cooktop, buy a 36-inch chimney.
- If you have a 36-inch cooktop, buy a 42-inch chimney.
- If space does not permit a larger size, ensuring you have a highly rated CFM capacity becomes doubly important to compensate for the lack of canopy width.
5. Understanding Noise Levels (Sone vs. dB Ratings)
Kitchen chimneys are rated for noise in two different units: decibels (dB) and sones. Understanding the difference saves you from a nasty, loud surprise after installation.
Decibels are the more commonly used measurement you will encounter in product listings. The sone scale, however, is considered the more intuitive measurement for human hearing, as it is linear—meaning a chimney rated at 2 sones is twice as loud as one rated at 1 sone.
| Noise Level | Approximate dB | Sones | Real-World Equivalent |
|---|---|---|---|
| Very Quiet | Under 45 dB | Under 1 sone | Quiet library or rustling leaves |
| Quiet | 45–55 dB | 1–2 sones | Soft background music or a whispered conversation |
| Moderate | 55–65 dB | 2–4 sones | Normal conversation at home |
| Loud | 65–75 dB | 4–7 sones | Dishwasher running or a busy café |
| Very Loud | Above 75 dB | 7+ sones | Hair dryer or blender |
For an open-plan kitchen that flows into a living or dining room, aim for a chimney that operates at under 55 dB (around 2 sones) on its medium speed setting. Noise at maximum speed is almost always higher and is an expected trade-off for maximum extraction performance.
6. Motor Types: Single Motor vs. Dual Motor
The motor is the heart of your chimney. Choosing the right motor configuration determines how long your appliance lasts and how efficiently it performs under sustained heavy cooking loads.
- Single Motor Chimneys: The standard for most residential units. A single well-engineered motor is perfectly adequate for most home kitchens. Look for models using a centrifugal turbine (squirrel cage) design, which moves more air more quietly than simple axial (propeller-style) fans.
- Dual Motor Chimneys: Found in high-CFM professional-grade units. Two motors working together deliver redundancy (if one motor fails, the other continues to operate), dramatically higher airflow, and in some designs like the FOTILE, allow for the innovative slanted capture design that improves smoke interception closer to the source.
- DC vs. AC Motors: This is a critical distinction that many buyers overlook. Traditional AC (alternating current) motors are cheaper to manufacture but consume significantly more power and operate at fixed speed increments. Modern DC (direct current) motors are the clear superior choice—they are 30–50% more energy-efficient, operate at a whisper across a continuously variable speed range, and have a dramatically longer operational lifespan.
Kitchen Chimney vs. Exhaust Fan: Which is Right for You?
Many homeowners—especially first-time buyers—wrestle with this fundamental question: is a dedicated kitchen chimney actually necessary, or will a simple exhaust fan mounted in the wall or ceiling suffice? The answer depends entirely on how you cook. Let us break down the real differences so you can make an informed decision.
🏠 Exhaust Fan
- Draws air from the entire room
- Mounted on wall or ceiling
- Very affordable (under $50)
- No filter; vents everything directly
- Low suction power (50–150 CFM)
- Does not target cooking fumes at source
- Grease accumulates on walls/ceiling
- Good for: light cooking, steam
🍳 Kitchen Chimney
- Positioned directly over the cooktop
- Captures smoke at the source
- $150–$1,500+ depending on model
- Built-in filtration system
- High suction power (200–900+ CFM)
- LED task lighting included
- Protects cabinets from grease
- Good for: all cooking intensities
The verdict is clear: if you regularly cook meals beyond simple boiling or reheating, a kitchen chimney is the superior investment. Exhaust fans are reactive—they pull contaminated air from the room after it has already spread. A chimney, positioned directly above the heat source, intercepts smoke, grease, and odors before they can migrate to your cabinets, curtains, or lungs.
The financial math also eventually favors a chimney. A modest exhaust fan might cost $30–$80 upfront, but without grease filtration, your kitchen cabinets, walls, and ceiling will absorb cooking residue. Repainting kitchen cabinetry costs hundreds to thousands of dollars. A good chimney pays for itself by protecting your kitchen’s surfaces over a period of years.
⚠️ Important Note for Heavy Cooks: If you regularly cook with high-heat methods—deep frying, blackening, stir-frying at high BTU—an exhaust fan is completely inadequate. The aerosol grease particles produced by these methods will coat every surface in your kitchen if not captured at the source by a properly sized chimney.
Top Kitchen Chimney Brands: Head-to-Head Comparison
The market is dominated by several key players, each with their own philosophy, strengths, and target audience. Understanding the brand landscape helps you narrow your search before you even look at individual models.
| Brand | Origin | Price Tier | Best Known For | Ideal Buyer |
|---|---|---|---|---|
| Cosmo | USA / European Design | Mid-Range | Excellent value, European aesthetics, baffle filters | Homeowners wanting premium looks at an accessible price |
| FOTILE | China (Premium Segment) | Premium | Highest suction power, innovative slant design, smart controls | Serious home cooks and professional-grade kitchens |
| Broan-NuTone | USA | Budget to Mid | Reliability, massive parts availability, ductless options | Renters, budget-conscious buyers, first-time homeowners |
| Zephyr | USA | Premium | Award-winning design, ultra-quiet operation, smart home integration | Design-forward homeowners and luxury renovations |
| Hauslane | USA | Mid-Range | Feature-rich at mid-price, touch controls, delay auto-off | Value seekers who want smart features without a premium price |
| Proline Range Hoods | USA | Mid to Premium | Extremely heavy-gauge stainless, commercial-grade construction | High-BTU gas ranges, commercial-style cooking at home |
| KOBE Range Hoods | USA | Premium | Ultra-silent operation (as low as 1 sone), lifetime motor warranty | Open-plan living spaces where noise is unacceptable |
Brand Reliability and Warranty Comparison
When making an investment in a kitchen appliance that you expect to last 10–15 years, warranty terms are not a footnote—they are a core purchasing criterion. Here is what the leading brands offer:
- Cosmo: 3-year limited warranty on parts and motor; excellent US-based customer service with responsive online support.
- FOTILE: Comprehensive 3-year warranty with a dedicated US support infrastructure; replacement parts are readily available domestically.
- Broan-NuTone: 1-3 years depending on the model; however, replacement parts are the most widely available in hardware stores of any brand—a critical advantage for long-term ownership.
- KOBE: Lifetime warranty on the motor, which is an extraordinary industry-leading commitment that reflects confidence in their manufacturing.
- Zephyr: 2-year warranty standard, with extended warranty options available at purchase.
Choosing Your Kitchen Chimney Based on Your Cooking Style
One of the most commonly overlooked factors in buying a chimney is matching the appliance’s capabilities to your personal cooking style. A gentle home baker has entirely different ventilation needs from someone who regularly deep-fries or cooks fragrant South Asian curries. This section provides a targeted recommendation framework.
For Light Everyday Cooks
If your typical cooking session involves scrambled eggs, pasta, reheating leftovers, or light sautéing with minimal oil, you cook at what professionals call a “light load.” The smoke and odor generation is manageable.
Recommendation: A ductless under-cabinet hood like the Broan-NuTone 413004 is perfectly adequate. Look for 200–300 CFM, a reliable charcoal filter system, and easy-clean surfaces. Budget: $100–$250.
For Standard Home Cooks
You cook dinner most nights, use a mix of methods (roasting, pan-frying, stir-frying occasionally), and want a chimney that handles everything without drama. This is the most common buyer profile.
Recommendation: A ducted wall-mount chimney with baffle filters and 350–500 CFM, like the Cosmo COS-63175S, is your ideal solution. It is powerful enough for intense sessions but quiet enough on low for everyday use. Budget: $250–$600.
For Enthusiast and Heavy Cooks
You own a high-BTU gas range, regularly deep-fry, cook spice-heavy aromatic dishes, make large holiday meals, or practice high-heat wok cooking. Your kitchen gets hot, smoky, and fragrant fast. A standard chimney will visibly struggle to keep up.
Recommendation: You need a minimum of 600 CFM, ideally 800–1,000 CFM with dual motors. The FOTILE JQG7505 was built for you. Ensure you also have adequate duct sizing (minimum 8-inch diameter round duct). Budget: $600–$1,500.
For Open-Plan Kitchen and Living Spaces
Your kitchen is part of a larger open-plan living area. Noise travels freely, and cooking odors can permeate your furniture and soft furnishings in minutes. Here, silence is as important as suction power.
Recommendation: Prioritize chimneys with DC motors rated under 2 sones at high speed. Look at KOBE Range Hoods or Zephyr’s lineup. Consider a remote blower setup, where the motor is installed in the attic or exterior wall, keeping all mechanical noise out of the living space entirely. Budget: $800–$2,000+.
For Indian and Asian Cooking Styles
South Asian and East Asian cooking traditions—involving high-heat tadkas (tempering spices in hot oil), pressure cooking, deep-frying batches of samosas, or sustained high-BTU wok cooking—generate the heaviest smoke and oil vapor loads of any domestic cooking style. Standard chimneys are routinely overwhelmed.
- You need a minimum 700–900 CFM rating
- Baffle filters are mandatory (mesh filters will clog within weeks)
- Auto-clean is worth every penny at this cooking intensity
- Consider an oversized 36-inch chimney even over a 30-inch range
- Ducted installation is strongly preferred over ductless for these load levels
- A removable, large-capacity oil collection cup dramatically reduces maintenance hassle
Smart Kitchen Chimney Features: What’s Actually Worth Paying For
The technology integrated into modern kitchen chimneys has advanced dramatically. Features that were considered exotic premium additions just a few years ago are now commonplace even in mid-range models. But which smart features deliver genuine value, and which are marketing fluff?
Touch Controls and Gesture Activation
Traditional push-buttons and rotary dials are robust and reliable, but they accumulate grease fingerprints rapidly in a busy kitchen. Touch-sensitive panels solve the fingerprint problem but can occasionally misfire when exposed to steam or when touched with wet hands. Some premium models solve this entirely with infrared gesture controls (like the FOTILE JQG7505)—a simple hand wave activates the unit without any physical contact. This is genuinely useful when your hands are coated in dough, raw meat, or oil.
Delay Auto-Off (Delayed Shut-Off)
This feature is a genuine quality-of-life improvement and is present in many mid-range models. When you switch off your burner, residual heat continues radiating upward for several minutes. Smoke, steam, and VOCs continue rising even after cooking stops. The delay auto-off feature keeps the chimney running at low speed for a user-defined period (usually 5–15 minutes) after you switch it off, ensuring your kitchen is fully cleared before the unit stops. This is not a gimmick—it is a smart automation that meaningfully improves air quality.
Auto Speed Sensing (Automatic Mode)
High-end chimneys now include thermal or optical sensors that detect heat and smoke levels rising from the cooktop and automatically adjust the fan speed accordingly. When you put a pan on the stove and things start heating up, the chimney intelligently ramps up to full power. When you reduce the flame or remove the pan, it scales back down to quiet idle. This is both energy-efficient and remarkably convenient for cooks who are juggling multiple burners simultaneously.
Wi-Fi Connectivity and App Control
A growing number of premium chimneys now connect to your home Wi-Fi network and are controllable via a dedicated smartphone app. This allows you to monitor filter saturation levels, receive maintenance alerts, adjust fan speeds remotely, and in some cases, integrate with smart home ecosystems like Amazon Alexa or Google Home. Voice commands like “Alexa, turn the range hood to high” are a genuine convenience—but this feature is best reserved for buyers who are already deeply embedded in a smart home ecosystem. For the average buyer, it adds cost without proportional benefit.
LED Task Lighting Quality
The lighting included in a chimney is a functional feature many buyers ignore until they miss it. High-quality chimney-mounted LEDs dramatically improve visibility over the cooktop—you can actually see whether a sauce is burning or whether meat has browned correctly. Look for chimneys with a minimum of 3 watts of LED output per bulb, a color temperature of around 3000K–4000K (warm to neutral white), and a CRI (Color Rendering Index) of 80+ to ensure food looks its natural color, not washed out.
Filter Replacement Indicator
This simple indicator light illuminates when the charcoal filter has absorbed its maximum capacity of odors and grease. On ductless models where charcoal filters are the primary defense, this alert is genuinely essential—an expired charcoal filter provides essentially zero protection while still making noise. Running a hood with a spent filter means all that smoke and grease is passing straight back into your kitchen air.
Energy Efficiency: How to Choose a Low-Running-Cost Kitchen Chimney
Over the lifespan of a kitchen chimney—which should be 10 to 15 years with proper maintenance—the cumulative electricity cost adds up to a figure that often exceeds the original purchase price. Choosing an energy-efficient model is not just environmentally responsible; it is financially smart.
Understanding Power Consumption
A chimney’s energy draw is measured in watts (W). The average residential kitchen chimney consumes between 100 and 300 watts on high speed. Running a 250W chimney for 2 hours daily calculates to 500 watt-hours (0.5 kWh) per day, or roughly 182.5 kWh annually. At the average US electricity rate of approximately $0.16 per kWh, that equates to about $29 per year in running costs on high speed alone.
However, a high-efficiency DC motor chimney of equivalent power (say, 850 CFM) might achieve the same airflow at only 150W—a 40% reduction in running costs. Across 15 years of ownership, that difference is measurable and meaningful.
The Energy Efficiency Checklist
- Choose a chimney with a DC motor over an AC motor for 30–50% lower power consumption
- Select models with multiple speed settings—running on low uses a fraction of the energy of high speed
- LED lighting uses up to 80% less energy than incandescent bulbs over the same lumen output
- Auto-speed sensing ensures the chimney only runs at full power when the cooking load demands it
- Delay auto-off eliminates the need to manually switch off, preventing accidental long-idle operation
- For ducted models, keep duct runs as short and straight as possible—bends and long runs force the motor to work harder
- Clean filters regularly; clogged filters force the motor to strain against restricted airflow, wasting energy
Duct Size and Its Hidden Impact on Energy Efficiency
This is one of the most overlooked factors in chimney performance and energy efficiency. Every bend, every foot of duct length, and every reduction in duct diameter increases what engineers call “static pressure”—the resistance the motor must overcome to push air through the system. This resistance increases energy consumption and reduces effective airflow significantly.
| Chimney CFM Rating | Minimum Recommended Duct Diameter | Ideal Duct Diameter |
|---|---|---|
| Under 300 CFM | 4 inches round | 6 inches round |
| 300–600 CFM | 6 inches round | 7–8 inches round |
| 600–900 CFM | 8 inches round | 10 inches round |
| Over 900 CFM | 10 inches round | 12 inches round |
Complete Kitchen Chimney Installation Guide
Installing a kitchen chimney is a task that exists on a spectrum from “weekend DIY project” to “requires a licensed contractor”—depending entirely on the model type and your home’s existing infrastructure. This section walks you through both scenarios comprehensively.
Tools and Materials You Will Need
- Power drill with masonry and wood drill bits
- Stud finder (to locate wall studs for secure mounting)
- Level (a crooked chimney looks terrible and performs worse)
- Tape measure and pencil for marking
- Drywall saw or jigsaw (for cutting duct holes)
- Aluminum duct tape (not regular cloth tape—it degrades from heat)
- Appropriate duct diameter pipe (rigid galvanized steel preferred)
- Exterior wall cap / roof cap with built-in backdraft damper
- Wire nuts and electrical tape (if hardwiring)
- An assistant—range hoods are heavy and awkward to hold in place while mounting
Step-by-Step: Installing a Ducted Wall-Mount Chimney
- Plan Your Duct Route: Before purchasing, determine the most direct path from your stove location to the exterior of the house. The fewer bends, the better. Measure the total run length. Every 90-degree elbow in a duct run is equivalent to adding approximately 10 feet of straight duct in terms of airflow resistance.
- Mark the Wall: Using your stud finder, locate and mark the wall studs above your stove. The chimney’s mounting bracket must be screwed into studs (not just drywall) to safely support the weight of the unit.
- Cut the Duct Opening: Using the template provided by the manufacturer, mark the center of the duct hole on the wall. Drill a pilot hole, then use a drywall saw to cut the opening. If the duct must pass through an exterior wall, you will need to use a hole saw on the interior drywall, the exterior sheathing, and the siding material (wood, brick, stucco, etc.).
- Install the Exterior Wall Cap: From outside, install the weather-proof exhaust cap over the hole. This cap includes a backdraft damper (a flap that opens when the chimney runs but closes when it is off, preventing cold air, insects, and rain from entering your duct system). Seal all edges with weatherproof caulk.
- Run the Duct: Connect sections of rigid galvanized duct from the wall cap to the position above your stove. Secure all joints with aluminum foil duct tape—do not use conventional screws, as they can catch grease particles and reduce airflow.
- Mount the Chimney Bracket: With your assistant’s help, hold the mounting bracket against the wall studs and mark the screw holes. Drill pilot holes and secure the bracket with the provided lag screws. Verify it is perfectly level before fully tightening.
- Connect the Wiring: Kitchen chimneys require a dedicated 120V circuit. If a proper grounded outlet is already present within the chimney’s flue area, simply plug in. If hardwiring is required (common for built-in models), switch off the relevant circuit breaker and connect the wires according to the color-coded instructions. If you are not experienced with electrical work, hire a licensed electrician for this step.
- Hang the Chimney and Attach the Duct: Lift the chimney body onto the bracket and secure it. Connect the chimney’s duct collar to the run of duct piping above, sealing the joint with aluminum foil tape.
- Adjust the Flue Extension: The telescoping stainless flue cover slides up or down to accommodate your ceiling height. Extend it to the ceiling, mark the screw positions, drill pilot holes, and secure it in place.
- Test and Verify: Restore power, switch the chimney to maximum, and hold a piece of tissue near the canopy edge to verify strong, consistent suction. Go outside and verify air is exhausting from the exterior cap. Check all duct joints for air leaks using the tissue test inside.
⚠️ Building Code Alert: Many municipalities require a permit for any work that involves cutting through an exterior wall or modifying your home’s electrical system. Always check with your local building department before beginning a ducted installation. Unpermitted work can complicate home sales and may void your homeowner’s insurance.
Installing a Ductless (Recirculating) Chimney
Ductless installation is dramatically simpler and is within the reach of most confident DIYers.
- Assemble the carbon filter: Before mounting, snap the charcoal filter into the designated slot inside the hood. This is frequently forgotten and discovered only after the unit is mounted.
- Mount the bracket: Follow the same stud-finding and leveling process as a ducted install. The bracket must be in studs.
- Close the duct outlet: Most convertible units come with a blank cover plate that caps the duct collar opening. Install this plate so recirculated air exits through the designated front or top vents instead.
- Plug it in: Ductless units are always plug-in; ensure there is a grounded outlet inside the cabinet above the stove or arrange for one to be installed.
- Test the airflow: Switch on and verify that air is recirculating correctly out of the front vents. Check that the LED lighting functions.
Pro Maintenance Guide: Full Schedule for Peak Performance
Neglecting your filters not only ruins your indoor air quality but puts undue strain on the suction motor, leading to premature failure. A properly maintained chimney will last 15+ years; a neglected one can fail in as little as 5 years. Follow this maintenance schedule religiously.
Monthly Maintenance Tasks
- Wipe the stainless steel exterior surfaces with a damp microfiber cloth and a drop of dish soap. Always wipe in the direction of the steel grain to avoid scratching. Immediately buff dry to prevent water spots.
- Empty and wash the oil collection cup (if your model has one). Rinse with hot soapy water and allow it to dry completely before reattaching.
- For auto-clean models: run the auto-clean cycle by pressing and holding the designated button for the manufacturer-specified duration. The cycle will run for 10–15 minutes and automatically collect liquefied grease.
- Wipe down the interior of the hood canopy with a degreaser spray. Accumulated grease inside the canopy is a fire hazard.
Every 3–6 Weeks: Cleaning Baffle or Mesh Filters
- The Hot Water Soak: Remove the baffle or mesh filters from the hood. Find a container large enough to lay them flat. Fill it with boiling hot water. The extreme heat is vital for loosening the polymerized grease.
- The Magic Solution: Add half a cup of baking soda and a generous squirt of heavy-duty dish soap into the hot water. Swirl it around.
- Submerge and Wait: Submerge the filters completely. Let them soak for a minimum of 30 minutes. You will see the water turn cloudy and brown as the grease separates from the metal.
- The Scrub: For mesh filters, use a soft-bristled brush. Be gentle, as aluminum mesh can bend and tear. For stainless steel baffle filters, you can use a stiffer nylon brush to get inside the curves.
- Rinse and Dry: Rinse thoroughly with hot running water. Crucial Step: Let the filters air dry completely before re-installing them. Turning on the chimney with wet filters can draw moisture directly into the electrical motor components.
Every 3–6 Months: Carbon Filter Replacement (Ductless Models)
Carbon filters are consumable items. Unlike baffle and mesh filters, they cannot be washed or regenerated—the activated charcoal pores become permanently saturated with odor molecules and must be replaced. Most manufacturers recommend replacement every 3 to 6 months depending on cooking frequency. Heavy daily cooks may need to replace every 2 months. Never run a ductless chimney with an expired carbon filter; you are receiving the noise with none of the filtration benefit.
Annual Deep-Clean and Inspection
- Inspect and clean the internal motor housing. Use a degreaser spray and a soft cloth to wipe accessible motor surfaces. Look for heavy grease accumulation around the turbine.
- Check all duct connections for loosening. Vibration from the motor can gradually loosen joints over years of operation.
- Test the exterior wall or roof cap: ensure the backdraft damper opens freely when the chimney is running and closes firmly when it is off. A stuck-open damper lets cold air (and pests) into your duct system.
- Check the LED lights and replace any that have failed.
- Test all speed settings and controls to verify they function correctly.
- Inspect the power cord (if plug-in) for any fraying, cracking, or heat damage near the plug.
Troubleshooting Common Kitchen Chimney Problems
Even well-maintained chimneys can develop issues over time. Before calling a technician or replacing your unit, work through this systematic diagnostic guide. Many of the most common problems have simple DIY solutions.
Problem 1: Chimney is Not Removing Smoke Effectively
This is the most common complaint and has several possible causes, ordered from most to least likely:
- Clogged Filters: Check the filters. If they are visibly dark and heavily coated with grease, cleaning them will immediately restore most of the lost suction.
- Saturated Carbon Filters (ductless): If you have a ductless model and your charcoal filters haven’t been replaced in over 4 months of regular use, replace them immediately.
- Chimney Undersized for Your Stove: If you recently upgraded to a more powerful burner or started cooking differently, your chimney may no longer have sufficient CFM for the heat load.
- Blocked Exterior Vent: Birds sometimes build nests inside exterior vent caps. Check your exterior exhaust outlet and ensure the damper is opening freely when the chimney runs.
- Negative Air Pressure: If your home is tightly sealed and lacks a makeup air system, the chimney may be struggling against negative pressure. Open a nearby window slightly when running the chimney at high speed to allow makeup air to enter.
Problem 2: Chimney is Noisier Than Normal
A sudden increase in operating noise is always a diagnostic signal worth investigating.
- Loose Filters: If a baffle or mesh filter panel has not been re-latched correctly after cleaning, it will vibrate and rattle noisily. Remove and re-seat all filter panels.
- Grease in the Motor Housing: A grinding or whirring noise from the motor area indicates grease buildup on the turbine blades. This creates imbalance, causing vibration. Run the auto-clean cycle, or manually clean the turbine housing.
- Loose Duct Connections: Rattling that seems to come from the wall or ceiling may be a loose duct joint vibrating against the surrounding structure. Inspect and re-tape all joints with aluminum foil tape.
- Failing Motor Bearings: A high-pitched screeching or metallic grinding sound that persists after cleaning is a sign of worn motor bearings. This typically requires professional service or motor replacement.
Problem 3: Chimney Lights Are Not Working
- For LED models: LEDs are rated for 20,000–50,000 hours but can fail prematurely due to voltage spikes. Check if the LED module is user-replaceable (many are) and order the correct replacement from the manufacturer.
- For incandescent bulb models (Broan-NuTone type): Simply replace the bulb. Use the wattage specified in your manual—do not exceed the maximum wattage rating, as this creates a heat and fire hazard in the enclosed space.
- If neither a new bulb nor a new LED module resolves the issue, the problem may be with the lighting circuit’s wiring. Contact the manufacturer’s support line.
Problem 4: Chimney Turns On By Itself or Controls Are Unresponsive
This is specific to models with touch-sensitive or gesture-activated controls.
- Steam and Humidity: Heavy steam from boiling water can trigger capacitive touch panels. This is a known issue with some touch-panel designs. The solution is to ensure there is adequate ventilation in the kitchen beyond just the chimney—an open window helps.
- Grease on the Touch Panel: A film of grease on a touch-sensitive panel mimics the electrical capacitance of a finger touch, triggering random inputs. Clean the panel thoroughly with a glass cleaner and microfiber cloth.
- Electrical Interference: Some gesture-activated units can be triggered by strong sources of infrared radiation. Ensure no high-intensity heat lamps or infrared devices are in close proximity.
Problem 5: Condensation or Water Dripping Inside the Hood
This is a ducted installation-specific issue. It occurs when warm, moisture-laden cooking air travels through the duct and hits a cold section of pipe (typically near an exterior wall or roof), causing condensation to form and drip backward into the hood.
- Insulate your duct runs in unconditioned spaces (attics, crawl spaces, exterior walls) using duct insulation wrap to prevent the temperature differential.
- Ensure your exterior vent cap has a functional backdraft damper that closes tightly when the chimney is off, preventing cold outside air from chilling the duct between cooking sessions.
- Verify that all duct joints are sealed with aluminum foil tape and sloped slightly toward the exterior if possible, to allow any condensate to drain outward rather than inward.
Kitchen Chimney Safety: Non-Negotiable Rules Every Owner Must Know
A kitchen chimney that is improperly installed, poorly maintained, or used incorrectly transitions from a safety appliance into a safety hazard. Understanding these rules is not optional—it is the responsibility that comes with owning powerful kitchen ventilation equipment.
Fire Safety and Grease Accumulation
The single greatest safety risk associated with kitchen chimneys is grease fire. Vaporized cooking oil condenses as it travels through your filters and duct system. If this grease is allowed to accumulate excessively, it becomes highly flammable. A flash flame from the stovetop can ignite heavily grease-laden filters or internal duct components, creating a kitchen fire that can spread rapidly through the ductwork into your walls and attic.
- Never allow baffle or mesh filters to become so heavily coated with grease that they appear opaque or drip
- Never allow the interior oil collection cup to overflow
- Never leave open flames unattended directly beneath a chimney with heavily soiled filters
- Do not spray aerosol cleaners directly into the chimney’s interior while the motor is running
- Install a Class K fire extinguisher in your kitchen—it is specifically formulated for cooking oil fires
Carbon Monoxide and Backdrafting Risk
If you have gas appliances—a gas range, gas water heater, gas furnace, or a wood-burning fireplace—and you run a high-CFM chimney without adequate makeup air, you risk creating negative air pressure inside your home. This negative pressure can cause your other combustion appliances to backdraft—meaning the combustion gases (including potentially lethal carbon monoxide) that are supposed to exhaust upward and out of the house through their own flues get reversed and pulled down into your living space instead.
⚠️ Carbon Monoxide Warning: Install carbon monoxide detectors on every floor of your home if you have any gas appliances, and replace the batteries twice annually. If your CO detector alarms while your range hood is running, turn off all gas appliances, evacuate the home, and call emergency services. Do not re-enter until cleared by professionals.
Electrical Safety
- Never operate a chimney with a damaged power cord
- Do not use extension cords with kitchen chimneys—they are not rated for the sustained draw of hood motors
- Ensure the chimney is connected to a properly grounded circuit
- Do not attempt to clean internal electrical components with water or liquid cleaners
- Always switch off and unplug (or switch off the circuit breaker) before performing any maintenance, filter removal, or bulb replacement
Correct Installation Height
For optimal performance and fire safety, the distance between your cooktop and the bottom of the chimney is critical. For electric cooktops, the ideal height is between 24 and 28 inches. For gas cooktops, which generate an open flame, the chimney must be placed slightly higher, between 26 and 30 inches. Installing it lower than the minimum height poses a severe fire hazard. Installing it higher than the maximum will cause smoke to disperse before the fan can capture it.
Frequently Asked Questions (FAQs)
Our experts answer the most common questions homeowners have before making their final purchase decision.
For optimal performance and fire safety, the distance between your cooktop and the bottom of the chimney is critical. For electric cooktops, the ideal height is between 24 and 28 inches. For gas cooktops, which generate an open flame, the chimney must be placed slightly higher, between 26 and 30 inches. Installing it any lower poses a severe fire hazard and can damage the chimney’s electronics. Installing it higher than 30 inches will cause the smoke to disperse into the room before the fan can capture it.
Absolutely not. This is a severe building code violation. Kitchen exhaust contains high levels of moisture, vaporized grease, and sometimes carbon monoxide. If you vent this into an enclosed space like an attic or garage, the moisture will immediately cause massive black mold growth on your wooden rafters. The vaporized grease will coat the surfaces, creating a terrifying hidden fire hazard. Ducted chimneys must always be vented completely to the outside of the house, either through the roof or a side exterior wall.
This is almost entirely an aesthetic choice. Curved glass chimneys look lighter, more elegant, and give the kitchen a spacious, modern feel. The slight curve can theoretically help funnel smoke towards the center suction plate. However, glass requires significantly more daily maintenance; grease splatters and dust are highly visible on glass, requiring frequent wiping with glass cleaner. Flat stainless steel hoods hide grease better and are generally considered more rugged and industrial.
High-CFM chimneys push a massive volume of air, making some noise unavoidable. However, if your chimney sounds like a jet taking off, check your ducting. The most common cause of excessive noise is using duct pipes that are too small (e.g., forcing a 600 CFM chimney through a 4-inch pipe instead of the required 6-inch or 8-inch pipe). Rigid, smooth galvanized steel ducting is also significantly quieter than flexible, ribbed aluminum ducting, as the smooth walls reduce air turbulence.
If you purchase a highly powerful chimney (typically anything over 400 to 600 CFM, depending on your local building codes), you are sucking a massive amount of air out of your house. This creates negative air pressure inside the home. To balance this, a “makeup air system” is required by law in many modern, tightly sealed homes. It is a motorized damper connected to your HVAC system that automatically opens to let fresh air into the house whenever your high-power chimney is turned on. Without it, your chimney might struggle to pull air, or worse, it could pull dangerous carbon monoxide down your furnace or fireplace chimney and into your living room (backdrafting).
If it is a ductless (recirculating) model, yes, a competent DIYer can easily install it using basic tools. However, if you are installing a ducted model that requires cutting a 6-to-8-inch hole through your home’s exterior wall or roof, navigating electrical wiring, and ensuring proper weatherproof sealing on the exterior vent cap, it is highly recommended to hire a licensed general contractor or HVAC professional. A botched exterior vent installation will lead to catastrophic water leaks during the next rainstorm.
A well-maintained kitchen chimney from a reputable brand should provide 10 to 15 years of reliable service. The motor is typically the longest-lasting component, especially DC motors, which are rated for up to 20,000 hours of operation. Factors that shorten lifespan include: allowing filters to become heavily clogged (which overloads the motor), running the unit without filters installed, using undersized ductwork that creates excessive back-pressure on the motor, and neglecting the auto-clean function on models that have it. The grease buildup accelerates motor bearing wear and can cause thermal failures over time.
Manufacturers sometimes list two different airflow specifications: a maximum CFM under no-load conditions (no filters, no ducting resistance) and an effective CFM under real operating conditions (with filters installed and through a typical duct run). The gap between these two numbers can be significant—a chimney rated at 900 CFM maximum might deliver only 600–700 effective CFM through a real-world installation. When comparing models, try to find the effective airflow rating tested with filters installed and at a standardized static pressure, not the maximum no-load rating. Independent reviews and lab tests are the most reliable source for this data.
Many ducted chimney models are labeled “convertible,” meaning they can be adapted for ductless recirculating operation by adding a carbon filter kit (sold separately) and blocking the duct outlet with a cover plate. However, it is important to understand the performance trade-offs: a chimney designed primarily for ducted use will deliver lower recirculating effectiveness than a purpose-built ductless unit. The airflow is restricted by the carbon filter’s density, and the motor may not be optimized for the increased back-pressure. If you know at the time of purchase that you need ductless operation, select a model specifically designed and optimized for recirculation rather than a converted ducted unit.
Stainless steel is the clear winner for durability and longevity in a kitchen environment. True stainless steel (look for 430-grade or 304-grade specifications) is corrosion-resistant, heat-resistant, and will not chip, peel, or discolor from normal cooking exposure. Painted steel hoods are cheaper to manufacture, but the paint finish is vulnerable—high heat from burners, cleaning chemicals, and everyday impacts can chip the coating over time, leading to rust in the exposed steel underneath. If you find a painted hood that you love aesthetically, ensure it uses a high-temperature powder-coat finish, which is far more durable than standard paint.
Final Verdict: Which Kitchen Chimney Should You Buy?
After this comprehensive deep-dive into every aspect of kitchen chimney technology, installation, maintenance, and safety, here is our clear, no-nonsense buying summary:
🏆 Best Overall
Cosmo COS-63175S — For the vast majority of homeowners who cook regularly on a gas or electric range and want premium build quality, beautiful design, and effortless filter maintenance at a fair price. This is the “buy it once, be done with it” choice.
🔥 Best for Heavy Cooks
FOTILE JQG7505 — If you cook at high intensity daily, make aromatic or high-fat cuisines, or own a professional-grade gas range, this is the only chimney that will keep up. The premium price is justified by premium performance and an innovative design.
💰 Best for Renters & Budget Buyers
Broan-NuTone 413004 — If you cannot run external ductwork, have a limited budget, or want the simplest possible plug-and-play installation, this legendary brand’s ductless unit is the most reliable choice at the lowest price point.
Whichever model you choose, the most important thing is to size it correctly for your stove, install it at the proper height, and commit to regular filter maintenance. A well-chosen, well-maintained kitchen chimney transforms your cooking experience—and protects the long-term health of your home.