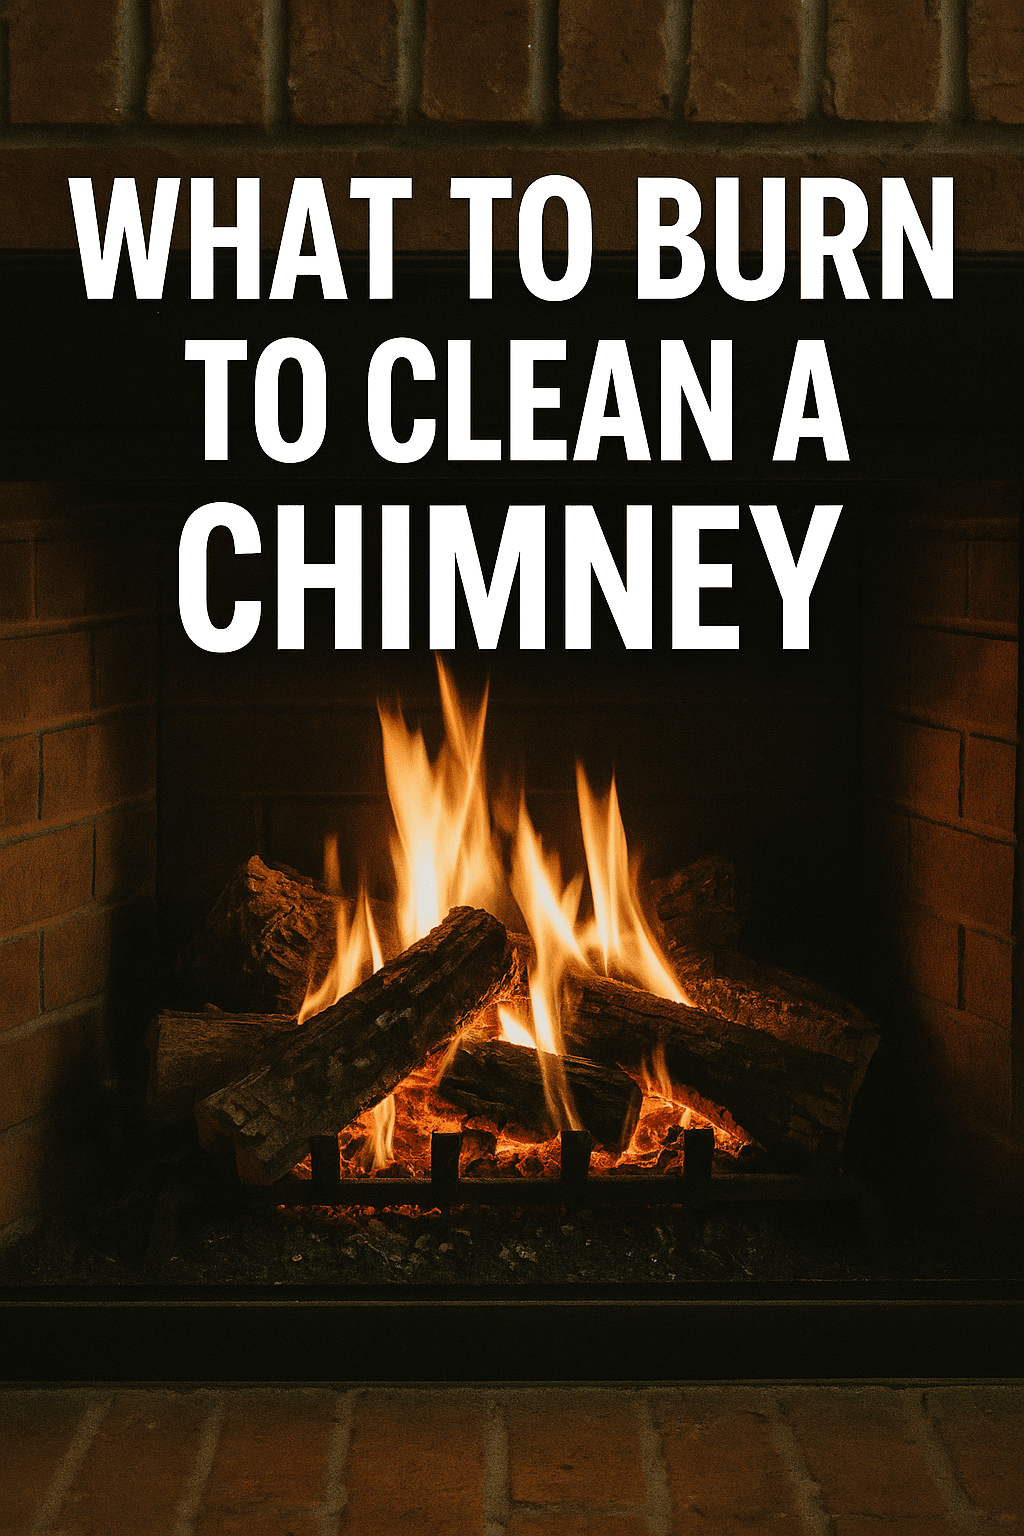
What to Burn to Clean Your Chimney: A Certified Pro’s Complete Guide
The crackle of a wood fire is one of life’s simple pleasures, offering warmth, comfort, and a captivating focal point for any room. But behind that cozy scene, a hidden danger can be building up in your chimney: creosote. This flammable byproduct of burning wood is the leading cause of chimney fires in the United States, responsible for over 22,000 house fires every year. It’s no wonder that homeowners are always looking for an easy way to keep their chimneys clean and safe.
This search often leads to a popular category of products: chimney sweeping logs and creosote removers. You’ve likely seen them in hardware stores, promising to clean your chimney as you enjoy a fire. But do they actually work? Can you really just burn a special log or sprinkle a powder and consider your chimney clean? As a Chimney Safety Institute of America (CSIA) certified professional, I’m here to give you the unvarnished truth—and to walk you through every product, technique, and folk remedy you may have read about, so you can make genuinely informed decisions about your family’s safety.
In this guide, we’ll break down the science of creosote, explain what every type of cleaning product does (and what none of them can do), debunk popular folk remedies, and give you the complete framework for burning wood correctly to minimize buildup from the very first fire of the season.
📋 Table of Contents
- The Three Stages of Creosote: Know Your Enemy
- Creosote Sweeping Logs: The Science and the Limits
- Powdered and Liquid Creosote Removers
- Folk Remedies: Rock Salt, Potato Peelings, and Lime — Do They Work?
- What You Should NEVER Burn in Your Fireplace
- The Best Wood to Burn: A Hardwood vs. Softwood Guide
- How to Season Firewood Properly
- Fire Management: The Art of Burning Clean
- The Top-Down Fire Method
- Flue Temperature: The Critical Number Most Homeowners Ignore
- Wood Stove vs. Open Fireplace: Different Creosote Dynamics
- Pellet Stoves and Creosote
- DIY Chimney Brushing: When It’s Appropriate
- What Actually Happens During a Chimney Fire
- The Indispensable Role of a Professional Sweep
- Frequently Asked Questions
The #1 Enemy: Understanding the Three Stages of Creosote
Before you can understand how to “clean” your chimney by burning something, you need to know exactly what you’re up against. Creosote is not a single substance; it’s a complex mixture of unburned wood particles, tars, and moisture that condenses on the cool inner walls of your chimney when combustion gases meet a cooler surface before exiting. It progresses through three distinct stages, each more dangerous than the last.
Stage 1: Fluffy Soot
This is the earliest stage. It’s mostly black carbon dust with a velvety or flaky texture, sometimes called “first-degree” creosote. Stage 1 creosote is the easiest to remove with a standard chimney brush and is typically the result of burning hot fires with well-seasoned hardwood. If you’re maintaining your chimney well and burning correctly, this is the only form you should ever see inside your flue.
Stage 2: Crunchy and Tar-Like
When fires are burned at cooler temperatures or with damp wood, the creosote becomes more substantial. It takes on a crunchy, porous, or tar-like appearance, often looking like black cornflakes or a dark, coarse crust—professionals sometimes call these formations “biscuits.” This type is harder to remove and significantly more flammable than Stage 1. A standard brush can sometimes remove it, but more often a rotary power sweeping system is required. Stage 2 buildup is a signal that your burning practices need attention.
Stage 3: Glazed or “Third-Degree” Creosote
This is the most dangerous form. It looks like a thick, black, shiny layer of tar that has been baked onto the flue liner—almost like a hard, glossy lacquer. It’s incredibly dense, heavy, and adhesive. Stage 3 creosote is caused by consistently burning wet wood, running a wood stove at low temperatures for extended periods, or simply years of neglect without proper cleaning. Standard chimney brushes are ineffective against it. In many cases, the only real solution is replacement of the flue liner, as aggressive mechanical removal risks damaging the tiles. Stage 3 creosote is also the most likely type to ignite a catastrophic chimney fire. By the time your chimney reaches this stage, the cost of remediation far exceeds what any amount of annual maintenance would have cost.
Soot is soft, powdery carbon residue from incomplete combustion. While messy and worth removing, it’s not particularly dangerous on its own. Creosote, by contrast, is a sticky or hardened tar-like substance formed when smoke condenses in the flue. It’s highly flammable and far more difficult to remove, especially in its later stages. All creosote contains soot, but not all soot is creosote.
The Real Answer: How Chimney Sweeping Logs Work
Now that you understand creosote, let’s talk about the products designed to combat it: Creosote Sweeping Logs (CSLs). These are not logs in the traditional sense; they are compressed logs made of sawdust and other materials, impregnated with a proprietary blend of chemical catalysts.
The Science Explained: A Catalytic Process
A CSL does not mechanically scrape or scrub your chimney. Instead, it works through a catalytic chemical process. Here’s a step-by-step breakdown of what happens:
- Activation: You place the log on a bed of hot coals from a previous fire. As the log burns, the heat releases the active chemicals as a gas.
- Coating: This gas rises up the chimney and clings to the creosote deposits on the flue walls.
- Transformation: The catalysts in the gas cause a chemical reaction within the creosote, breaking down the tarry, sticky molecular bonds and changing its chemical structure.
- Result: The dangerous, adhesive creosote (especially Stage 2) is transformed into a less-volatile, brittle, or ash-like substance. This modified creosote is significantly less likely to ignite and falls away from the flue walls over subsequent fires.
Essentially, a CSL makes your chimney safer in the short term and easier for a professional to clean later. Think of it as a chemical pre-treatment that loosens the grip of creosote rather than removing it entirely.

Top Pick: CSL Creosote Sweeping Log
A leading and widely trusted brand, this Creosote Sweeping Log is an excellent tool for your regular chimney maintenance routine. Using one periodically during the burn season helps reduce the flammability of creosote buildup between professional cleanings. Most manufacturers recommend one log per 60 fires or one to two per burning season.
Check Price on AmazonThe Crucial Limitations: What Cleaning Logs CANNOT Do
Understanding the limitations of these logs is just as important as knowing how they work. This is where false confidence becomes dangerous.
- They CANNOT Remove Heavy Buildup: A CSL is essentially ineffective against Stage 3 glazed creosote. It also cannot remove large, thick deposits of Stage 2 creosote. The chemical treatment modifies the surface but does not reach deeply into thick accumulations.
- They CANNOT Remove Blockages: A professional sweep is also an inspection. They look for and remove blockages like animal nests, leaves, and debris that no burning log can address. Dealing with how to get a raccoon out of your chimney or a bird stuck in the chimney are real problems that create both blockages and terrible odors.
- They CANNOT Inspect Your Chimney’s Structure: A certified sweep performs a visual inspection to check for structural issues like cracked liners, damaged crowns, or deteriorating brickwork. These are serious safety issues a log can’t diagnose. Knowing what the best mortar for chimney repairs is—and whether your homeowners insurance covers chimney repair—matters more than any burning log.
Powdered and Liquid Creosote Removers: The Other Products You Should Know
Creosote Sweeping Logs are the most consumer-visible product in this category, but they are far from the only option. There is an entire range of powdered and liquid creosote removers that work on the same catalytic chemistry principle but in different application formats. For active wood burners who want to stay on top of creosote throughout the season, these products can be even more practical than a single annual CSL.
Powdered Creosote Removers
Powdered removers—such as the widely-recommended Rutland Creosote Remover and Meeco’s Red Devil Creosote Destroyer—come in tub form and are applied by sprinkling a measured scoop (typically one ounce) directly onto a hot bed of coals. The active ingredients are released by the heat and travel up the flue to treat creosote deposits.
A major advantage of powder format is frequency and dose control. Rather than one large treatment several times a season, powders allow you to treat every second or third fire with a small dose. This more consistent, lower-level treatment is highly effective at preventing Stage 2 buildup by continuously treating deposits before they harden. One 2-pound tub typically provides 16 to 30 applications, making it economical for frequent users.
Liquid Creosote Removers
Liquid formulations can be sprayed or painted directly onto creosote deposits inside the firebox and on accessible areas of the smoke chamber. Wet-based cleaners work more quickly to dissolve deposits on contact than powders—professionals often prefer them for treating the smoke shelf and firebox walls where deposits are directly accessible. Some liquid products are also compatible with pellet stoves, where powder application through the fire is not practical.
Professional-Grade Products: Cre-Away Pro and PCR Poultice
For Stage 3 glazed creosote, there are professional-grade products that go beyond what consumer products can do. Cre-Away Pro is a powder applied directly into the flue (typically from above) to chemically react with and destabilize glazed third-degree creosote. It does not remove the creosote in one treatment, but repeated applications combined with fire heat can convert glazed deposits into a more brushable form. PCR Poultice Creosote Remover is a paste-based professional product applied directly to exposed glazed creosote surfaces. Both products are typically used by certified chimney professionals rather than homeowners, as their application requires access to the flue interior and an understanding of what you’re treating.
Folk Remedies: Rock Salt, Potato Peelings, and Lime — Do They Actually Work?
The internet is full of folk remedies for chimney creosote passed down through generations of wood-burners. As a CSIA-certified professional, I get asked about these constantly. Let me give you an honest, evidence-based assessment of each one.
Burning Rock Salt (Sodium Chloride)
This is one of the most widely shared home remedies. The theory: throw a handful of rock salt onto a hot fire and the resulting chemical reaction will loosen or remove creosote. The reality is more nuanced. Salt combustion does produce compounds that can slightly alter creosote’s chemical structure on the flue walls, similar in principle to a commercial catalytic product. Some wood-burners report seeing more material fall into the firebox after using salt. However, there are significant downsides. Salt is highly corrosive to metal components—your damper, any metal firebox components, and especially stainless steel flue liners can be damaged by repeated salt exposure. The minor chemical benefit does not justify the long-term corrosive risk to your chimney system. Our recommendation: use a commercial CSL or powder remover instead. The chemistry is better, more targeted, and won’t corrode your hardware.
Burning Potato Peelings
Raw potato peelings are another folk remedy with a surprising number of advocates. The chemistry here is real: potato peelings contain compounds that, when burned, produce gases that can soften creosote deposits slightly. Independent sources confirm that this approach has “some positive results” in softening creosote. However, the effect is modest and limited to softening, not removal. Potato peelings are not a substitute for any professional product or service, and the softened creosote must still be mechanically removed. Consider them a very mild supplemental treatment at best, not a primary cleaning method.
Garden Lime (Calcium Hydroxide)
Outdoor wood boiler operators have long used garden lime as a creosote management tool, throwing a few tablespoons into a hot fire daily during the burn season. Lime is alkaline and its combustion byproducts do react with the acidic components of creosote, helping to break down deposits over time. Users report that mirror checks of the flue show visibly less buildup with consistent lime use. The cost is extremely low compared to commercial products. Limitations: lime produces calcium oxide and calcium hydroxide when burned, which can be mildly corrosive to metal over time if used in very large quantities. In moderate amounts (two tablespoons per fire), the risk appears low. However, lime is not formulated or tested as a chimney maintenance product—its efficacy varies, and the dose matters. For homeowners with residential fireplaces, commercial creosote powder is the safer, more precisely formulated choice. Lime may have a supplemental role for outdoor boiler users burning high volumes of wood.
Burning Coal to Loosen Creosote
Another old-time approach occasionally mentioned in wood-burning forums is burning coal to produce hotter flue temperatures that dry out and loosen creosote. Coal does burn significantly hotter than wood, and higher flue temperatures do help reduce creosote. However, burning coal in a fireplace or wood stove not specifically rated for coal use is dangerous—the higher heat can crack clay flue tiles or damage the firebox. Never burn coal in an appliance not rated for it.
| Remedy | Does It Work? | Risks | Verdict |
|---|---|---|---|
| Rock Salt | Mild softening effect | Corrosive to metal; damages dampers and metal liners | Not recommended |
| Potato Peelings | Very mild chemical softening | Minimal; creates extra ash | Harmless but minimal benefit |
| Garden Lime | Moderate; better for outdoor boilers | Mild corrosion risk at high doses; not tested for chimneys | May help for high-volume burners |
| Coal Burning | Higher temp helps; dries creosote | Can crack clay tiles; only safe in coal-rated appliances | Dangerous in most residential fireplaces |
| CSL (Sweeping Log) | Yes — Stage 1 & 2 treatment | Not effective for Stage 3; not a replacement for sweeping | Recommended as maintenance aid |
| Powder Remover | Yes — consistent season-long treatment | Not effective for Stage 3 | Excellent for frequent wood burners |
What You Should NEVER Burn in Your Fireplace
Your fireplace is not an incinerator. Burning the wrong materials can release toxic chemicals into your home, cause structural damage to your flue, create dangerous creosote buildup at accelerated rates, and in some cases cause an immediate chimney fire. Here is the comprehensive list of materials to avoid—and why each is problematic.
- Painted, stained, or pressure-treated wood: Combustion of paint and wood preservatives releases heavy metals, arsenic compounds (in older treated lumber), and other toxic chemicals that are dangerous to breathe and highly corrosive to flue surfaces.
- Plywood, particleboard, or MDF: These engineered wood products contain formaldehyde-based adhesive resins that release formaldehyde and other harmful compounds when burned. They also produce unusually thick, rapid creosote deposits.
- Household trash or cardboard: Burning garbage may seem efficient, but it releases a cocktail of toxic smoke and creates temperature spikes that can damage flue tiles. It is also illegal to burn garbage in most jurisdictions.
- Plastics of any kind: Burning plastic releases dioxins, furans, and other persistent organic pollutants that are seriously harmful to health and highly corrosive to chimney components.
- Glossy paper, magazines, or color-printed materials: Glossy papers contain clay-coating compounds and color inks with heavy metal pigments. Their low-temperature combustion creates a distinctive gray ash that is laden with particulates and chemical residues.
- Driftwood or saltwater-soaked wood: Driftwood contains sodium chloride (salt) absorbed from seawater, which releases corrosive chlorine compounds when burned. These compounds attack metal dampers and liners at an accelerated rate.
- Wet or unseasoned wood (green wood): With moisture content above 25%, burning green wood produces cool, heavy smoke with maximum creosote and particulate content. A single winter of burning green wood can advance your chimney from Stage 1 to Stage 2 creosote.
- Accelerants (lighter fluid, gasoline, kerosene): Adding any flammable liquid to a fireplace fire is extremely dangerous and can cause an explosive flare-up that ignites creosote deposits or exits the firebox entirely.
- Large amounts of paper or cardboard: Small amounts of crumpled newspaper are appropriate for fire starting. Large volumes of burning paper produce embers that can travel up the flue and ignite deposits or exit the chimney top as live sparks.
- Highly resinous softwoods (pine, cedar, spruce) as a primary fuel: These woods can be useful for kindling and fire-starting, but as a primary fuel they produce significantly more resin-laden smoke than hardwoods, leading to faster Stage 1 and 2 creosote accumulation. Use sparingly if at all.
The Best Wood to Burn: A Complete Hardwood vs. Softwood Guide
The type of wood you burn is one of the most significant factors in how much creosote your chimney accumulates. Not all firewood is equal. The key variables are density (BTU output per cord), moisture content (seasoning), and resin content (a key driver of creosote).
Hardwood vs. Softwood: The Core Distinction
Hardwoods come from deciduous trees (those that lose their leaves seasonally) and are generally denser and lower in resins. Softwoods come from coniferous (evergreen) trees and are less dense but often resin-rich. Hardwoods burn hotter, longer, and produce significantly less creosote per cord of heat generated.
| Wood Species | Type | BTU / Cord (millions) | Creosote Risk | Best Use |
|---|---|---|---|---|
| Osage Orange (Hedge) | Hardwood | 32.9 | Very Low | Primary heat fuel; very hot burn |
| Black Locust | Hardwood | 27.9 | Very Low | Excellent primary fuel |
| Hickory | Hardwood | 27.7 | Very Low | Premium primary fuel; long-burning |
| White Oak | Hardwood | 26.4 | Very Low | Ideal primary fuel; widely available |
| Red Oak | Hardwood | 24.6 | Low | Excellent primary fuel |
| Ash | Hardwood | 23.6 | Low | Outstanding—burns well even slightly green |
| Beech | Hardwood | 27.5 | Low | Excellent heat; long-burning coals |
| Sugar Maple | Hardwood | 25.5 | Low | Long steady burn; great for overnight banking |
| Birch | Hardwood | 20.2 | Low-Moderate | Good kindling; burns fast; mix with denser woods |
| Cherry | Hardwood | 20.4 | Low-Moderate | Good fuel; pleasant aroma |
| Douglas Fir | Softwood | 20.7 | Moderate | Acceptable where hardwood is scarce; fully season before burning |
| Pine (dry, seasoned only) | Softwood | 15–17 | High (resinous) | Kindling only; not as primary fuel |
| Cedar | Softwood | 12.6 | High (resinous) | Fire-starting only; high creosote risk as primary fuel |
| Elm | Hardwood | 19.5 | Moderate | Burns well but difficult to split; stringy |
| Poplar / Cottonwood | Hardwood | 13–15 | Moderate (burns cool) | Last resort; low heat output; needs excellent seasoning |
The practical takeaway: prioritize dense hardwoods—oak, hickory, ash, maple, and beech—as your primary fuel. Save softwoods for kindling and fire-starting only. Where hardwood is genuinely unavailable (as in parts of the Pacific Northwest and Mountain West), fully seasoned Douglas Fir or similar conifers can be used but should be complemented by more frequent creosote management and professional inspections.
How to Season Firewood Properly
The number one cause of creosote buildup is burning unseasoned or “green” wood. Freshly cut wood can be over 50% water by weight. When you burn it, a huge amount of energy is wasted boiling this water off, creating cool, steamy smoke that condenses in the flue and forms creosote at an accelerated rate. Properly seasoned firewood should have a moisture content below 20%—and ideally between 15–18%—before burning.
How Long Does Seasoning Take?
The honest answer varies considerably by species, climate, and storage method. Most hardwoods require a minimum of 6–12 months of proper drying. Dense hardwoods like oak and hickory may need 18–24 months to reach optimal moisture content after splitting. The “let it sit for a year” rule of thumb is approximately correct for most species in most climates, but it’s not a guarantee.
How to Identify Properly Seasoned Wood
- The bark pulls away easily from the wood surface
- Cracks (called “checks”) have formed at the cut ends of the logs
- The wood has a grayish cast rather than the fresh, pale color of green wood
- Logs sound hollow when stacked against each other, rather than the “thud” of green wood
- The wood is noticeably lighter than freshly cut wood of the same species and size
- A moisture meter reads 15–20%
Best Storage Practices for Seasoning
- Split the wood before stacking: Splitting accelerates drying significantly by exposing the internal wood fibers to air. The larger the split diameter, the slower it dries.
- Stack it off the ground: Use pallets, rails, or a purpose-built wood rack. Ground contact introduces moisture and promotes rot.
- Allow air circulation: Stack with space between rows and avoid packing too tightly. A single-row stack dries faster than a multi-row pile.
- Cover the top, leave the sides open: A tarp or roof over the top protects against rain, but covering the sides traps moisture. Leave the sides of the stack exposed to allow airflow.
- South or west-facing exposure is ideal: Maximum sun exposure during daylight accelerates drying.

Essential Tool: Digital Wood Moisture Meter
Take the guesswork out of seasoning. This simple tool instantly tells you the moisture content of your firewood. It’s the single best investment you can make to ensure cleaner, hotter, and safer fires. Aim for 15–20% for optimal burning. Without a meter, you’re guessing—and guessing wrong is expensive for your chimney.
Check Price on AmazonFire Management: The Art of Burning Clean
Even with perfectly seasoned hardwood, poor fire management technique can produce excess creosote. The way you load your wood, control the air supply, and manage the fire through its lifecycle has a significant impact on how much material deposits on your flue walls.
Load Size and Frequency
A common mistake is piling the firebox completely full and then restricting the air to make the load last as long as possible. This “smoldering” approach is one of the worst things you can do for creosote buildup. A smoldering fire burns at low temperature, produces maximum smoke, and allows maximum condensation on the cool upper flue walls. Instead, load smaller quantities of wood and burn them hot. Two pieces burning vigorously is better than five pieces smoldering. Reload when you have a good coal bed and the fire has reduced to coals, rather than loading on top of a dying fire.
Air Supply and Damper Management
The damper should be fully open at the start of every fire. As the fire establishes and the flue warms, you can restrict the air slightly for wood stoves with air controls—but never close it down so far that you’re producing visible smoke or a languid, dim flame. The flame should always be bright and active. For open fireplaces without controllable air inlets, keep the damper fully open at all times during burning.
The Critical First 30 Minutes
The most important period of any fire from a creosote-prevention standpoint is the first 30 minutes. A cold flue has cold walls on which smoke condenses most readily. Burn a very hot, vigorous fire for the first half hour to warm the flue quickly. Once the flue walls are warm, condensation is dramatically reduced and creosote accumulation slows substantially. Never let a fire smolder in a cold flue—always start hot and fast, then moderate as needed.
The Newspaper Twist Test for Draft
Before lighting any fire, especially at the start of the season or after a long gap between fires, check that your chimney has a proper upward draft. Twist a single sheet of newspaper into a cylinder, light it, and hold it near the damper opening with the damper open. The smoke should rise strongly upward. If smoke drifts back into the room, you have a draft issue—possibly a cold, dense air column in the flue, a blocked chimney, or a barometric pressure issue. In cold-flue situations, hold the burning newspaper up at the damper for 30–60 seconds to warm the air column and establish draft before lighting the main fire.
The Top-Down Fire Method: A Game-Changer for Creosote
Most of us learned to build fires the traditional way: crumpled newspaper at the bottom, kindling on top, larger logs on top of that. Light the paper at the bottom and let the fire grow upward. This method works, but it has a creosote problem: as the paper and kindling burn, they produce smoke that passes through the larger, unlit logs above, depositing creosote on those logs and on the lower flue walls before the flue has had a chance to warm up.
The top-down fire method reverses this sequence entirely and has become the preferred approach recommended by many certified sweeps. Here’s how it works:
Large Logs First
Place your two or three largest logs at the bottom of the firebox, parallel to each other with small gaps between them for airflow.
Medium Splits
Lay medium-sized splits across the large logs, perpendicular or at a slight angle. These will catch fire from the kindling above.
Kindling Layer
Place small kindling pieces across the medium splits, again in a crossing pattern to allow airflow between pieces.
Firestarter on Top
Place crumpled newspaper, a fire-starting cube, or small pieces of dry bark at the very top of the stack.
Light from the Top
Light the paper or firestarter at the top. The fire burns downward, and because the smoke is produced above the already-warming lower logs, it rises into a warm flue rather than through cold wood.
Minimal Smoke, Hot Flue
The result is a fire that produces dramatically less smoke in its early stages, warms the flue rapidly, and is self-sustaining without the need to constantly add kindling.
Studies comparing top-down versus bottom-up fires consistently show that top-down fires produce less smoke and fewer particulates during the establishment phase. For homeowners who want to burn cleaner and reduce creosote formation at the source, adopting this method is one of the highest-impact changes you can make.
Flue Temperature: The Critical Number Most Homeowners Ignore
There is a specific temperature threshold at which creosote formation either accelerates or slows dramatically: 250°F (121°C) measured at the flue collar or first few feet of the flue pipe. Below this temperature, combustion gases condense readily on flue surfaces and creosote accumulates rapidly. Above it, the flue is warm enough to carry smoke out of the chimney before it condenses.
Many homeowners are surprised to learn that their chimney is spending significant time below this threshold—especially at the start of a cold fire, during reload periods, or when running a wood stove at very low output for extended periods. A stove pipe thermometer, mounted magnetically to the stovepipe, gives you real-time feedback on flue temperature and is one of the most useful diagnostic tools a wood-burner can own.
The Ideal Operating Range
Most certified sweeps and stove manufacturers recommend a stovepipe temperature between 250°F and 450°F (121–232°C) as the optimal operating range. Below 250°F, creosote accumulates rapidly. Above 450°F for extended periods, you’re creating wear on the stove’s components and potentially overheating the flue. Above 700–800°F, you may have a chimney fire in progress. A thermometer lets you stay within this productive range through simple air control adjustment.
Wood Stove vs. Open Fireplace: Different Creosote Dynamics
Not all wood-burning appliances produce creosote in the same way or at the same rate. Understanding the specific dynamics of your appliance type helps you make better maintenance decisions.
Open Masonry Fireplaces
Open fireplaces have large fireboxes, always-open flues (when the damper is open), and high airflow. This high airflow means temperatures can vary dramatically—very hot near the fire, but potentially cool at the upper sections of a tall chimney. The good news is that the abundant air supply tends to support more complete combustion. The challenge is that the large, uninsulated masonry chimney takes a long time to warm up, creating a prolonged period of flue wall condensation at the start of each fire. Open fireplaces are less efficient as heating tools but are generally lower-risk for creosote than sealed airtight stoves when operated correctly.
Airtight Wood Stoves
Modern certified airtight wood stoves are excellent heating appliances, but they create specific creosote risks that open fireplaces do not. When you restrict the air supply of an airtight stove significantly—as many users do to extend burn time overnight—you create the precise conditions that generate Stage 2 and Stage 3 creosote: low temperature, low airflow, high smoke density. The irony is that trying to get the most heat from the stove by “banking it down” can create the most chimney damage. Most airtight stove manufacturers specify a minimum air opening to avoid creosote formation. Always follow these guidelines.
Catalytic vs. Non-Catalytic Wood Stoves
Catalytic combustors, installed in some high-end wood stoves, cause combustion gases to burn at a lower temperature by passing them over a coated ceramic honeycomb. This can significantly reduce particulate emissions and creosote formation compared to non-catalytic stoves burning at equivalent heat output levels. A well-maintained catalytic stove produces less creosote per hour of operation. However, the catalytic combustor itself requires inspection and replacement (typically every 4–6 seasons), and running the stove below the combustor’s activation temperature (approximately 500°F) bypasses the catalyst and can produce significant creosote. If you have a catalytic stove, follow the manufacturer’s bypass valve recommendations carefully.
Pellet Stoves and Creosote: A Different Situation
Pellet stoves burn compressed wood pellets through an automated auger and combustion system rather than traditional firewood. The differences in how they produce and accumulate residues compared to wood-burning appliances are significant.
Because pellets are a highly consistent, low-moisture fuel (typically 5–8% moisture content), and because pellet stoves burn with a forced-air combustion system that maintains consistent temperature and airflow, they generally produce far less creosote than traditional wood stoves or fireplaces. However, they are not creosote-free. Pellet stoves produce a different type of residue—primarily a fine, gray to white ash combined with a modest amount of light creosote—that accumulates in the burn pot, heat exchanger, and venting system.
Pellet stove venting uses smaller diameter (typically 3-inch) sealed exhaust pipes rather than full masonry flues. These pipes require periodic cleaning with a brush and, for liquid-phase creosote deposits, a liquid remover formulated for pellet stoves. Standard CSL burning logs cannot be used in pellet stoves. Several liquid creosote remover products are specifically formulated for pellet stove exhaust systems.
DIY Chimney Brushing: When It’s Appropriate and When It’s Not
Before the era of professional chimney services, homeowners routinely cleaned their own chimneys. DIY chimney brushing is still appropriate for some homeowners in some circumstances—but understanding the limits clearly is essential.
When DIY Brushing May Be Appropriate
If your chimney has Stage 1 fluffy soot deposits, is a straight vertical flue with no offsets, and you are comfortable with safe roof access and working in a confined, dusty environment, DIY brushing with the correct rod-and-brush system can be effective for basic maintenance between professional inspections. Rotary sweeping systems—in which a flexible whip-style brush is driven by an electric drill—have made DIY brushing more accessible and effective for straight flue runs.
When to Absolutely Call a Professional
- Any Stage 2 or Stage 3 creosote is present
- Your chimney has offsets (horizontal runs or elbows)
- You have not had a professional Level 2 inspection recently
- You have experienced any chimney fire, no matter how minor it seemed
- You are not comfortable with safe roof access
- Your chimney serves a gas appliance (cleaning a gas flue requires different tools and training)
Professional sweeps use specialized vacuums—like those reviewed in our guide to the best chimney sweep vacuum systems—that generate sufficient negative pressure to contain all soot and debris during the cleaning process. Without professional-grade containment, a DIY brush cleaning can disperse fine black creosote particulate throughout your living space. It is messy, unhealthy, and often far more disruptive than homeowners anticipate.
What Actually Happens During a Chimney Fire: Know the Signs
Understanding what a chimney fire looks and sounds like is critical safety knowledge for every wood-burning homeowner. Many homeowners have had minor chimney fires without realizing it. Others have witnessed major ones and been unsure what to do. Here is what you need to know.
Types of Chimney Fires
Chimney fires come in two forms: slow-burn fires and explosive fires. Slow-burn fires occur when creosote ignites at a relatively low temperature and smolders quietly. The homeowner may notice nothing unusual, or may smell an intense, acrid odor stronger than normal smoke. The flue temperature in a slow-burn fire may reach 700–1,000°F, hot enough to crack clay tiles and damage the mortar, but not dramatic enough to attract attention. Many structural chimney failures are the result of slow-burn fires that went undetected.
Explosive chimney fires are impossible to miss. They produce a loud roaring or rumbling sound (often described as a freight train), visible flames or sparks shooting from the chimney top, and intense heat radiating from the chimney walls. The flue temperature in an explosive fire can exceed 2,000°F—enough to melt stainless steel flue liners, shatter clay tile liners, and ignite adjacent framing or roofing materials.
What to Do If You Suspect a Chimney Fire
- Close all air inlets, dampers, and glass doors to starve the fire of oxygen
- Get everyone out of the house
- Call 911 immediately—do not attempt to fight a chimney fire yourself
- Do not use the fireplace until the chimney has been inspected by a certified professional
Carbon Monoxide: The Silent Partner of Chimney Problems
Creosote and chimney fires are visible risks. Carbon monoxide is invisible. A blocked, restricted, or damaged chimney flue can cause combustion gases to back-draft into your living space rather than exhausting safely. CO is colorless and odorless, and its symptoms—headache, dizziness, nausea—mimic the flu. Every home with a wood-burning appliance must have functioning carbon monoxide detectors on every level, tested monthly, and replaced according to the manufacturer’s schedule (typically every 5–7 years).
The Indispensable Role of a Professional Sweep
According to NFPA 211, the national safety standard, “Chimneys, fireplaces, and vents shall be inspected at least once a year.” This isn’t a suggestion; it’s the professional safety standard for a reason. A professional sweep provides what no product can replicate.
Understanding NFPA 211 Inspection Levels
Not all chimney inspections are the same. NFPA 211 defines three levels of inspection with progressively increasing scope:
- Level 1 Inspection: A visual examination of all readily accessible components of the chimney exterior and interior. This is the appropriate inspection for a chimney that has been used without any changes to the system and with no evidence of a problem. It should be conducted annually.
- Level 2 Inspection: Includes all of Level 1 plus examination of accessible attic, crawl space, and basement areas, and a video scan of all flue interiors. A Level 2 inspection is required after any changes to the system, upon sale of the property, after any chimney fire or seismic event, and before relining or repairing a flue. This level is the minimum appropriate after any suspected chimney fire.
- Level 3 Inspection: Includes all of Level 2 plus removal of components as needed to access concealed areas. Required when serious hazards are suspected and less invasive inspections cannot fully assess the damage.
What a Professional Provides That No Product Can
- Guaranteed Removal: Professionals use specialized brushes, rods, and powerful vacuum systems like the best chimney sweep vacuum systems to physically remove all stages of creosote from the entire flue length.
- Expert Structural Inspection: They’re trained to spot problems you can’t see—hairline cracks in flue tiles, deteriorating smoke chambers, damaged flashing, and structural movement. They check everything attached to or near the chimney, ensuring fixtures like the best chimney antenna mount are secure and not compromising the masonry.
- Video Flue Inspection (Level 2): A camera run through the entire length of the flue can reveal damage that is completely invisible from above or below—particularly critical after any suspected chimney fire.
- Peace of Mind: Nothing replaces the confidence of knowing your chimney has been deemed safe by a CSIA-certified expert before the heating season begins.
Frequently Asked Questions (FAQ)
How often should I use a chimney cleaning log?
Most manufacturers recommend using one log for every 60 fires, or one or two logs over the course of a typical burning season. For frequent burners (more than 3–4 fires per week through the heating season), a powdered creosote remover used every second or third fire provides more consistent protection than two CSLs per season.
Can I use more than one cleaning log at once?
No. Never use more than one CSL at a time, and do not add it to a raging fire. Add it to a well-established bed of hot coals as directed on the packaging. Using multiples at once does not provide additional benefit and wastes product.
Are the fumes from cleaning logs toxic?
When used correctly in a properly functioning chimney, the chemicals are vented safely outside. They are not intended to be inhaled in concentrated form, but normal use in a drafting chimney presents no meaningful exposure risk. If you notice smoke spilling back into the room during use, it indicates a blockage or draft problem that needs immediate professional attention—do not continue using the fireplace until this is resolved.
What happens to the creosote after I use a cleaning log?
The treated, brittle creosote may fall into the smoke shelf or firebox over the next few days or weeks as you have subsequent fires. Be aware that this can happen—a sudden fall of dark, flaky material into the firebox during a fire is normal and expected after CSL treatment. The majority of the modified creosote will be removed during your next professional sweeping.
Does burning pine really cause more creosote?
Yes, significantly so when pine is used as a primary fuel. Pine and other resinous softwoods contain volatile terpene resins that vaporize during combustion and condense more readily in the flue than the combustion products of hardwoods. However, the risk is primarily from using pine as a regular primary fuel. Occasional use of dry, well-seasoned pine for kindling and fire-starting—where it burns quickly at high temperature—poses much less risk. The key rule: if pine is in the flue for a long time at moderate temperature, it creates more creosote. If it burns hot and fast, the risk is lower.
How do I know if I’ve had a chimney fire?
Signs of a past chimney fire include: a warped or discolored metal damper or connector; cracked, collapsed, or misaligned clay flue tiles (visible with a flashlight from below or detected during a Level 2 inspection); evidence of smoke escaping through mortar joints in the chimney masonry; a strong, intense burning smell that is different from normal smoke; and puffy or honeycomb-like creosote deposits (a sign that previously smooth creosote was heated to the point of partial combustion). If you suspect any of these signs, stop using the fireplace and schedule a Level 2 inspection immediately.
Is it safe to burn wood in a fireplace every day?
Yes, provided you are burning properly seasoned hardwood in a well-maintained chimney at appropriate temperatures. Daily burning simply means more frequent maintenance requirements. If you burn daily throughout a heating season, you likely need a professional inspection and cleaning both at the start of the season and mid-season, rather than once annually. Heavy use requires heavier maintenance.
What is the best time of year to schedule a chimney cleaning?
Late summer or early fall—before the heating season begins—is the optimal time. Scheduling in August or September means you beat the busy season when sweeps’ schedules fill up, and any repairs identified during the inspection can be completed before cold weather arrives. Spring cleaning (after the heating season) is also valuable for removing the season’s deposits before the damp summer months accelerate deterioration, and for catching any damage caused by winter’s freeze-thaw cycles.
Conclusion: A Tool, Not a Silver Bullet
So, what should you burn to clean a chimney? The honest answer is: a Creosote Sweeping Log or powdered creosote remover—but only when used correctly as one part of a comprehensive safety strategy. Think of them like a fuel system cleaner for your car: good maintenance that helps keep things running well, but never a substitute for the real service appointment with a qualified professional.
Embrace burning aids as helpful tools to reduce creosote between cleanings. Skip the folk remedies—rock salt corrodes your hardware, and potato peelings are charming but marginal. Focus instead on the fundamentals: seasoned hardwood, hot fires, proper air management, and the top-down fire method. Track your flue temperature. Know your wood species. And never, ever let these products replace the annual inspection and sweep from a certified professional. It’s the single most important thing you can do to protect your home and family all season long.
After all, you want your chimney to be clean and clear for the only visitor who’s supposed to use it—and we all have our theories about how Santa gets in without a chimney these days anyway!