
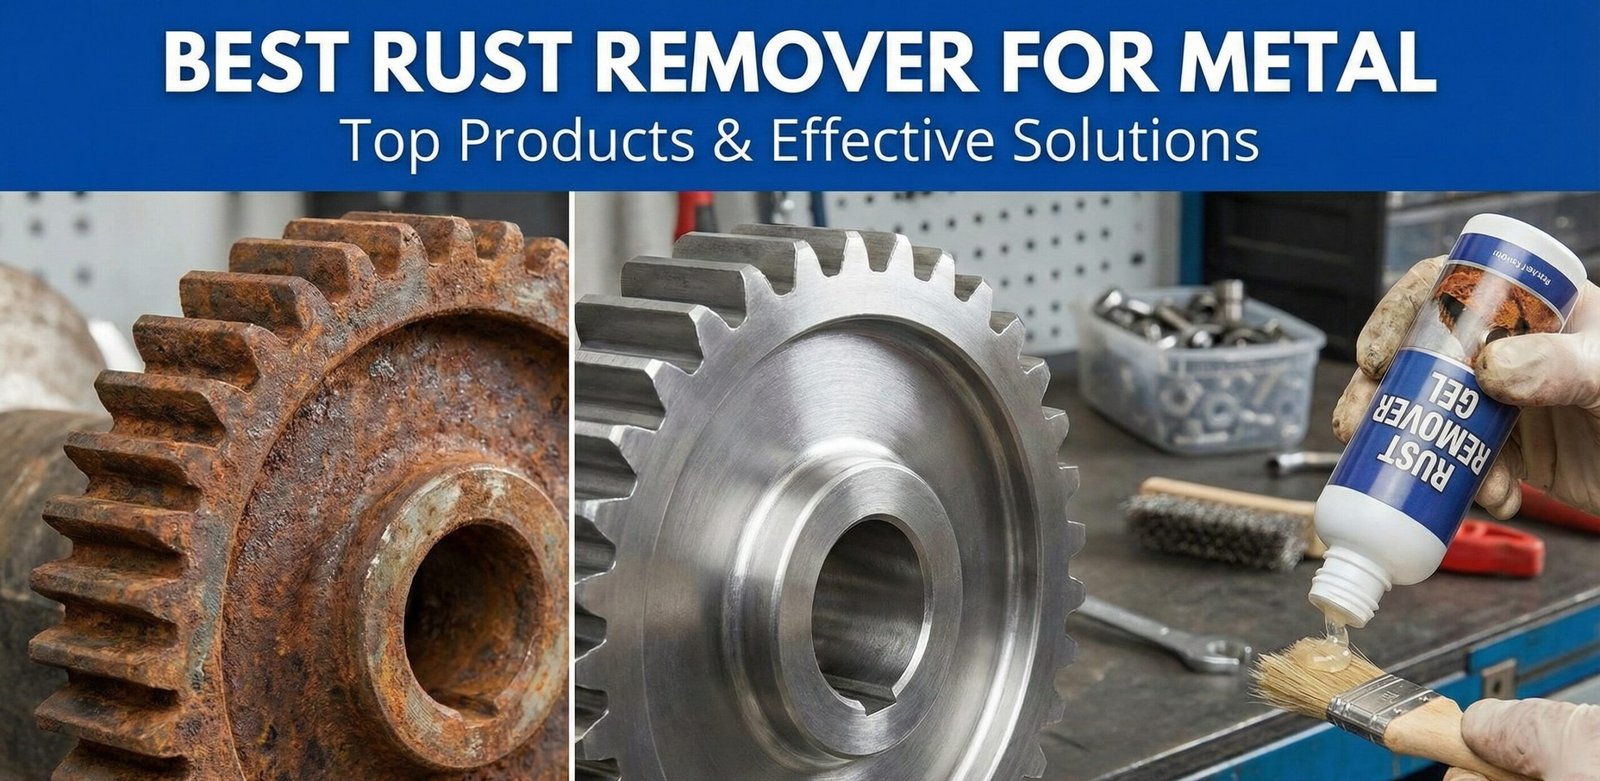
Best Rust Remover for Metal: Restoring Your Tools, Cars, and Home Hardware
Don’t let corrosion claim your prized possessions. We break down every chemical method, mechanical approach, and DIY technique — and review the top solutions on the market today.
📋 Table of Contents
- The Science of Rust: What You’re Actually Fighting
- All Six Chemical Categories Explained
- Electrolysis: The DIY Method Restoration Experts Love
- Naval Jelly: The Classic That Doesn’t Get Enough Credit
- Laser Rust Removal: The Emerging Technology
- Quick Comparison Table
- In-Depth Product Reviews
- Mechanical vs. Chemical: The Hybrid Approach
- PPE Guide: What Protection Each Method Requires
- The Hydrochloric Acid Warning Every DIYer Must Read
- Use Case Guide: The Right Method for Your Specific Project
- Flash Rust: The Silent Saboteur
- The Complete Step-by-Step Rust Removal Process
- Post-Removal: Sealing and Long-Term Prevention
- Rust Stain Removers: Concrete, Fabric & Surfaces
- Budget DIY Options: Citric Acid, Bar Keepers Friend & More
- Frequently Asked Questions
The Relentless Battle Against Corrosion
Rust is the silent, pervasive killer of metal. Whether it’s a vintage hand plane found buried in an estate sale, the structural undercarriage of your daily driver, or the critical components of your home’s heating system, iron oxide is absolutely relentless. Left unchecked, it compromises structural integrity, seizes crucial bolts, and destroys the aesthetic value of your property.
In the past, removing rust meant resigning yourself to hours of back-breaking physical labor with wire brushes, heavy-duty sandpaper, and toxic, lung-burning acids. Today, advanced chemistry has given us significantly better, safer options. The best rust remover for metal works by chemically breaking the molecular bond between the rust and the base metal, either dissolving it entirely or converting it into a stable, paintable surface.
The Science of Rust (Oxidation)
Rust is the common name for iron oxide. It forms through a natural electrochemical process called oxidation. When iron — or an alloy containing iron, like steel — is exposed to oxygen and moisture, the iron surrenders electrons to the oxygen atoms, aided by water acting as an electrolyte. The result is a flaky, reddish-brown compound (Fe₂O₃ and Fe₃O₄) that takes up more physical space than the original iron. This is why rust causes paint to bubble and flake off. Because iron oxide is structurally weak and porous, it traps even more water against the metal, accelerating the decay until the metal completely disintegrates.
Understanding this process is vital for home maintenance. Before applying the best paint for chimney brick or sealing metal roof flashing, the surface must be absolutely pristine and rust-free. Similarly, keeping specialized maintenance tools in top shape — like a heavy-duty chimney vacuum — requires fighting off rust caused by drawing in damp, acidic soot over the years.
Decoding the Chemistry: All Six Types of Rust Removers
Most buying guides describe three categories. In reality, there are six meaningfully different chemical approaches to rust removal, and understanding all of them lets you choose the most efficient tool for each specific situation.
1. Chelating Agents
Synthetic molecules (typically EDTA derivatives) that selectively bond with iron oxide and pull it into suspension. Non-toxic, reusable. Cannot harm bare metal. Requires immersion. Products: Evapo-Rust, WD-40 Specialist Soak.
2. Phosphoric Acid
Converts rust to iron phosphate — a stable black coating ready to prime over. Used in naval jelly, gel dissolvers, and liquid phosphoric products. Leaves temporary rust inhibition. Products: Rust-Oleum Gel, Jenolite, naval jelly.
3. Oxalic & Citric Acid
Naturally occurring weak acids that dissolve iron oxide. Gentler than mineral acids. Oxalic acid is the active ingredient in deck cleaners and Bar Keepers Friend. Citric acid is food-safe and available as a powder for DIY soaks.
4. Strong Mineral Acids
Muriatic (hydrochloric), sulfuric, and nitric acids. Extremely aggressive, fast, and genuinely dangerous. HCl leaves chloride ions that cause permanent accelerated rust — see the critical warning below. Rarely necessary for DIY work.
5. Rust Converters
Tannic acid + polymer primer formula transforms rust into iron tannate (hard black coating). Saves labor — brush on and paint over. Cannot restore bare metal finish. Products: Corroseal, Rust-Oleum Rust Reformer.
6. Electrolysis
Passes DC current through a soda ash solution to strip rust electrochemically — the only method that can actually convert rust back to iron rather than removing it. No chemicals, no surface loss on precision parts. See full section below.
🔬 The “Perm” of Rust Removal: Understanding EDTA Chelation
Chelation (pronounced key-LAY-shun) is the process behind products like Evapo-Rust. The chelating agent — typically a derivative of EDTA (ethylenediaminetetraacetic acid) — contains synthetic molecules with multiple binding sites that have a strong, selective affinity for iron ions. The molecule grabs iron oxide atoms and holds them in stable suspension in the liquid, physically pulling them away from the base metal. Critically, chelating agents have no affinity for metallic iron — only for oxidized iron. This is why you can leave a clean steel wrench in Evapo-Rust indefinitely without damaging it. The pH of a chelating soak is typically neutral (around 7), which also means no etching, no pitting, and no acid fumes.
Electrolysis: The DIY Method Restoration Experts Love
Electrolytic rust removal is, in the opinion of many professional restorers and machinists, the most technically elegant approach to heavy corrosion — and it costs almost nothing to set up. Unlike every chemical method that removes rust by stripping it away (which removes some base metal along with it when working on pitted surfaces), electrolysis can actually reduce iron oxide back to metallic iron, theoretically recovering some of the corroded material rather than just removing it.
How Electrolysis Works
The process uses a mild electrical current to reverse the oxidation reaction. Here’s the setup:
- Fill a plastic container with water and dissolve washing soda (sodium carbonate / soda ash) — approximately one tablespoon per gallon of water. This creates a conductive electrolyte solution. Do not use baking soda (sodium bicarbonate) or table salt (which releases toxic chlorine gas during electrolysis).
- Submerge a sacrificial anode — a piece of scrap steel (rebar works well). Connect this to the positive (+) terminal of a battery charger (6–12V DC, 2–10 amps).
- Connect the rusty part you want to clean to the negative (−) terminal. Submerge it in the solution. The part must not touch the anode.
- Switch on the charger. Bubbles will immediately begin forming on both pieces as the electrolysis proceeds. The rust is migrating from the part to the solution and partially to the anode.
- After several hours (or overnight for heavy rust), remove the part, scrub lightly with a stiff brush or Scotch-Brite pad, rinse, and immediately apply a protectant.
✓ Why Restoration Experts Prefer Electrolysis for Precision Parts
Electrolysis is the preferred method for restoring antique tools, engine castings, and precision machine parts where preserving original dimensions is critical. Unlike mechanical methods (which physically remove surface material) and acids (which etch the base metal), electrolysis is extremely gentle on the underlying metal. It reaches inside blind holes, threaded bores, and recessed cavities that brushes and gels cannot access. The setup is also infinitely scalable — you can build a tank any size using a plastic storage tote and a $30 battery charger.
Limitations of Electrolysis
- Line-of-sight reaction: Electrolysis works most efficiently where the anode and cathode directly face each other. For complex shapes with recesses facing away from the anode, you may need to reposition or add multiple anodes to ensure complete coverage.
- Hydrogen gas production: The process produces hydrogen gas at the cathode (your rusty part). Always perform electrolysis in a well-ventilated area or outdoors. Hydrogen is lighter than air and dissipates quickly, but an enclosed space builds up an explosive concentration.
- Speed: For very heavy rust on large parts, electrolysis can take many hours or overnight. Chemical removers are faster for simple surface rust.
- Scale limitations: A large truck frame is impractical to immerse. Electrolysis is best for disassembled parts and small to medium components.
Laser Rust Removal: The Emerging Technology
Laser rust removal is transitioning from a purely industrial process to an increasingly accessible technology for serious automotive restorers, metalworkers, and specialty shops. The principle is straightforward: a pulsed fiber laser beam is focused on the rusted surface at extremely high energy density, vaporizing the rust layer without heating the underlying base metal significantly. The vaporized rust is extracted by a vacuum or exhaust system.
Advantages Over Chemical and Mechanical Methods
- No chemicals required: Zero waste liquid, no neutralization needed, no flash rust risk from rinse water.
- Precision: The laser removes only the surface layer targeted, without affecting adjacent paint, rubber, or plastics.
- No surface contact: No abrasion means no dimensional loss on precision machined surfaces.
- Extremely clean results: On thin sheet metal and stamped automotive panels, laser cleaning produces a surface quality no chemical or mechanical method can match.
Current Limitations
Consumer-accessible laser rust removal units (typically 20–100W handheld fiber lasers) are now available starting at approximately $1,500–$3,000 — within reach for serious hobbyists and small shops but still a significant investment compared to a $20 bottle of Evapo-Rust. Processing speed is limited on very thick rust accumulation. Eye protection requirements are strict and non-negotiable — direct or reflected laser light at these wavelengths causes permanent retinal damage. For most home users working with hand tools and occasional automotive parts, chemical and electrolytic methods remain more practical. For professional shops doing high-volume automotive or metalwork restoration, laser rust removal is increasingly the gold standard.
Complete Comparison: All Rust Removal Methods at a Glance
| Method / Product | Chemistry | Best For | Safety | Speed | Restores Bare Metal? |
|---|---|---|---|---|---|
| Evapo-Rust | Chelating Agent | Tools, antiques, delicate parts | Non-toxic | Slow (1–24h) | Yes |
| WD-40 Specialist Soak | Chelating Agent | Automotive parts, heavy corrosion | Biodegradable | Moderate (1–12h) | Yes |
| Rust-Oleum Gel / Naval Jelly | Phosphoric Acid | Vertical surfaces, gates, fencing | PPE Required | Fast (15–30 min) | Partial (leaves phosphate) |
| Corroseal Converter | Tannic Acid + Polymer | Structural steel, to be painted | Low VOC | Fast (cures 24h) | No (turns black) |
| Jenolite Liquid | Liquid Phosphoric Acid | Deep pitting, fabrication prep | Strong acid PPE | Very fast (<15 min) | Partial (leaves phosphate) |
| Electrolysis (DIY) | Electrochemical | Precision parts, large batches | No chemicals; ventilate for H₂ | Slow (hours–overnight) | Yes (converts back to iron) |
| Citric Acid Powder | Weak Organic Acid | DIY budget soak | Safe, biodegradable | Moderate (4–12h) | Yes |
| White Vinegar | Acetic Acid (5%) | Light surface rust, small items | Non-toxic | Very slow (12–48h) | Yes (light rust only) |
| Muriatic / HCl Acid | Strong Mineral Acid | Heavy fabrication (professionals) | Highly dangerous; chloride risk | Extremely fast | Risk of permanent Cl⁻ damage |
| Laser Removal | Ablative Laser | Precision panels, professional shops | Eye protection critical | Fast | Yes (no surface loss) |
In-Depth Reviews of the Best Rust Removers

Evapo-Rust The Original Super Safe Rust Remover
The Undisputed Gold Standard for Restoration Enthusiasts
Evapo-Rust has fundamentally changed the rust removal industry. Unlike traditional acid-based cleaners, it uses selective chelation to target only rust — never the base metal. You could forget a wrench in a bucket of Evapo-Rust for a week, and it would emerge perfectly safe, just devoid of rust. No noxious fumes, no PPE required, no timer watching.
This is the absolute best choice for antique hand tools, delicate clock parts, expensive automotive hardware, and any application where preserving original dimensions, threads, and manufacturer markings is critical. It is also the recommended product for restoring cast iron damper mechanisms, fireplace hardware, and the intricate hardware for chimney antenna mounts.
Pro tip on heating the bath: Evapo-Rust works significantly faster when warmed. A room-temperature soak that takes 12 hours for heavy rust may take only 2–4 hours with the solution heated to approximately 140°F (60°C). A slow cooker on the “warm” setting or a heated workshop accelerates the process considerably without any safety risks.
- 100% non-toxic, non-corrosive, safe on bare skin.
- Reusable many times until the solution turns completely black.
- Does not affect underlying plastic, PVC, glass, or rubber seals.
- Zero scrubbing required — soak, rinse, dry.
- Heated baths significantly cut working time.
- Requires full immersion — cannot use on large, immovable objects.
- Slower than acids on very heavy corrosion.
- Can leave a dark carbon film on high-carbon steel (wipes off easily with a rag).

WD-40 Specialist Rust Remover Soak
Best for Heavy-Duty Automotive & Machine Shop Applications
WD-40’s entry into the chelating soak category is a direct, fierce competitor to Evapo-Rust. Also biodegradable and non-toxic, it uses a similar chelating formula but appears slightly more aggressive on very heavily pitted automotive hardware — control arms, brake calipers, and severely corroded machine components. It leaves a temporary anti-corrosion barrier after rinsing, giving you a wider window to apply permanent paint or oil coating before flash rust sets in.
If you are dealing with a stuck chimney damper and need to restore seized iron mechanism parts, soaking the disassembled hardware in this solution can restore full functionality. See our guide on how to diagnose fireplace draft problems caused by rusted, seized mechanisms.
- Industrial-strength chelating formula; biodegradable and safe.
- Safe on assembled parts with gaskets and O-rings.
- Leaves a temporary anti-corrosion barrier after rinsing.
- Often available locally in 1-gallon and 5-gallon buckets.
- Slightly more expensive per fluid ounce than some competitors.
- Requires a container large enough to fully submerge the part.

Rust-Oleum Rust Dissolver Gel
The Ultimate Solution for Vertical Surfaces & Large Objects
The biggest limitation of soaking agents is gravity — you cannot immerse a car fender, a wrought iron fence, or chimney cap flashing that is permanently installed on your roof. Rust-Oleum’s phosphoric acid-based gel is designed specifically to cling to vertical and even inverted surfaces, allowing the chemistry to work without dripping away.
This “brush on, wait, rinse” product typically produces results in 15–30 minutes. As the phosphoric acid works, it creates a microscopic iron phosphate layer that inhibits future rust — an excellent prep step before primer. If you are preparing to waterproof exterior metalwork (see: compare chimney flashing sealants), using this gel on the metal flashing first is an essential prep step.
- Thick gel clings to vertical and inverted surfaces.
- Fast-acting — results in 10–30 minutes.
- Leaves zinc/phosphate coating that inhibits rust return.
- Cost-effective for large surface areas.
- Acid-based: requires PPE (gloves, goggles).
- Will strip paint and damage certain plastics.
- Requires thorough neutralizing rinse after application.
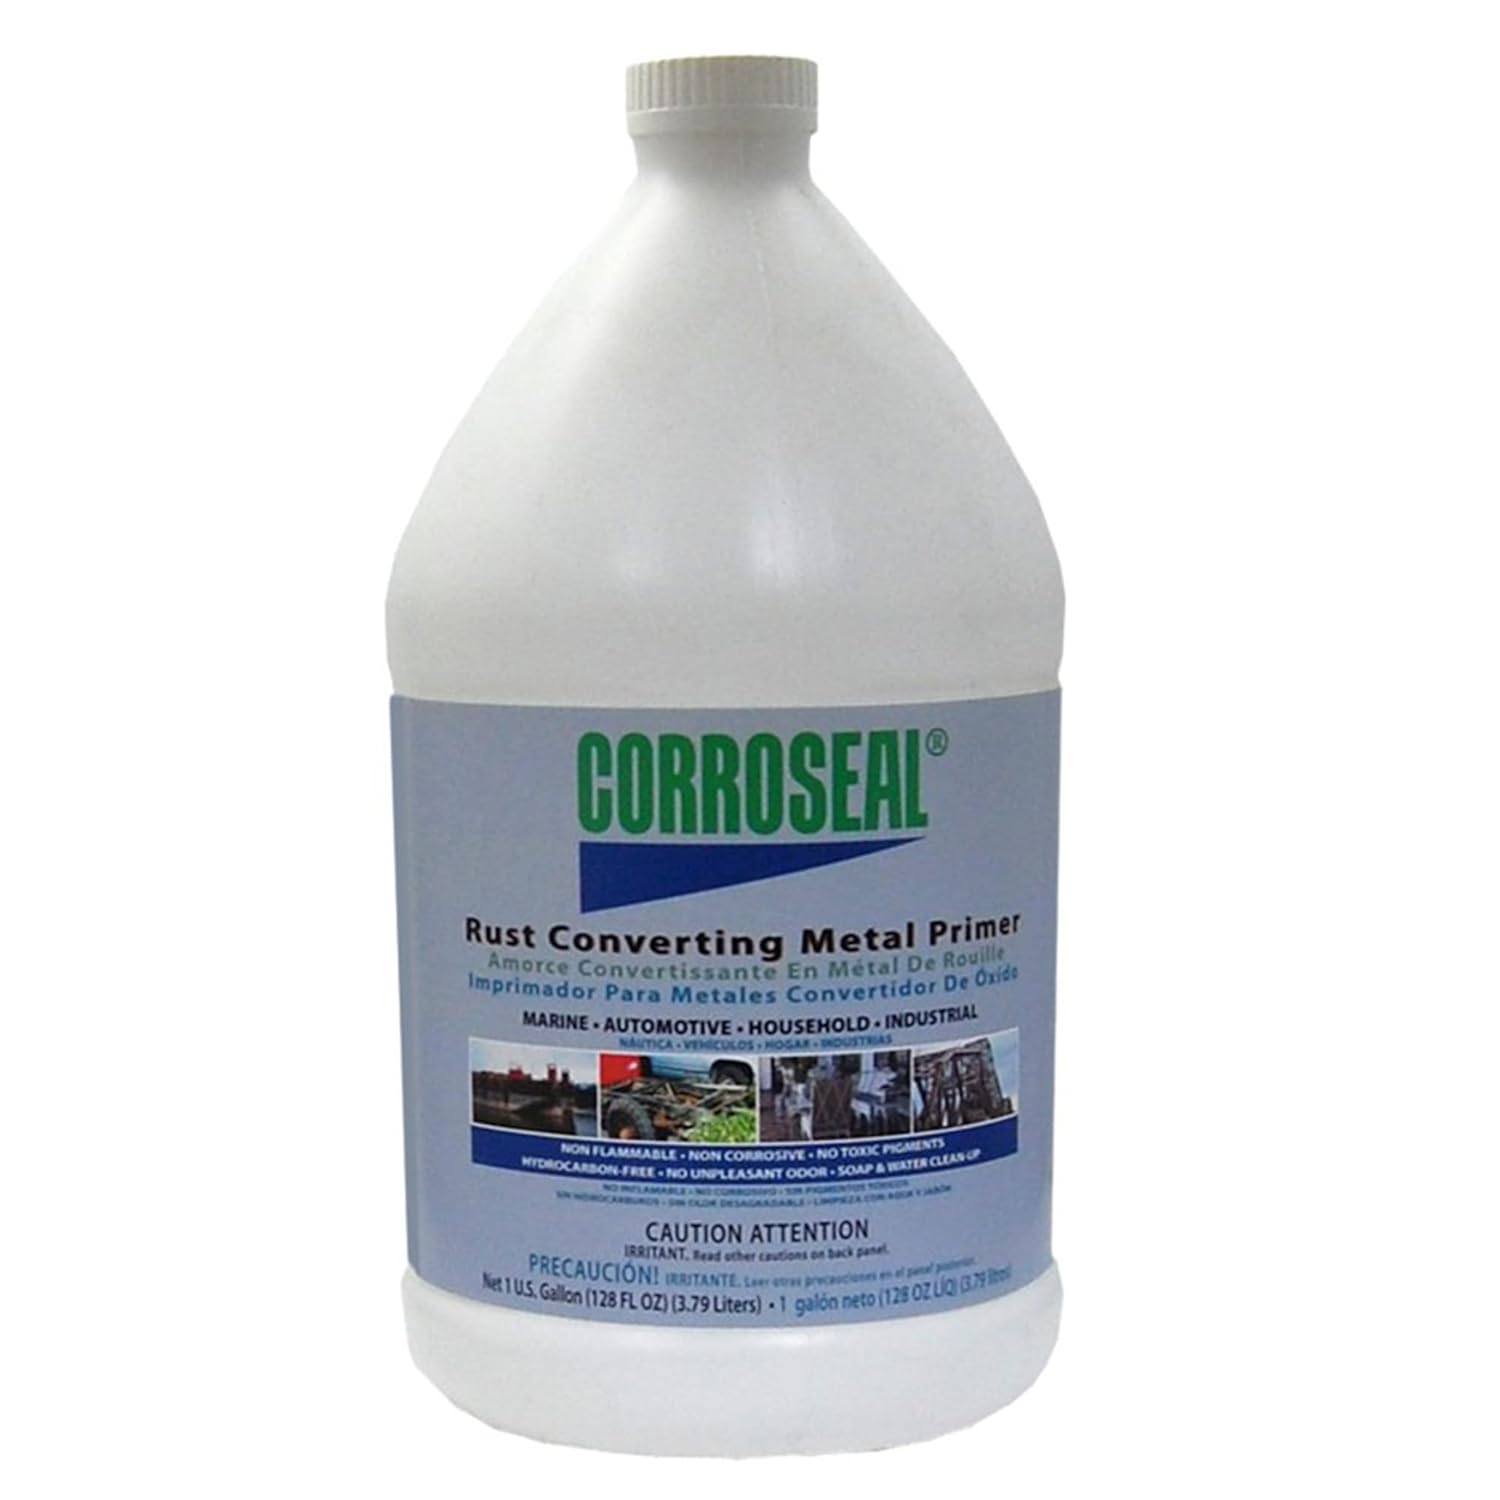
Corroseal Water-Based Rust Converter Metal Primer
Don’t Remove It — Convert It and Paint Over It
Sometimes removing rust entirely is either impossible or structurally unnecessary — on large structural I-beams, agricultural equipment, boat trailers, or heavily weathered outdoor fixtures. Corroseal takes an entirely different approach: rather than stripping the rust away, it chemically converts the existing iron oxide into magnetite — a highly stable, rock-hard black substance that simultaneously acts as a high-quality paint primer.
This milky white liquid paints on easily with a brush or roller and turns black as it chemically reacts with the rust. Once fully cured (usually 24 hours), paint directly over it. Corroseal is the trusted industry standard for brutal marine environments and is excellent for home repairs involving the rusted metal housing of external vents, or older prefabricated fireplace structures with rusted metal chases.
- Ultimate one-step process: converts rust and primes simultaneously.
- Water-based; easy soap-and-water cleanup before it cures.
- Saves countless hours of sanding and grinding labor.
- Trusted in marine environments for ship deck maintenance.
- Not for surfaces you want to leave as bare metal — always turns black.
- Requires a topcoat (oil-based or enamel) for UV protection.
- Surface must be wire-brushed to remove loose flaky scale first.
Jenolite Original Liquid Rust Remover
The Fast-Acting Liquid Acid for Heavy Fabrication
Jenolite is a legendary name in the UK and European market for no-nonsense heavy corrosion removal. Unlike the thick Rust-Oleum gel, the original Jenolite is a thin, highly penetrating liquid that seeps deep into microscopic pits and crevices of heavily textured rust that thicker gels may bridge over. It is ideal for mechanics and fabricators dealing with raw steel that needs to be cleaned quickly before welding or priming. It turns rust into a wipeable grey sludge in under 15 minutes and leaves a heavy phosphate coating ready to accept primer almost immediately. For rebuilding a steel wood stove, applying Jenolite to raw steel panels before high-heat paint ensures a permanent bond.
- Thin liquid penetrates deep crevices and seized threads better than gels.
- Extremely aggressive and fast on stubborn, aged rust.
- Leaves an excellent paint-ready phosphated surface.
- Well-suited for pre-weld preparation on raw steel.
- Thin liquid runs off vertical surfaces — best used on flat.
- Strong acid: strict safety precautions, ventilation, and PPE.
- Can flash rust quickly if not wiped and primed promptly.
Mechanical vs. Chemical Rust Removal: The Hybrid Approach
Throwing a severely corroded, crusty object directly into an expensive chemical bath is a waste of money and time. The most efficient approach is hybrid: mechanical force removes the bulk of the problem first, then chemical removers extract rust from the microscopic pores of the metal.
The Mechanical Arsenal
- Wire Brushes and Cup Wheels: Attached to an angle grinder or drill, a wire cup brush strips scale rust and old paint in seconds. Always wear a face shield — wire bristles snap off at high speeds and can penetrate skin.
- Flap Discs: An 80-grit flap disc on an angle grinder takes steel to a near-shiny finish on flat surfaces almost instantly. Appropriate when a small amount of base metal removal is acceptable.
- Needle Scalers: A pneumatic tool using vibrating metal needles to chisel away extreme rust scale on heavy structural steel. Used in shipyards and heavy industry.
- Sandblasting (Media Blasting): The ultimate mechanical removal. Blasting media under high pressure strips rust from every crevice. Requires investment in equipment, generates significant dust, and can warp thin sheet metal if not done carefully. For delicate surfaces like vintage bodywork, soda blasting (using sodium bicarbonate media) is a gentler alternative.
- SandFlex Abrasive Blocks: A flexible abrasive block useful for hand-cleaning light rust on flat or gently curved surfaces. Low investment, no power tools required, useful for touch-up and detail work.
Once mechanical work reduces rust to a fine surface layer or residual pitting, apply your chosen chemical remover to finish cleanly and preserve the remaining healthy metal.
PPE Guide: What Protection Each Method Actually Requires
One of the most important — and most poorly communicated — aspects of rust removal is the significant variation in safety requirements between product categories. Using Evapo-Rust barehanded in your kitchen sink and using Jenolite in the same way are radically different risk profiles.
| Method / Product | Gloves | Eye Protection | Respiratory | Ventilation | Skin Contact Risk |
|---|---|---|---|---|---|
| Chelating Soaks (Evapo-Rust, WD-40) | Optional | Optional | None needed | Normal indoor ventilation OK | Non-irritating; wash hands after |
| Naval Jelly / Phosphoric Gel | Nitrile gloves | Safety glasses | Fresh air/ventilation | Outdoors or ventilated space | Mild irritant; flush with water |
| Liquid Phosphoric Acid (Jenolite) | Thick nitrile/neoprene | Chemical goggles | Respirator if enclosed | Outdoors or strong ventilation | Corrosive at concentration; flush immediately |
| Muriatic / HCl Acid | Thick chemical-resistant gloves | Chemical face shield | Full respirator (acid vapor) | Outdoors ONLY | Severely corrosive; causes serious burns |
| Rust Converters (Corroseal) | Light nitrile gloves | Safety glasses | Low VOC; normal ventilation | Normal ventilation OK | Mild irritant; wash with soap |
| Electrolysis | Optional (water-based) | Optional | None (chemicals) | Outdoor or ventilated (H₂ gas) | Wash soda solution — mild irritant |
| Laser Removal | Work gloves | Laser safety glasses (rated wavelength) | Fume extraction | Fume extraction required | Vaporized rust particles — respiratory risk |
The Hydrochloric Acid Warning Every DIYer Must Read
⛔ Critical: Why Muriatic / Hydrochloric Acid Should Never Be Used for Tool Restoration
Muriatic acid (hydrochloric acid / HCl) is extremely fast and effective at removing rust — but it carries a permanent hidden consequence that makes it inappropriate for most rust removal applications: chloride ion contamination.
When HCl reacts with rust and with the steel surface, chloride ions (Cl⁻) are chemically incorporated into the steel’s surface layer. These chloride ions act as a permanent electrochemical catalyst for future corrosion — they accelerate rust formation indefinitely, even after the acid has been neutralized and rinsed. No amount of neutralizing with baking soda or rinsing with water will remove these ions from the metal surface once they have bonded. The only way to remove chloride contamination from steel is through electrolysis, which is the very method you could have used to remove the rust in the first place without creating the contamination.
For most DIY rust removal applications — tools, automotive parts, garden hardware, fireplace components — muriatic acid is the wrong choice. Use a chelating soak, phosphoric acid, citric acid, or electrolysis instead.
Use Case Guide: The Right Method for Your Specific Project
Matching the rust removal method to the specific type of project dramatically improves results and avoids costly mistakes.
🔧 Antique Hand Tools
Evapo-Rust or electrolysis. Preserves maker’s marks, patina, and precise dimensions. Never use a wire wheel or sandblasting — destroys flat surfaces and markings permanently.
🚗 Automotive Frames and Rails
Wire wheel to remove scale, then Corroseal converter on inaccessible frame areas. Use Rust-Oleum gel or naval jelly on exposed areas where bare metal restoration is desired before priming with a zinc-rich primer.
🚗 Automotive Body Panels
Rust-Oleum gel or naval jelly to dissolve rust completely, followed by automotive body primer. For very light surface rust, a DA orbital with fine scotch-brite pad and Evapo-Rust pre-soak.
🍳 Cast Iron Cookware
Soak in 50/50 white vinegar and water for 1–2 hours maximum (not overnight — long soaks begin pitting the iron). Scrub with steel wool, wash with dish soap, dry on the stovetop over heat, and immediately re-season with cooking oil. Never use commercial rust removers on food-contact surfaces.
🔩 Seized Bolts and Fasteners
WD-40 Specialist Soak or electrolysis for disassembled fasteners. For in-situ seized bolts, penetrating oil (PB Blaster, Kroil) + heat from a propane torch is typically more effective than rust removers for breaking the rust lock.
🌿 Garden Tools
Evapo-Rust soak for small hand tools. Wire brush + Corroseal converter for long-handled tools with extensive rust. Annual re-oiling with linseed oil on handles and machine oil on metal surfaces prevents recurrence.
🚲 Bicycle Chains and Components
Evapo-Rust or citric acid soak for chain rings and small components. For chrome steel components, use only chelating agents — avoid acids that can dull or etch chrome plating.
🏠 Outdoor Furniture (Wrought Iron)
Wire brush to remove loose scale, then naval jelly or Rust-Oleum gel applied with a brush. Rinse, prime with a zinc-rich primer, and topcoat with outdoor enamel. Repeat every 3–5 years depending on climate.
🔫 Firearms
Evapo-Rust or electrolysis for blued steel — both preserve the original bluing finish better than acids. Avoid any chloride-based product. After cleaning, immediately apply gun oil or CLP and re-blue any areas that need it.
🏗️ Structural Steel (Beams, Trailers)
Wire wheel to remove scale, then Corroseal converter over all remaining rust. Topcoat with epoxy primer and chassis enamel. For very large structures, professional media blasting followed by zinc spray is the most durable system.
🔥 Chimney Hardware and Dampers
Evapo-Rust or WD-40 Specialist soak for disassembled cast iron damper components. For in-place chimney cap flashing, use Rust-Oleum gel or naval jelly, then prime with a rust-inhibiting primer and coat with high-heat paint. See our guide on chimney brick paint for surrounding area treatment.
🚢 Marine / Boat Trailers
Corroseal is the traditional choice for trailers repeatedly exposed to saltwater corrosion. Salt air creates a particularly aggressive rust environment — the marine-grade Corroseal formulation is specifically designed for this. Always follow with a topcoat rated for marine environments.
Restoring Antique Hand Tools: A Complete Protocol
Vintage hand planes, chisels, and axes are often made of high-carbon steel that holds an edge far better than modern cheap tools. The complete restoration protocol for these deserves specific attention because standard approaches can permanently damage valuable tools.
- Disassemble the tool completely. Remove handles, wedges, chip breakers, and any non-metal components.
- Mechanical pre-cleaning: Use a wooden scraper or plastic scraper (never metal) to remove any loose scale without scratching.
- Soak in Evapo-Rust or an electrolysis tank. For electrolysis, the “line of sight” limitation means you may need to reposition the part. For Evapo-Rust, check every few hours and remove when the rust is gone — do not over-soak to the point of darkening the carbon steel unnecessarily.
- Remove from soak, scrub lightly with a Scotch-Brite pad under running water, and dry immediately with compressed air or a heat gun.
- Immediately apply a light coat of machine oil, camellia oil, or Renaissance Wax to the metal surfaces before any flash rust can form.
- Flatten and sharpen the blade as appropriate, then reassemble.
Automotive Restoration: Frames and Panels
When dealing with a car frame, immersion is impossible. The correct approach combines mechanical removal (wire wheel on an angle grinder to remove scale) followed by Corroseal converter on the frame rails to encapsulate any remaining rust, topped with a tough chassis enamel. For exterior body panels where a smooth finish is required, use Rust-Oleum Gel to dissolve the rust completely before applying automotive primer. POR-15 — a three-part system involving metal prep, POR-15 coating, and topcoat — is widely regarded among car restoration communities as the most durable available system for frame and floor pan restoration, though its application requirements (strict surface preparation, UV-sensitivity of the base coat) require careful following of instructions.
Cast Iron Skillets and Cookware
Never use commercial rust removers, naval jelly, or industrial acids on items that will contact food. For cast iron cookware: soak in 50/50 white vinegar and water for 1–2 hours, not longer — extended soaking begins to pit the iron. Scrub with steel wool, wash with dish soap, dry immediately on a stovetop burner, and rub with cooking oil while still warm to re-season. Repeat if necessary.
Flash Rust: The Silent Saboteur of Rust Removal
Flash rust is one of the most frustrating problems in metal restoration. You complete a thorough, successful rust removal process — the metal looks clean, bright, and perfect. Then you turn your back for 20 minutes, and orange rust bloom appears across the freshly cleaned surface. What happened?
Flash rust is the extremely rapid formation of a very thin layer of iron oxide on bare, clean steel when it is exposed to atmospheric moisture. Clean, bare steel is actually more prone to rapid surface oxidation than the same steel with a light protective oil film — the oil provides a moisture barrier that slows the electrochemical reaction. The rate of flash rust formation depends on relative humidity, temperature, and whether the surface retains any traces of the chemical used to remove the original rust.
How to Prevent Flash Rust
- Dry immediately after rinsing. Use compressed air, a heat gun, or an oven (for small parts) to remove all surface moisture instantly after the final rinse.
- Apply protectant within minutes of drying. The window between “clean dry metal” and “flash rust appearing” can be as little as 15–30 minutes in humid conditions. Have your oil, wax, primer, or paint ready before you begin the final rinse.
- Consider a flash rust inhibitor additive. Several products (like Metal Prep by Eastwood or Ospho) can be wiped onto the clean surface as a final step before priming — they leave a light phosphate coating that significantly extends the window before flash rust begins.
- Warm, dry working conditions help. Low humidity and warm temperatures substantially reduce flash rust risk. Avoid working on metal restoration during high-humidity summer days unless your workspace is climate-controlled.
Products that leave a phosphate residue — phosphoric acid gels, naval jelly, and Ospho — inherently provide better flash rust protection than chelating soaks, because the phosphate coating acts as a temporary inhibitor. Chelated parts (Evapo-Rust, electrolysis) should be primed or oiled especially quickly.
The Complete Step-by-Step Rust Removal Process
Degrease Thoroughly (Step Zero — Most Skipped)
Oil, grease, and dirt act as a chemical barrier, preventing rust removers from making contact with the iron oxide they need to treat. A part that looks rusty may have a film of oil, handling contamination, or old paint residue over the rust that will block chemical penetration entirely. Clean the part meticulously with a degreaser (Dawn dish soap works well for lightly contaminated parts; acetone or brake cleaner for oily automotive parts). Rinse and dry before applying any rust treatment.
Mechanical Triage
Use a wire brush, steel wool, scraper, or power tool to knock off loose “scale” rust — the thick, flaking, layered material that sits on top of tighter corrosion. You are not trying to reach bare metal at this stage; you are just removing material that chemical products cannot penetrate efficiently. Do not waste expensive chemical product on flakes that a stiff brush removes in seconds.
Choose and Apply the Chemistry
For soaks: fully submerge the part, agitate to release trapped air bubbles from blind holes and recesses. For gels and liquids: apply a thick, generous coat. For gel products especially — do not let them dry; if a gel product begins to dry on the surface before you are ready to rinse, mist it lightly with water to reactivate. A dried gel has stopped working and becomes difficult to remove cleanly.
The Waiting Game
Patience is the most important tool you have. Chelating agents need 1–24 hours depending on rust severity. Phosphoric acid gels typically need 10–30 minutes. Electrolysis takes several hours to overnight for heavy rust. Check progress periodically. Do not rush by adding more product — give the product its full working time.
Rinse and Neutralize
For acid-based products (phosphoric, gels, naval jelly): rinse thoroughly with clean water, then rinse with a baking soda and water solution (1 tablespoon per cup of water) to neutralize any remaining acid, then rinse with clean water again. For chelating soaks: clean water rinse only — no neutralization needed. For converters: no rinse at all — let cure undisturbed for 24 hours.
Dry and Protect Immediately (The Most Critical Step)
Dry the part instantly with compressed air or a heat gun. Have your protective coating ready before this step begins. Apply oil, wax, primer, or paint within minutes of drying. Bare unprotected steel will flash rust in as little as 15–30 minutes in humid conditions. This step is where most DIY rust removal projects fail — the chemical work was perfect, but the protection step was delayed.
Post-Removal: Sealing the Metal and Long-Term Prevention
Removing rust is only half the battle. Preventing its immediate return is equally important, and preventing long-term recurrence requires choosing the right protection system for the application.
Protective Coatings by Application
- Zinc-Rich Primers (Cold Galvanizing): For outdoor equipment, applying a primer with high zinc content creates a sacrificial anode effect — the environment attacks the zinc before attacking the steel beneath it. The most durable primer system for structural steel intended for long-term outdoor exposure.
- Oil and Wax (Hand Tools): For hand tools, table saw beds, and unpainted parts, applying machine oil (3-IN-ONE), camellia oil, or hard paste wax (Renaissance Wax) creates a moisture barrier without altering the look of the metal. Apply thin coats, wipe off excess, and reapply seasonally.
- POR-15 System (Automotive): A three-part system — Metal Prep (phosphoric acid etching and conditioning), POR-15 base coat (extremely hard, direct-to-rust topcoat), and a UV-resistant topcoat — is widely regarded as the gold standard for automotive floor pans, frame rails, and undercarriage restoration. The POR-15 base coat is sensitive to UV and must be topcoated.
- Fluid Film (Undercarriage): A lanolin-based penetrating coating used extensively in northern states on vehicles exposed to road salt. Applied to undercarriage, door sills, and cavities, it penetrates into metal pores and provides excellent long-term corrosion protection even in salt environments.
- Clear Coats: For the “bare metal” industrial look on furniture or motorcycle tanks, a specialized 2K clear coat designed to adhere to bare steel provides UV-resistant protection without altering appearance.
- VCI (Vapor Corrosion Inhibitor) Packaging: For tools and parts in storage, VCI poly bags or VCI paper slowly releases vapor-phase corrosion inhibitor molecules that deposit on metal surfaces and block the oxygen and moisture needed for rust formation. Excellent for long-term storage of valuable tools or seasonal equipment without oiling every surface.
- Climate Control: In humid garage environments, condensation is the enemy of all your metal equipment. A dedicated garage dehumidifier is one of the highest-impact investments you can make to protect all your tools from rust. See our guide on winter home comfort techniques for broader moisture management strategies.
Rust Stain Removers: A Completely Different Category
This is a frequently confused distinction that is worth addressing clearly: there are two entirely different product categories that share the “rust remover” name but serve completely different purposes.
- Metal rust removers (the primary subject of this guide) remove rust from metal — the iron oxide that forms on iron and steel surfaces.
- Rust stain removers remove the orange/brown staining left by rust on surfaces like concrete driveways, tile grout, fabric, sinks, toilets, and wood decks — surfaces that are not themselves rusting, but have been discolored by contact with rust or iron-rich water.
Rust Stain Products by Surface
- Concrete, stone, and masonry rust stains (from irrigation water, metal furniture legs, or corroded reinforcing bar): Oxalic acid-based products are most effective. Bar Keepers Friend (which contains oxalic acid as its active ingredient) works well on light to moderate staining. Specific concrete rust removers like CLR or ZUD use similar oxalic or glycolic acid chemistry. Research from the U.S. General Services Administration has validated sodium hydrosulfite (found in products like Iron Out) as effective for rust stains on concrete and masonry.
- Fabric and laundry rust stains: Never use any metal rust remover on fabric. Use a product specifically formulated for fabric (Iron Out Spray or a similar product). The active ingredient sodium hydrosulfite reduces the iron compounds without damaging fabric fibers. Apply, wait 5–30 minutes, then launder normally.
- Tile, grout, and porcelain (sinks, toilets, bathtubs): CLR (Calcium Lime Rust) or Bar Keepers Friend paste are the standard choices. Both use mild acid chemistry appropriate for ceramic and porcelain surfaces.
- Wood deck rust stains (from metal fasteners or furniture): Oxalic acid wood brightener — available as a deck cleaning powder or solution — removes rust staining while simultaneously brightening weathered wood fibers. Apply, scrub, and rinse.
Budget DIY Options: Citric Acid, Bar Keepers Friend, and More
Commercial rust removers like Evapo-Rust deliver excellent results, but their per-gallon cost can add up quickly for large batches. Several budget-friendly alternatives work on the same chemical principles and are highly effective for light to moderate rust when cost is a primary concern.
Citric Acid Powder Soak
Citric acid (the acid found naturally in citrus fruits) is an excellent, food-safe, biodegradable rust remover available as an inexpensive powder from homebrewing supply stores, health food stores, and online retailers. A standard working solution is 1–2 tablespoons per quart of hot water. Submerge the rusty part and allow to soak for 4–12 hours depending on rust severity. The acid dissolves iron oxide and leaves a slightly matte surface. Important: rinse very thoroughly after citric acid treatment and apply protection immediately — citric acid leaves no rust-inhibiting residue and flash rust risk is higher than with phosphoric acid treatments.
Bar Keepers Friend (Oxalic Acid)
Bar Keepers Friend powder contains oxalic acid as its primary active ingredient and is an effective light-duty rust remover for hand tools, kitchen knives, and small hardware. Make a thick paste with water, apply to the rusted surface, let sit for 5–15 minutes, and scrub with a Scotch-Brite pad. Rinse and dry immediately. Not suitable for heavy corrosion, but excellent for flash rust, surface discoloration, and light oxidation on stainless steel kitchen tools where chelating soaks would be overkill.
White Vinegar Soak
Standard household white vinegar contains approximately 5% acetic acid — enough to slowly dissolve light iron oxide when given sufficient time. For light surface rust on small items, submerge in undiluted white vinegar for 12–24 hours, then scrub with steel wool and rinse immediately and thoroughly. The primary limitation is acetic acid’s weakness — it is ineffective for moderate to heavy rust without many repeat treatments — and the absence of any rust-inhibiting residue after treatment. Dry and oil the part the moment it exits the rinse. Vinegar is a valid budget option for refreshing slightly rusty garden tools or cast iron cookware between seasons.
💡 Cost Comparison: Budget vs. Commercial Methods
Citric acid powder runs approximately $3–6 per pound, and one pound makes roughly 30+ gallons of working solution. Evapo-Rust runs approximately $15–20 per gallon (reusable for multiple baths). White vinegar is $3–4 per gallon (single use). For occasional small projects, any of these work well. For high-volume or frequent rust removal, the reusability of Evapo-Rust (which can treat many pounds of rusty metal before exhaustion) makes its per-project cost competitive with DIY acids despite the higher upfront price.
Frequently Asked Questions (FAQ)
Yes — standard white vinegar contains roughly 5% acetic acid, which can slowly dissolve iron oxide. It is a budget option for very light surface rust on small items, requiring 12–24 hours of soaking and scrubbing afterward. It is inefficient for deep structural corrosion compared to commercial products, and the absence of any inhibiting residue means flash rust risk is high immediately after treatment.
Exercise extreme caution. Aggressive acids like muriatic or hydrochloric acid will violently attack and permanently discolor stainless steel, and will literally dissolve aluminum. Oxalic acid products and chelating agents (Evapo-Rust) are generally safe on stainless, but always verify the product label. Bar Keepers Friend is specifically marketed as safe for stainless steel. Never use any acid product on aluminum without checking the manufacturer’s specifications first.
A rust remover (chelating agent or acid) strips the iron oxide entirely away, leaving raw, bare metal that must be immediately protected. A rust converter (tannic acid + polymer formula) chemically transforms the existing rust into a stable, hard black compound (iron tannate) that halts the corrosion process and serves as a primer. Converters save labor but are only appropriate for surfaces that will be painted — they leave a black finish that cannot be buffed to bare metal.
They are better for different situations. Evapo-Rust is easier to set up, requires no electrical equipment, and is excellent for small to medium parts soaked in a bucket. Electrolysis has no chemical cost at scale (washing soda is extremely cheap), can be performed in any size tank you build, and theoretically returns some material by converting rust back to iron rather than dissolving it. For large, complex machine castings where size and cost make Evapo-Rust impractical, electrolysis is often the better choice. For convenience on small parts, Evapo-Rust wins.
Muriatic (hydrochloric) acid works fast, but permanently deposits chloride ions into the steel surface during the reaction. These ions cannot be fully removed by rinsing or neutralizing — they act as a permanent electrochemical catalyst for future corrosion, meaning your metal will rust faster after HCl treatment than before. For most DIY applications, phosphoric acid, citric acid, chelating soaks, or electrolysis provide superior long-term results without chloride contamination.
Evapo-Rust is non-toxic and biodegradable, and the solution itself is generally safe to pour down the drain in most municipalities. However, the liquid now contains iron, and potentially grease, oil, and trace heavy metals from the parts you cleaned. Check your local environmental regulations regarding the disposal of liquids containing heavy metals or automotive contamination before disposing down a drain or into a storm system.
A combination of methods provides the most comprehensive protection: apply a thin coat of machine oil or camellia oil to all metal surfaces before storage; store in a climate-controlled space or use a garage dehumidifier to keep humidity below 50%; use VCI (Vapor Corrosion Inhibitor) poly bags or drawer liners for long-term storage of valuable hand tools; and for workshop tool surfaces (table saw beds, plane soles, chisels), apply a paste wax (Renaissance Wax, Briwax) and buff to a thin protective film.
Final Verdict: Reclaiming Your Metal
Restoring metal is one of the most satisfying DIY transformations you can make — from a frozen, orange mess to gleaming, functional steel feels genuinely remarkable. The right product makes all the difference.
For most home mechanics, tool restorers, and homeowners, Evapo-Rust is the undisputed champion. Its safety profile, reusability, and selective chemistry that preserves healthy base metal make it the best rust remover for hand tools, delicate car parts, and valuable antiques. For serious enthusiasts with large batches of parts, electrolysis offers comparable quality at near-zero chemical cost.
For immovable vertical surfaces — wrought iron fencing, chimney cap flashing, gate hardware — the clingy nature of Rust-Oleum Gel or naval jelly is exactly the right tool. For structural steel you plan to paint, Corroseal converter is the labor-saving choice that converts rust in place rather than removing it. And for budget-conscious DIYers with light rust on small items, a citric acid powder soak delivers solid results at a fraction of the cost of commercial products.
Whatever method you choose, remember the golden rule: the job isn’t finished when the rust is gone. Seal that fresh metal the moment it is dry — because the same chemistry that enabled you to strip the rust is just waiting to start the process again.
Ready to Start Your Restoration Project?
Stop struggling with wire brushes and sandpaper alone. Browse the top-rated rust removal solutions and let modern chemistry do the heavy lifting.
Shop All Top Rust Removers on Amazon