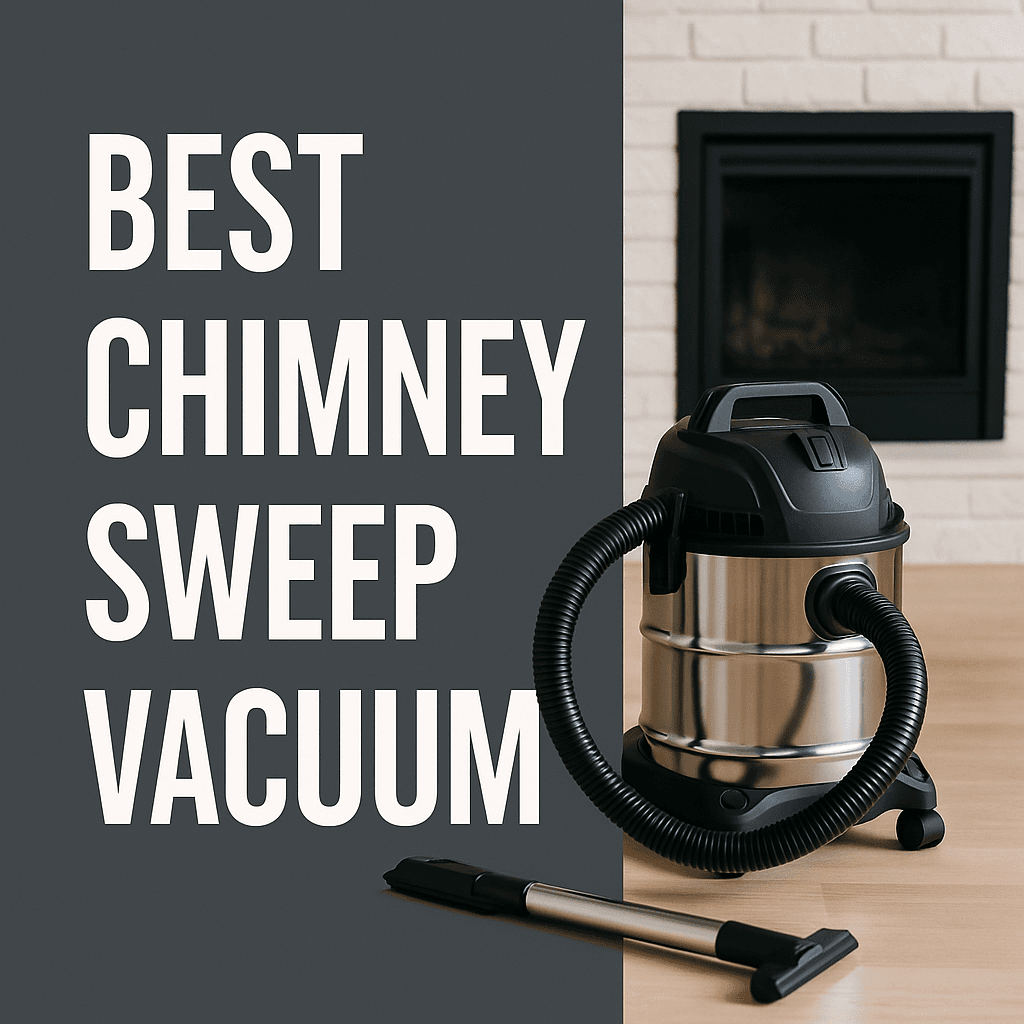
The Ultimate Guide to Choosing the Best Chimney Brush for Your Stainless Steel Liner
A clean chimney is a safe chimney. For homeowners with a modern stainless steel chimney liner, regular cleaning is not just a suggestion—it’s a critical maintenance task that prevents dangerous creosote buildup and ensures the longevity of your flue. However, the unique properties of stainless steel liners demand a specific type of cleaning tool. Using the wrong brush can lead to scratches, corrosion, and ultimately, a compromised chimney system that poses a significant fire hazard.
This in-depth guide is designed to navigate you through the process of selecting the perfect chimney brush for your stainless steel liner. We’ll delve into the nuances of bristle types, sizing, and cleaning techniques. Furthermore, we’ll recommend top-rated products available on Amazon, complete with detailed reviews to help you make the best choice for your home.
Understanding Your Chimney: Anatomy of a Stainless Steel Liner
Before you can properly select a brush, it is crucial to understand exactly what a stainless steel liner is and why it functions differently than a traditional clay tile masonry flue. When older masonry chimneys deteriorate, or when a new, high-efficiency wood stove is installed, building codes often require the installation of a stainless steel liner.
These liners serve three primary purposes:
- Protecting the masonry: Flue gases are highly acidic. The liner prevents these gases from eating away at the mortar joints of the brick chimney from the inside out.
- Providing proper draft: Modern stoves require precisely sized flues to draft correctly. A metal liner reduces the volume of an oversized masonry chimney, ensuring smoke is pulled up and out efficiently.
- Containing chimney fires: In the catastrophic event of a flue fire, a properly installed, insulated stainless steel liner is designed to contain the immense heat (often exceeding 2000°F) and prevent the fire from spreading to the combustible framework of your home.
Rigid vs. Flexible Stainless Steel Liners
Stainless steel liners generally come in two forms, which can dictate the type of brush and rod system you choose:
- Rigid Liners: These come in solid, straight sections that are riveted or screwed together. They are typically used in straight chimneys with no offsets. Because they have a perfectly smooth interior, they are generally easier to clean and draft very efficiently. A standard stiff rod and brush combination works perfectly here.
- Flexible Liners (Corrugated): Often referred to as “flex liners,” these are manufactured from a continuous strip of stainless steel that is crimped and coiled. They are necessary for chimneys that have bends, offsets, or size irregularities. The corrugated interior of a flex liner provides thousands of tiny ridges where creosote can hide. Cleaning a flex liner requires a brush with flexible bristles that can reach into these corrugations without getting stuck or tearing the thin metal. Rotary whips are exceptionally effective for flex liners.
The Enemy: Understanding the 3 Stages of Creosote
To choose the right brush, you must understand what you are trying to remove. When wood burns, it releases smoke, water vapor, gases, and unburned wood particles. As these byproducts exit the fireplace and hit the cooler environment of the chimney liner, condensation occurs. This resulting residue is called creosote.
Creosote is highly combustible, and if allowed to build up in sufficient quantities, it can ignite. However, not all creosote is the same. It develops in three distinct stages, each requiring a different approach to cleaning:
Stage 1: Flaky Soot
This is the most common and easiest type of creosote to clean. It has a high soot content and appears as a velvet-like, flaky, or powdery black dust lining the flue. Stage 1 creosote brushes away very easily with standard polypropylene or nylon brushes. If you have good burning habits (using dry, seasoned wood and ensuring a hot, oxygen-rich fire), this is primarily what you will find in your liner.
Stage 2: Crunchy, Tarlike Flakes
If you restrict the air supply to your fire (smoldering the fire overnight) or burn slightly unseasoned wood, you may develop Stage 2 creosote. This type is crustier, resembling shiny black cornflakes. It is harder to remove than Stage 1. A stiff polypropylene brush or a rotary cleaning whip is highly effective at breaking up and sweeping out Stage 2 creosote. Wire brushes *could* remove it easily, but again, they must never be used on a stainless steel liner.
Stage 3: Glaze (The Danger Zone)
This is the most dangerous and difficult form of creosote. Stage 3 creosote looks like hard, shiny, black tar poured down the inside of your chimney. It is incredibly dense and highly concentrated fuel. No standard chimney brush—polypropylene, nylon, or otherwise—will remove Stage 3 glazed creosote. Attempting to force a brush through a heavily glazed liner can easily damage the metal or result in the brush getting permanently stuck. If you encounter Stage 3 creosote, you must hire a professional chimney sweep who will use specialized chemical creosote modifiers and industrial rotary chains to break down the glaze.
Why Your Stainless Steel Liner Needs a Special Brush
Traditional clay tile flues have been cleaned for centuries using stiff wire brushes. However, the introduction of the stainless steel liner changed the rules of chimney sweeping. Here is exactly why you need to be particular about your choice of brush:
- Scratching and Galvanic Corrosion: The primary reason to avoid wire brushes (especially carbon steel wire brushes) on a stainless steel liner is the risk of scratching the inner surface. When a carbon steel bristle scratches stainless steel, it can leave behind microscopic iron particles. These particles will rapidly rust in the damp environment of a chimney, leading to a phenomenon known as galvanic corrosion. This will eventually eat holes straight through your expensive liner.
- Warranty Void: Most, if not all, manufacturers of stainless steel chimney liners (such as DuraVent, Selkirk, or Rockford) will immediately void the warranty if a wire brush is used for cleaning. This is a clear indicator from the engineers that the potential for damage is guaranteed.
- Creosote Adhesion: Even if rusting wasn’t an issue, scratches create a rougher surface texture on the metal. Creosote adheres much faster and more stubbornly to a rough surface than a smooth one, meaning you will have to clean your chimney more frequently in the future.
The solution is absolute: You must use a brush with softer, synthetic bristles. This is where polypropylene and nylon brushes come into play.
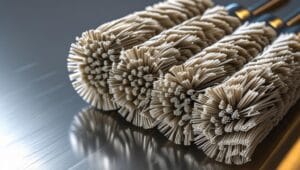
Polypropylene vs. Nylon: Which Bristle is Best?
When shopping for a chimney brush for your stainless steel liner, you’ll primarily encounter two types of synthetic bristles: polypropylene and nylon. Both are excellent choices, but there are subtle differences in their application:
- Polypropylene Bristles (Poly Brushes): These are the most common and widely recommended bristles for stainless steel liners. They are manufactured to be stiff enough to aggressively scrape away soot and Stage 1/Stage 2 creosote buildup without scratching the steel wall. Polypropylene is also highly resistant to the acidic, corrosive nature of creosote and will not degrade easily. They are excellent for traditional push-and-pull rod sweeping.
- Nylon Bristles: Nylon bristles are generally softer and more flexible than polypropylene. While they can be used in traditional push brushes, they truly excel in rotary cleaning systems (chimney whips). Because nylon is incredibly resilient, it can withstand the high-speed centrifugal force of being spun by a power drill without snapping. They are also superior for navigating tight 45-degree or 90-degree bends in a flexible liner without getting wedged.
Getting the Size Right: A Crucial Step
Choosing the correct brush size and shape is just as important as selecting the right bristle material. An improperly sized brush is not just inefficient; it can be a massive headache.
Matching Shape to Your Flue
Stainless steel liners are almost exclusively round or oval. You must buy a brush that matches the shape of your liner. Do not buy a square brush for a round liner; the corners will dig in, and the flat sides will fail to clean the walls.
Matching Diameter
The golden rule of chimney sweeping is to select a brush that is the exact same diameter as the *inside* of your stainless steel liner. For example, if you have a standard 6-inch diameter liner for a wood stove, you must purchase a 6-inch round poly brush.
- If the brush is too small: It will simply slide past the creosote without applying the friction necessary to scrape the walls clean.
- If the brush is too large: A poly brush that is oversized will be incredibly difficult to push down the flue. In extreme cases, a brush that is 2 inches larger than the flue can become permanently stuck, requiring you to dismantle the chimney or call a professional to retrieve it.
Pro Tip: To determine the exact size of your liner, check the manufacturer’s documentation for your wood stove/insert, look for a metal data tag attached to the liner at the top or bottom, or carefully measure the inside diameter with a tape measure.
Top-Rated Chimney Brushes for Stainless Steel Liners on Amazon
We’ve scoured Amazon to find the best chimney cleaning solutions for your stainless steel liner, focusing on products with excellent user reviews, high-quality materials, and a proven track record of performance.
1. Best Overall: Seal-Tite 6-Inch Round Poly Chimney Brush

For a reliable and straightforward cleaning experience, the Seal-Tite 6-Inch Round Poly Chimney Brush is our top pick. This brush is specifically designed for insulated and non-insulated stainless steel liners and is a favorite among DIY homeowners for its effectiveness and durability.
Pros
- Durable polypropylene bristles resist acid
- Sturdy core for effective push-pull cleaning
- Will not scratch stainless steel warranties
- Compatible with standard 1/4-inch NPT rods
- Excellent value for the price
Cons
- Rods must be purchased separately
- May be too stiff for liners with severe sharp bends
2. Best Rotary Cleaning Kit: Gardus RCH205-B SootEater Rotary Chimney Cleaning System

If you’re looking for a more powerful and efficient cleaning method, the Gardus SootEater Rotary Chimney Cleaning System is an outstanding choice. This innovative system attaches to your cordless drill and uses spinning nylon whips to scrub your liner clean. Because it spins, it automatically expands to fit liners of multiple sizes (from 5 to 9 inches), eliminating the need for exact sizing.
Pros
- Cleans from the bottom up, keeping you off dangerous roofs
- Centrifugal force is highly effective at removing tough Stage 2 creosote
- Flexible rods navigate 45 and 90-degree bends with ease
- One size fits multiple liner diameters
- Includes multiple rod extensions (up to 18 feet)
Cons
- Requires you to own a cordless drill
- Nylon whip strings will eventually wear out and need replacing
3. Best All-in-One Budget Kit: Holikme 30 Feet Chimney Sweep Kit

For those who want everything they need in one package without breaking the bank, the Holikme 30 Feet Chimney Sweep Kit is an excellent value. This kit includes a durable nylon brush head, 30 feet of flexible and extendable rods, and drill adapters. It’s a comprehensive, budget-friendly solution for DIY chimney cleaning.
Pros
- Complete kit out of the box (brush and 30 feet of rods)
- Flexible rods are great for offsets and flex liners
- Easy button-lock assembly mechanism
- Can be used manually or with a drill
- Highly affordable
Cons
- Button-lock rods may feel less sturdy than premium screw-in fiberglass options
- Brush head may be less dense than standalone professional brushes
Essential Safety Gear for DIY Chimney Sweeping
Chimney sweeping is inherently dirty and comes with specific risks. Before you insert a brush into your flue, ensure you are wearing the appropriate personal protective equipment (PPE):
- N95 or P100 Respirator Mask: Creosote dust is toxic. Inhaling soot particles can cause severe respiratory irritation and long-term health issues. A standard cloth mask is insufficient; you need a proper particulate respirator.
- Safety Goggles: When scrubbing, soot will fall. If you are cleaning from the bottom up, safety glasses that seal around the eyes are mandatory to prevent eye injuries.
- Heavy-duty Gloves: Polypropylene bristles can be sharp, and the fiberglass rods can sometimes splinter. Wear thick leather or nitrile-coated work gloves.
- Roof Harness (If cleaning Top-Down): Falling from a roof is the leading cause of injury in DIY chimney maintenance. If you must get on the roof, invest in a proper safety harness anchored to a sturdy point. This is why bottom-up rotary systems have become so popular—they eliminate roof risk.
A Step-by-Step Guide to Safely Cleaning Your Stainless Steel Chimney Liner
Once you have selected the right brush and donned your safety gear, it’s time to tackle the cleaning. There are two primary methods: Top-Down and Bottom-Up.
Method 1: The Traditional Top-Down Clean
This method utilizes a standard poly brush and rigid fiberglass rods. It requires getting on the roof.
- Prepare the Firebox: Inside the house, remove any decorative logs or grates from your wood stove or fireplace insert. Spread a canvas drop cloth over the hearth.
- Seal the Opening: This is a critical step. Use heavy plastic sheeting and painter’s tape to completely seal the door of the stove or the opening of the fireplace. If you skip this, the downdraft will blow soot all over your living room furniture.
- Access the Roof: Safely place your ladder, secure your harness, and bring your brush and rods to the chimney crown.
- Remove the Chimney Cap: Use a screwdriver or wrench to unfasten the chimney cap/spark arrestor. Set it aside safely. Inspect the cap for blockages (like bird nests or heavy creosote).
- Begin Plunging: Attach the poly brush to your first rod. Insert the brush into the stainless steel liner. Plunge it up and down vigorously, scrubbing the top few feet of the liner.
- Add Rods and Continue: Once the first section is clean, screw on the next fiberglass rod. Push the brush further down, repeating the vigorous up-and-down scrubbing motion. Continue adding rods until you feel the brush hit the bottom of the stove or the smoke shelf.
- Retrieve and Clean Up: Slowly pull the brush back up, removing rods one at a time. Reinstall the chimney cap. Go inside, wait 15 minutes for the soot to settle behind the plastic sheeting, then carefully remove the plastic and use a shop-vac (preferably with a HEPA filter) to vacuum up the pile of creosote that has fallen into the firebox.
Method 2: The Bottom-Up Rotary Clean
This method uses a system like the Gardus SootEater and is generally safer as it keeps you off the roof.
- Prepare and Seal: Prepare the hearth as above. When taping the plastic sheeting over the fireplace opening, cut a small slit in the center of the plastic. This is where you will feed the rods through.
- Assemble the Whip: Attach the rotary whip head to the first flexible rod. Insert it through the slit in the plastic and up into the flue opening.
- Attach the Drill: Attach the other end of the rod to your cordless drill. (Do not use a corded drill, as the torque can be too high and snap the rods).
- Spin and Feed: Turn the drill on at a medium speed, spinning clockwise. The whip will rapidly scrub the walls. Slowly push the rod upward.
- Add Rods: Stop the drill. Disconnect the drill from the rod, screw on a new extension rod, reattach the drill, and continue spinning and feeding upward until you reach the chimney cap.
- Clean Up: Reverse the process, pulling the rods down while spinning. The creosote will fall neatly into the sealed firebox for vacuuming.
Troubleshooting common Chimney Sweeping Issues
Even with the best tools, things can occasionally go wrong. Here is how to handle common DIY sweeping mishaps:
What if the brush gets stuck?
If your poly brush becomes wedged tightly in the liner, do not panic and do not yank violently. Yanking can break the rods, leaving the brush stranded inside the flue.
First, try gently twisting the rod counter-clockwise (if it’s a push-button system; do not twist screw-together rods counter-clockwise or they will unscrew and detach!). Try pushing up slightly before pulling down. If it is hopelessly stuck, you may have hit an offset bend that is too tight for the rigid brush, or a thick patch of glazed creosote. At this point, you must call a certified chimney sweep. They have specialized retrieval tools and cameras to remove stuck brushes without destroying the stainless liner.
What if a rod breaks?
This is a common issue with cheap, aged fiberglass rods. If a rod snaps while the brush is halfway down the chimney, you are in a difficult situation. If you were cleaning from the top down, you might be able to go to the bottom (the firebox) and push a new set of rods up to push the broken section out the top. Again, if unsuccessful, a professional sweep is required.
Preventative Maintenance: How to Reduce Creosote Buildup
Cleaning your chimney is easier when there is less creosote to begin with. Your burning habits directly impact how quickly your stainless steel liner gets dirty.
| Habit | Impact on Chimney Liner | Recommendation |
|---|---|---|
| Wood Moisture Content | Burning wet or unseasoned wood (above 20% moisture) creates excessive steam. This cools the flue gases, causing rapid condensation and heavy, sticky creosote buildup. | Only burn split wood that has been seasoned for at least 6-12 months. Use a digital moisture meter to ensure wood is below 20% moisture before burning. |
| Fire Temperature | Smoldering fires (dampering the stove down low to burn overnight) produce heavy smoke and cool exhaust gases, leading to rapid Stage 2 and Stage 3 glaze buildup. | Burn smaller, hotter fires. Ensure the fire has plenty of oxygen to combust the smoke particles *before* they enter the chimney liner. |
| Wood Type (Hardwood vs Softwood) | Softwoods (pine, fir) burn fast and can create soot quickly if not burned hot. Hardwoods (oak, maple) burn longer and cleaner. | Focus on burning dense hardwoods, but remember: dry softwood is always better than wet hardwood. |
Chemical Cleaners: Do Creosote Sweeping Logs Work?
You have likely seen “Creosote Sweeping Logs” or chemical powders sold at hardware stores. It is important to understand their purpose. These products do not replace physical brushing.
Chemical modifiers work by releasing gases that bond to the creosote in your liner, drying it out and turning sticky Stage 2 or 3 creosote into brittle, flaky Stage 1 soot. They make the job of brushing much easier. If you suspect you have stubborn buildup, burn a sweeping log a few days *before* you plan to run your poly brush up the chimney.
The Importance of Regular Cleaning: A Professional’s Perspective
The Chimney Safety Institute of America (CSIA) mandates that chimneys, fireplaces, and vents be inspected annually and cleaned as needed. For modern wood-burning appliances connected to stainless steel liners, this often translates to a mandatory annual sweeping to remove flammable creosote and prevent catastrophic chimney fires. An annual inspection also allows you to check the structural integrity of the stainless steel, ensuring there are no hidden buckles, tears, or disconnected joints in the flue system.
Frequently Asked Questions (FAQs)
How often should I clean my stainless steel chimney liner?
This depends entirely on how much wood you burn and the quality of that wood. The standard rule of thumb is to inspect it annually and clean it if you have 1/8 inch or more of creosote buildup. For heavy users who heat their home primarily with wood all winter, cleaning halfway through the season (in January) and again at the end of the season is highly recommended.
Can I use a chimney cleaning log instead of a brush on my stainless steel liner?
No. Chimney cleaning logs are chemical modifiers. They help to reduce heavy creosote buildup by turning it into a more brittle, flaky substance that is easier to remove. However, the debris still remains in the chimney. They are not a substitute for mechanical cleaning with a brush. Think of them as a pre-treatment before you sweep.
What are the dangers of not cleaning my chimney liner?
The primary and most catastrophic danger is a chimney fire. Creosote is highly flammable fuel. If a spark ignites a thick layer of creosote, it can create a roaring fire inside the liner that sounds like a jet engine. While stainless steel liners are designed to contain high heat, prolonged chimney fires can warp the metal, destroy the insulation, and eventually spread to the combustible framing of your home. Additionally, a blocked chimney can lead to deadly carbon monoxide backing up into your living space.
Do I need to hire a professional or can I do it myself?
If you have a straight rigid liner, the proper safety equipment, and the right poly brush, DIY cleaning is highly achievable for a handy homeowner. However, you should hire a certified CSIA chimney sweep if: your roof is dangerously steep, you have a complex flexible liner with multiple bends, you suspect you have glazed Stage 3 creosote, or you have not had a professional video inspection of the liner’s structural integrity in several years.
Conclusion: A Clean Liner for a Safe and Cozy Home
Choosing the best chimney brush for your stainless steel liner is a crucial step in maintaining a safe, efficient, and warm home heating system. By strictly avoiding damaging wire brushes and opting instead for a properly sized polypropylene or nylon brush, you can effectively remove dangerous creosote without compromising the integrity or the warranty of your expensive liner.
The products recommended in this guide—whether you prefer a traditional push-and-pull poly brush or a modern, bottom-up rotary system—offer excellent performance and value. Couple these tools with good burning habits and a commitment to annual maintenance, and your fireplace or wood stove will provide safe, reliable heat for decades to come.
Remember that while DIY chimney cleaning is an excellent way to save money and understand your home’s mechanics, it is essential to prioritize your physical safety. If you are ever uncomfortable working on a ladder, dealing with toxic soot, or if you encounter stubborn blockages in the flue, do not hesitate to call a certified professional chimney sweep. The peace of mind that comes with a professionally validated and cleaned chimney is well worth the investment.