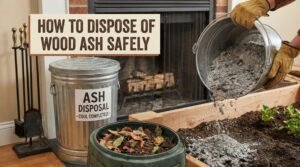
How to Dispose of Wood Ash Safely
Don’t Let Embers Catch You Off Guard: The Complete Guide to Ash Management
Every winter, fire departments across the country respond to house fires caused by a seemingly innocent culprit: a bucket of “cold” ashes sitting on a back porch. It is a tragedy that is entirely preventable, yet it happens with alarming frequency.
When you enjoy the warmth of your fireplace or wood stove, you are left with a byproduct that commands respect. Wood ash is an excellent insulator. This means that while the gray powder on top might feel cool to the touch, deep within the pile, active embers can remain hot enough to re-ignite for days—sometimes even weeks—after the fire has gone out.
Disposing of wood ash isn’t just about cleanliness; it is a critical home safety protocol. In this comprehensive guide, we will walk you through exactly how to handle, store, and dispose of ash without risking your property. We will also explore the surprisingly wide range of beneficial uses for ash, so nothing from your hearth has to go to waste.
The Golden Rules: Step-by-Step Ash Disposal
Treat every scoop of ash as if it contains live fire. By following this strict protocol, you eliminate the variables that lead to accidental combustion.
1. Allow Time to Cool
Never attempt to remove ashes immediately after a fire unless absolutely necessary. Ideally, let the fire burn out completely and sit for at least 24 hours before you open the doors to clean it out. Many fire safety professionals recommend a full 72 to 96 hours—three to four days—as the minimum cooling period, especially for large firebox loads. The deeper and denser the ash pile, the longer it retains heat at its core.
2. The Metal Bucket Method
This is non-negotiable. You must use a metal container. Plastic buckets, cardboard boxes, and paper bags are fuel sources. Even a heavy-duty plastic trash can will melt and ignite if a hot ember touches the side. The container must have a tight-fitting metal lid, which performs two critical functions: it starves any surviving embers of oxygen, and it prevents wind from scattering ash or fanning an ember back to life.
Transfer the ash carefully into the metal bucket using a metal shovel. Do not fill it to the brim; leave a few inches at the top and ensure the lid fits tightly.
3. The Isolation Phase
Once the ash is in the metal bucket, do not place it inside your garage, on your wooden deck, or against the vinyl siding of your house. Radiant heat transfer can ignite nearby combustible materials even through the metal container walls. Place the bucket on a non-combustible surface—concrete or bare soil—at least 10 feet away from your home or any other structure. Do not place it near a firewood pile, under a porch, or in any enclosed or semi-enclosed space. Let it sit in that isolated location for a minimum of 72 hours. This quarantine period ensures any hidden embers die out completely.
4. Final Disposal or Repurposing
After the quarantine period, perform a simple test before doing anything else with the ash: place your hand a few inches above the bucket lid (do not touch it). You should feel no warmth whatsoever. If any warmth is detected, extend the quarantine period by at least another 24 hours and retest. Once you are confident the ash is fully cold, you can bag it for trash collection, use it in the garden, or repurpose it in one of the many practical ways described later in this guide.
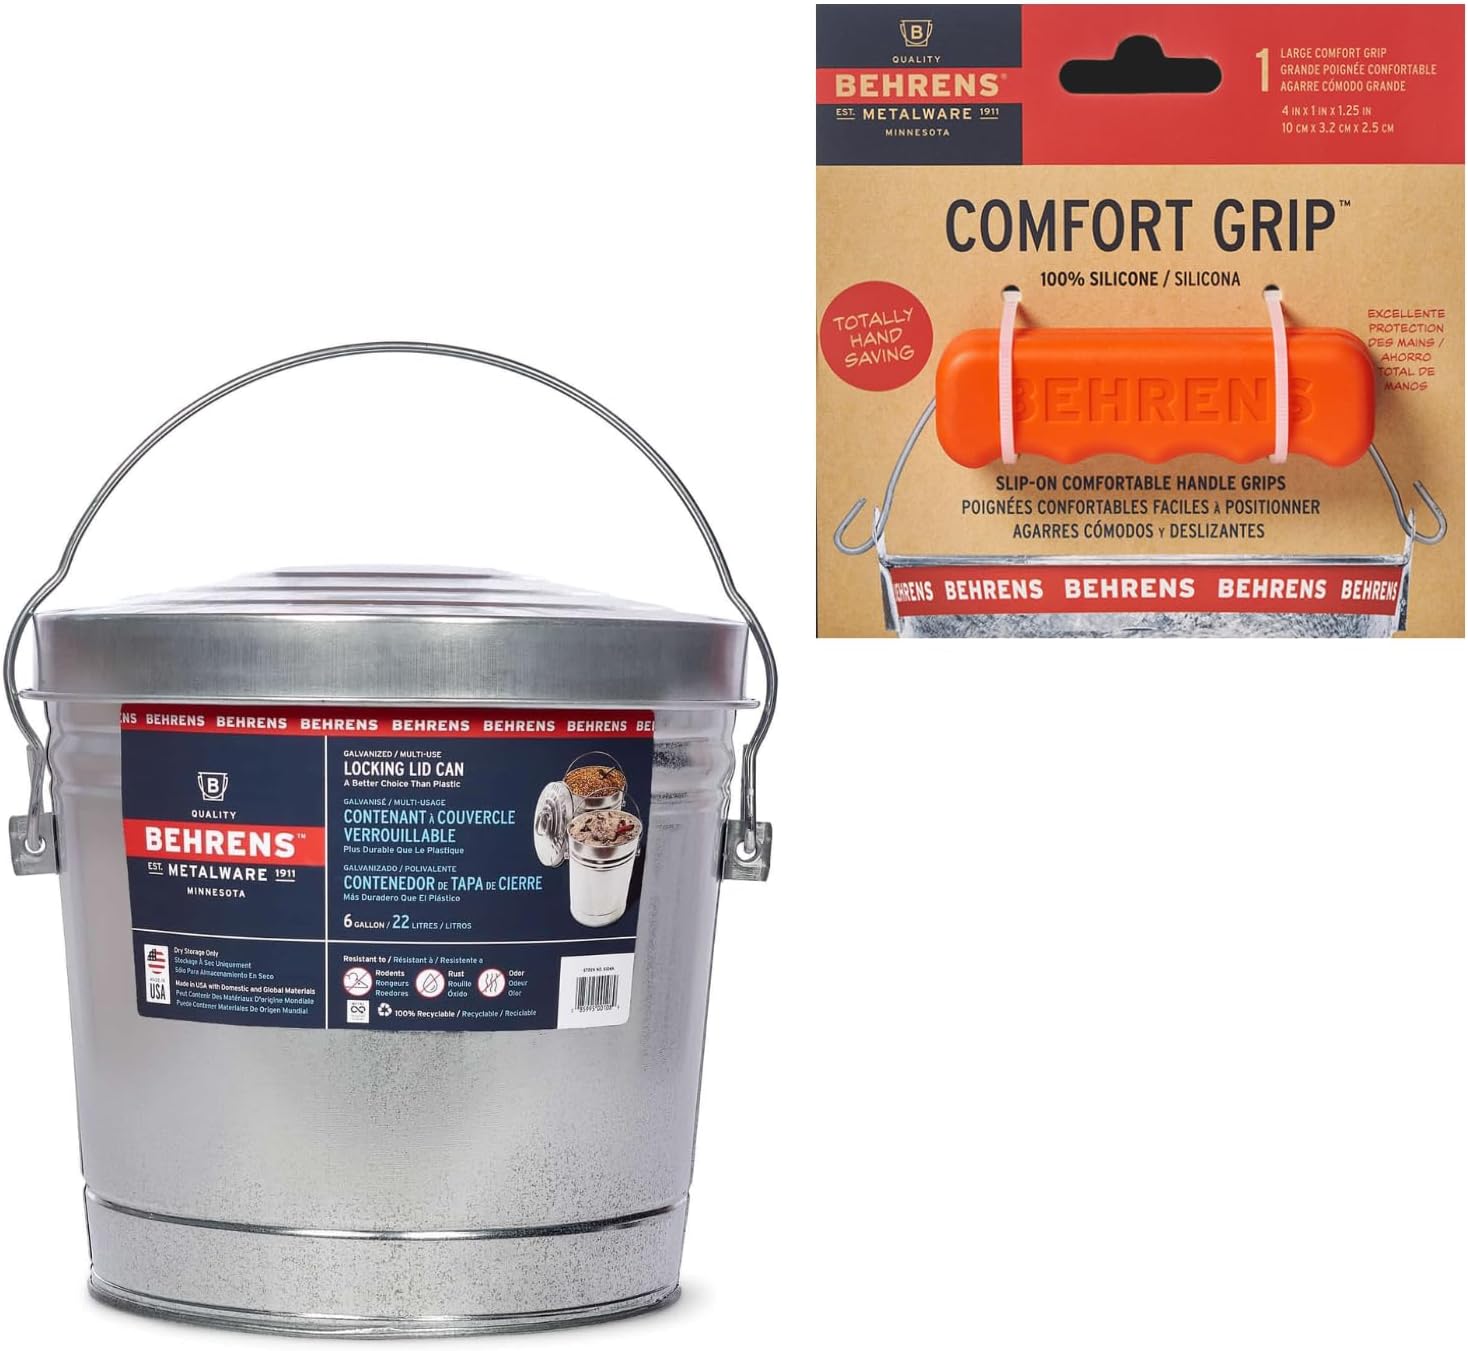
The industry standard for safety. This galvanized steel can won’t melt, and the locking lid keeps oxygen out (starving embers) and keeps wind from blowing ash all over your yard. Every wood-burning household should own one of these before the first fire of the season.
Check Price on AmazonHow Wood Ash Forms and What It Actually Contains
Understanding what is inside your ash bucket helps explain both why it is hazardous and why it has so many practical uses. Wood ash is the inorganic mineral residue left after combustion has consumed the carbon and volatile compounds from the wood. It is not the smoke, not the creosote, and not the charcoal—it is what remains after the burning process is as complete as it can be at your fireplace’s operating temperature.
The Chemical Composition of Wood Ash
The exact composition of wood ash varies depending on the species of wood, the soil it grew in, and the completeness of combustion. However, a typical hardwood ash contains approximately:
- Calcium carbonate (lime): 25–45% — the primary component, responsible for the alkaline nature of ash and its soil-amending properties
- Potassium (potash): 3–8% — a key plant nutrient, making ash a legitimate fertilizer source
- Phosphorus: 1–2% — modest levels of another plant macronutrient
- Magnesium: 1–3% — an essential plant nutrient and chlorophyll component
- Trace elements: including iron, manganese, zinc, copper, and boron
- Unburned carbon (charcoal): typically 5–15%, varying with combustion completeness
This composition means that wood ash is essentially a naturally derived liming agent and mineral supplement—when it comes from clean wood. That qualification—clean wood—is critically important and is explored in detail below.
Hardwood Ash vs. Softwood Ash
The type of wood you burn determines both the volume of ash produced and its nutritional profile. Hardwoods (oak, maple, hickory, beech, ash trees) burn hotter, more completely, and produce less ash per cord than softwoods. Hardwood ash also tends to have a higher mineral content per pound, making it more valuable for garden use. Softwoods (pine, fir, spruce) burn faster, at lower temperatures, and produce more ash with somewhat lower mineral concentrations. Softwood ash is still beneficial in the garden but should be applied more conservatively due to its higher resin and tar residue content. One cord of hardwood produces approximately 20 to 30 pounds of ash; one cord of softwood can produce significantly more.
🔥 Why Does Ash Stay Hot So Long?
The insulating properties of ash are extraordinary. The fine particles trap air and dramatically reduce heat loss through conduction and convection. A smoldering coal buried under a thick layer of ash can maintain ignition-level temperatures for 72 to 96 hours—sometimes longer in large, deep loads. This is the same principle used by traditional bread ovens and charcoal kilns, which rely on ash insulation to maintain heat over extended periods. Never judge ash temperature by its surface appearance alone.
Wood Ash vs. Coal Ash: A Critical Safety Distinction
Not all fireplace ash is the same, and confusing wood ash with coal ash is a significant mistake—both in terms of what you can safely do with it and how you must dispose of it. If your home has a fireplace or stove that has ever burned coal, or if you are unsure what was burned in a wood stove you inherited with a home purchase, this section is essential reading.
Wood Ash: Generally Beneficial
Clean hardwood ash from unpainted, untreated wood is generally considered safe for garden use and a range of household applications. It is alkaline, mineral-rich, and biodegradable. The primary disposal concerns with wood ash are fire safety (hidden embers) rather than chemical toxicity.
Coal Ash: A Hazardous Waste Product
Coal ash—whether from bituminous, anthracite, or lignite coal—is in an entirely different category. Coal contains concentrated heavy metals and trace radioactive elements that were present in the geological deposits from which the coal formed. When coal burns, these contaminants do not combust; they concentrate into the ash. Common contaminants in coal ash include arsenic, lead, mercury, cadmium, chromium, selenium, and boron. These compounds can leach into soil and groundwater if coal ash is used in gardens or spread on land.
Coal ash should never be used in vegetable gardens, flower beds, compost, or anywhere it could enter the soil, water supply, or food chain. It must be disposed of as directed by local regulations, which typically means bagging it in sealed plastic bags and placing it in the regular trash—never composting or spreading it on land. Check with your local waste management authority for specific guidance if you have large quantities of coal ash to dispose of.
| Property | Wood Ash (Clean Hardwood) | Coal Ash |
|---|---|---|
| Heavy metals | Trace / negligible | Significant (arsenic, lead, mercury) |
| Garden use | Beneficial in moderation | Not recommended / hazardous |
| Compost addition | Yes, in small amounts | No |
| pH effect on soil | Raises pH (alkaline) | Variable; contaminant concern overrides use |
| Disposal method | Trash or garden reuse | Sealed bag in trash; check local rules |
Ash from Treated, Painted, or Manufactured Wood
The same hazard concern applies to ash from any wood that was not a natural, untreated tree. Pressure-treated lumber contains copper compounds (and historically, chromium and arsenic) that concentrate in the ash. Painted wood contains lead (in older paint) and various synthetic pigments and binders. Plywood, particleboard, and MDF contain formaldehyde-based binders and synthetic resins. Pallets may be treated with pesticides or fumigants. Burning any of these materials in your fireplace is both hazardous and, in many jurisdictions, illegal. If you have burned treated or manufactured wood, the resulting ash should be treated as hazardous waste.
Essential Tools for the Job
While a simple shovel works, having the right gear makes the job cleaner and safer. Ash is incredibly fine; it floats into the air and settles on furniture, lungs, and carpets if you aren’t careful. Investing in a few dedicated tools pays for itself in safety and cleanliness over a single heating season.
- Metal Ash Bucket with Lid: As described above—non-negotiable. Choose one that is large enough for your fireplace’s typical ash load.
- Ash Shovel: A specialized shovel with a flat edge allows you to scrape the bottom of the firebox effectively. Look for one with a long handle to keep your hands away from the heat zone.
- Horsehair or Natural Fiber Brush: Synthetic brushes can melt if they contact a warm brick. Horsehair or natural fiber brushes are heat resistant and necessary for sweeping fine ash out of corners.
- Protective Gloves: Leather welding gloves or heavy-duty fireplace gloves protect your hands from stray sparks and allow you to handle tools that may be warm from proximity to the firebox.
- Dust Mask or Respirator: Fine ash particles are a respiratory hazard. A simple N95 dust mask is minimum protection; a half-face respirator with P100 particulate filters is better for frequent users.
- Safety Glasses: Ash is highly alkaline and extremely irritating to eyes. Protective eyewear prevents the fine particles from contacting your eyes during scooping and transfer.
Understanding and Using a Built-In Ash Pit
Many traditional masonry fireplaces—particularly those built before central heating became standard—were designed with a built-in ash pit located directly beneath the firebox. This feature is often completely unknown to current homeowners, especially in older homes that have changed ownership multiple times.
What Is an Ash Pit?
An ash pit is a chamber built below the firebox floor, accessed through a small cast iron door at the back or bottom of the firebox. When the fireplace was in regular use as a primary heat source, the homeowner would periodically open the small cleanout door in the firebox floor and sweep ash down into the pit below, where it accumulated until the pit was emptied from an exterior cleanout door—typically located in the basement or at the base of the chimney exterior.
The pit is designed to hold a significant volume of ash—often enough for an entire heating season—and is constructed of non-combustible masonry throughout. This makes it an inherently safer storage location for ash than any above-ground container, because the surrounding masonry provides thermal mass that absorbs and dissipates heat from surviving embers.
Using an Ash Pit Safely
If your fireplace has a functioning ash pit, it can dramatically simplify your ash management routine. Simply open the cleanout door in the firebox floor and use your ash shovel to push accumulated ash into the pit after each cleaning. However, several cautions apply:
- Do not push hot coals or large pieces of unburned wood into the ash pit—only fully combusted ash.
- Inspect the ash pit cleanout door annually to ensure it seals properly. A door that doesn’t close fully allows smoke and CO from smoldering ash to enter the basement.
- Do not allow the ash pit to overfill. A pit full of ash above the cleanout opening can allow ash to fall back into the firebox or restrict the flow of combustion air.
- When emptying the ash pit from the exterior cleanout, follow the same protocols as any ash disposal: treat the contents as potentially harboring live embers until you know with certainty how long it has been since the last fire.
Ash Pits in Homes Where the Fireplace Is No Longer Used
In many homes, the fireplace was converted to gas or simply stopped being used decades ago. In these cases, the ash pit may still contain decades of accumulated ash from previous occupants. If you discover an ash pit during a home renovation or inspection, have it emptied by a chimney professional who can do so safely and confirm the pit structure is intact. An overfull ash pit with a compromised cleanout door is a potential smoke and CO infiltration point into the basement.
How Often Should You Clean Out Fireplace Ash?
This is one of the most frequently misunderstood aspects of fireplace maintenance. The answer is more nuanced than “as often as possible”—and in fact, cleaning too often can actually impair your fireplace’s performance.
Leave a Working Ash Bed
During the active burning season, it is beneficial to maintain a layer of ash—approximately one to two inches deep—on the floor of the firebox. This ash bed serves as insulation for the firebox floor, protecting the brick and mortar from direct flame contact over extended burning sessions. More importantly, it provides a hot, oxygen-maintaining environment for new fires to be started. Experienced wood burners know that a fire started on a bed of warm ash catches faster and burns more steadily than one started on a cold, bare firebox floor.
This means you should only clean out ash when the level exceeds two to three inches, not after every fire. For a household burning wood daily as a primary heat source, weekly cleanings to restore the ash level to the one-to-two-inch baseline are appropriate. For occasional-use fireplaces, cleaning every three to five fires is a reasonable guideline.
End-of-Season Full Cleanout
At the end of the burning season—typically in spring—the ash bed should be completely removed and the firebox fully cleaned. Ash left in the firebox over the summer absorbs ambient humidity and can form a mildly corrosive alkaline paste that slowly damages the firebox floor and mortar joints over time. A full spring cleanout is also the appropriate time to inspect the firebox interior for cracks, loose mortar, and any signs of damage before the next season begins.
Common Ash Disposal Mistakes to Avoid
Even seasoned wood burners make mistakes. The consequences range from a ruined vacuum cleaner to a house fire. Avoid these common pitfalls:
- Using a Plastic or Cardboard Container: As described above, the single most dangerous disposal error. Countless house fires begin this way every winter.
- Vacuuming Hot Ash: Standard household vacuums are not designed for ash. Fine particles pass through the filter and coat the interior, and hot embers will melt the plastic housing and hoses, destroying the vacuum and potentially starting a fire inside the machine.
- Dumping in the Woods Too Soon: Many people dump their bucket in the woods thinking “it’s natural.” If the ash isn’t fully extinguished, wind can fan the embers and start a brush fire—potentially a wildfire in dry conditions.
- Placing the Metal Bucket on a Wooden Deck: A metal container holding warm ash can transfer enough radiant heat to scorch or ignite wood decking beneath it. Always use a non-combustible surface.
- Storing Near Firewood: A bucket of ash placed near your firewood stack creates exactly the fire conditions it is supposed to prevent. The proximity of the tinder (wood) to a potential heat source (warm ash) is a serious hazard.
- Composting Without Testing Soil pH: While ash is excellent for compost, too much raises the pH too dramatically and too quickly, potentially ruining both the compost and the soil it is ultimately added to. Always test before applying.
- Using Ash from Unknown Sources: Never use ash from a fireplace or stove where you are unsure what was burned. Treated wood, coal, and manufactured materials produce ash that should not be used in gardens or compost.
- Pouring Water Over Ash in the Firebox: A common instinct when someone wants to “make sure” ash is cold before disposal. Pouring water into the firebox creates a cloud of caustic, alkaline steam that irritates the respiratory tract and eyes, and can crack hot firebox bricks through thermal shock. If you must quench ash, do it in the metal bucket outdoors, very slowly.
Cleaning Your Fireplace Correctly
When it comes to getting the fine dust out of the fireplace after the bulk of the ash has been removed, a shovel often leaves a mess behind. The remaining fine powder is what causes the gray-cloud problem—it billows into the room with the slightest air movement. There are two effective approaches for this final stage of cleaning.
The Slightly Damp Coffee Grounds Trick
Professional fireplace cleaners have used this technique for decades: before shoveling, scatter a handful of used coffee grounds or damp tea leaves across the ash. The slight moisture causes the fine ash particles to clump together rather than becoming airborne. This dramatically reduces the dust cloud and makes the ash easier to scoop and contains the mess. Do not use enough moisture to create a wet paste—just barely damp grounds sprinkled lightly across the surface.
Using a Dedicated Ash Vacuum
If you burn wood regularly, an ash vacuum is a worthwhile investment. These machines are metal-lined, heat-resistant, and have specialized filters to trap the microscopic ash particles that would blow straight through a standard vacuum filter. An ash vacuum makes the final cleanup stage significantly faster and cleaner, and its enclosed collection canister means no ash cloud in the room.

Designed specifically for warm and cool ash. It features a metal hose, metal canister, and a fire-resistant filter system. Stop ruining your Dyson and get the right tool for the job. Works safely on ash up to 104°F.
Check Price on AmazonHealth and Respiratory Safety When Handling Ash
Ash safety is not only about fire risk—there is a real respiratory and skin safety dimension that receives far less attention than it deserves. Understanding these risks allows you to protect yourself and your family during the regular cleanout process.
Respiratory Hazards
Wood ash particles are extremely fine—many in the respirable range below 10 microns—meaning they can be inhaled deep into the lungs where the body’s natural clearance mechanisms are far less effective. Acute exposure to large quantities of ash dust causes coughing, throat irritation, and in sensitive individuals, bronchospasm (asthma attacks). Repeated long-term exposure to fine ash particles has been associated with impaired lung function and chronic respiratory inflammation in occupational settings.
For the average homeowner cleaning a fireplace once or twice a week during heating season, the exposure is relatively brief and modest. However, the risk is meaningful enough to warrant basic precautions:
- Always wear at minimum an N95 dust mask when scooping and transferring ash. A P100 respirator provides superior protection.
- Work slowly and avoid sudden movements that create ash clouds.
- Open a window slightly to create a slight outward draft, drawing ash particles away from the room rather than toward it.
- Keep children and pets out of the room during cleanout operations.
Skin and Eye Irritation
Wood ash is highly alkaline, with a pH typically between 9 and 13. At these pH levels, ash can cause chemical burns to skin with prolonged contact and is severely irritating to eyes. Wear gloves during all ash handling, and wash hands thoroughly after working with ash, even if gloves were worn. If ash contacts eyes, flush immediately with large amounts of clean water for at least 15 minutes and seek medical attention if irritation persists.
Who Is Most at Risk
People with asthma, COPD, or other respiratory conditions should either avoid performing ash cleanouts personally or use the most protective respiratory equipment available. Children should never be involved in ash handling, both because their respiratory systems are more sensitive and because they are more likely to touch their faces and transfer ash to their eyes and mouths. Elderly individuals with compromised immune or respiratory systems should also take extra precautions.
Don’t Trash It: Beneficial Ways to Recycle Ash
Once you are 100% certain the ash is cold (after the full cooling and quarantine period), you don’t necessarily have to throw it in the landfill. Hardwood ash is rich in calcium, potassium, and other trace minerals, making it a genuinely useful material with a range of practical applications. These uses only apply to ash from clean, untreated hardwood.
1. Garden Fertilizer (The “Lime” Effect)
Wood ash acts similarly to agricultural lime—it raises the pH of acidic soil and adds key nutrients, particularly calcium and potassium. This is beneficial for many common vegetables, flowers, and lawn grass. Tomatoes, peppers, asparagus, roses, lilacs, and clematis all respond well to wood ash applications. However, do NOT use it on acid-loving plants like blueberries, azaleas, rhododendrons, camellias, or most evergreen shrubs—it will significantly harm them.
2. Natural Ice Melt
Ash contains potassium salts (potash) that help lower the freezing point of water, providing modest ice-melting action. More practically, ash provides excellent traction on icy driveways and sidewalks without the corrosive effects of rock salt on concrete and metal, and without the paw-irritating chemistry of many commercial ice melts. It is also completely non-toxic to pets and won’t kill lawn grass at the edges of walkways the way rock salt does.
3. Glass Cleaner
A damp paper towel or cloth dipped in fine white ash is one of the best abrasives for cleaning creosote and soot off fireplace glass doors. The fine silica particles in ash provide just enough gentle abrasion to cut through the carbonized deposits without scratching the glass. Dampen the cloth, dip it in the ash, and rub in circular motions. Wipe clean with a fresh damp cloth. It works as well as commercial fireplace glass cleaners at zero cost.
4. Pest Deterrent in the Garden
Slugs, snails, and certain crawling insects find dry ash deeply unpleasant. The alkaline particles adhere to their bodies and cause dehydration. A ring of dry ash around vulnerable plants (hostas, lettuces, strawberries) creates an effective barrier. The barrier must be reapplied after rain, since wet ash loses its deterrent properties. Ash can also be combined with water and sprayed on foliage as a deterrent for soft-bodied insects.
5. Compost Amendment
A small amount of wood ash is an excellent addition to a compost pile. It provides calcium and potassium to the finished compost, helps neutralize an overly acidic pile, and can help control fruit flies and odors. The key word is “small”—a light dusting between layers is sufficient. Too much ash creates a compost pile that is too alkaline for effective bacterial decomposition. Aim for ash representing no more than five percent of the total compost volume.
The Gardener’s Complete Guide to Using Wood Ash
Wood ash has been used as a garden soil amendment for centuries—long before synthetic fertilizers existed. Used correctly, it is a valuable and completely free resource. Used incorrectly, it can damage plants and soil structure. Here is everything a gardener needs to know to use ash effectively and safely.
When and How to Apply
The ideal time to apply wood ash in the garden is in fall or early spring, working it into the top few inches of soil before planting. Avoid applying ash in wet or windy conditions—in rain, it washes away quickly and can run off into water features or neighboring beds; in wind, it becomes a respiratory and eye hazard. Apply as a thin, even layer and work it into the soil immediately with a rake or tiller rather than leaving it on the surface.
Application Rates
The generally recommended application rate for wood ash in the garden is 20 pounds (roughly one five-gallon bucket) per 1,000 square feet of garden area per year. This rate provides meaningful nutrient input without pushing soil pH into ranges that become problematic. Exceeding this rate—especially repeatedly over multiple seasons without soil testing—can create excessively alkaline conditions that lock up other nutrients (particularly iron, manganese, and zinc) and harm even the plants that normally benefit from ash.
The Importance of Soil Testing Before Using Ash
This cannot be overstated: before applying wood ash to any garden bed, get a soil pH test. Most cooperative extension offices offer free or low-cost soil testing services. Ash should only be applied to soils with a pH below 6.5. Applying ash to soil with a pH that is already neutral (7.0) or alkaline (above 7.0) can push the pH into ranges where plants struggle to absorb nutrients regardless of how much fertilizer you add. A soil test also tells you the existing potassium and calcium levels, helping you determine whether additional ash application would genuinely benefit the specific bed or be redundant.
Vegetable-by-Vegetable Guide to Ash Use
| Plant | Ash Compatible? | Notes |
|---|---|---|
| Tomatoes | Yes | Add ¼ cup directly in planting hole; boosts calcium |
| Peppers | Yes | Light soil application beneficial |
| Asparagus | Yes | Loves alkaline-tending soil; excellent candidate |
| Brassicas (cabbage, broccoli) | Yes | Mild application helps; also deters clubroot |
| Garlic & Onions | Yes | Modest benefits; avoid excess |
| Potatoes | Avoid | Alkaline soil promotes scab disease in potatoes |
| Blueberries | Never | Require pH 4.5–5.5; ash will severely harm them |
| Azaleas / Rhododendrons | Never | Strict acid-soil requirement |
| Strawberries | Caution | Only on confirmed acid soils; modest application |
| Lawn grass | Yes | Excellent for acidic lawns; apply in early spring |
Wood Ash vs. Commercial Lime: What’s the Difference?
Both wood ash and agricultural lime raise soil pH, but they behave differently. Wood ash is immediately water-soluble—it begins raising soil pH within days of application. Agricultural lime (calcium carbonate) reacts slowly, typically taking six months to a year to fully express its pH-raising effect. This means wood ash can cause rapid, dramatic pH spikes if over-applied, while lime provides a slower, more controlled adjustment. For urgent corrections, ash is more responsive. For long-term soil management, lime is more predictable. Ash also provides potassium that lime does not—making it a more nutritionally complete amendment when used judiciously.
Additional Uses for Wood Ash Around the Home
The practical applications for clean wood ash extend well beyond the garden. Many of these uses were common knowledge in the pre-industrial era and are experiencing renewed interest among homesteaders and sustainability-minded households.
Lye Soap Making
One of the oldest chemical processes known to humanity is the leaching of wood ash with water to produce potassium lye (potassium hydroxide). When this lye solution is combined with animal fat and cooked down, the result is soft soap—the same basic soap that was the primary cleaning agent for most of human history. The process is straightforward but requires care: lye is corrosive, and the soap-making process generates heat. If you are interested in making lye soap, use only ash from pure hardwood and follow a tested recipe with proper protective equipment.
Absorbing Oil and Grease Spills
A bucket of dry ash kept in the garage or workshop is an effective absorbent for oil, gasoline, and grease spills on concrete floors. Sprinkle generously over the spill, allow it to absorb for 15 to 20 minutes, then sweep up. The ash binds the hydrocarbon molecules and can then be disposed of appropriately (with the spill absorbed in it, this ash is no longer suitable for garden use).
Polishing Metal
The mild abrasive quality of fine wood ash makes it effective for polishing silver, copper, and other metals. Mix a small amount of ash with water to create a light paste, apply with a soft cloth, rub gently, and rinse. It removes tarnish from silverware without the harshness of commercial metal polishes.
Removing Water Rings from Wood Furniture
A mixture of fine ash and a small amount of olive oil or linseed oil makes an effective paste for treating water rings and light stains on finished wood furniture. Apply sparingly with a soft cloth, rub gently with the grain, and buff. The ash provides very mild abrasion while the oil conditions the wood. Test in an inconspicuous area first.
Pond Algae Control
Adding a small amount of wood ash to a garden pond can help manage excessive algae growth. The potassium in ash promotes the growth of aquatic plants that compete with algae for nutrients. The recommended amount is approximately one tablespoon per 1,000 gallons of pond water—a very small quantity. Exceeding this amount can harm fish and other aquatic life by causing rapid pH changes, so err strongly on the side of caution.
Odor Neutralization
Fine wood ash is a reasonable odor absorber. A small open container of ash placed in a musty area (basement, storage space, mudroom) can help absorb ambient odors over time, similar to baking soda. It is also occasionally used to neutralize skunk odor on pets—rubbing a small amount into the affected area before bathing can reduce the sulfurous intensity of the spray before shampooing.
Wildfire Risk and Outdoor Ash Disposal
For homeowners in or near wildland-urban interface areas—regions where residential neighborhoods border forests, grasslands, or brushlands—ash disposal carries an additional layer of responsibility. Outdoor ash disposal errors in fire-prone areas can have consequences far beyond the home property.
Never Dump Ash in Wildland Areas
The practice of dumping ash buckets in the woods, brush, or open fields is inappropriate even when you believe the ash is cold. A wind gust can uncover a surviving ember, and in dry vegetation conditions, that ember can travel and ignite a fire far from the dump site. In many fire-prone states and counties, dumping ash in vegetated areas is specifically prohibited, with significant fines. Always confine final ash disposal to designated trash containers, compost areas, or garden beds that are at least 10 feet from any vegetation.
Extended Quarantine in Dry, Windy Conditions
In regions experiencing drought conditions or unusually low humidity, extend your standard ash quarantine period beyond the normal 72 hours. Dry air conditions reduce the ambient moisture that would otherwise help suppress surviving embers, meaning the ash pile stays more fire-ready for longer. In drought conditions, many fire safety professionals recommend a full week before any outdoor disposal of ash.
Wetting Down Before Disposal
If your municipality or local fire district recommends it—or during periods of elevated fire danger—you can carefully wet ash before final disposal to absolutely eliminate any ember risk. Do this outdoors in the metal container, add small amounts of water gradually (never pour a large volume at once—the steam can carry fine ash particles), and allow to cool further before bagging. Wetted ash should be bagged in sealed plastic before placing in trash to prevent it from becoming a messy liquid mass in the garbage can.
Local Regulations and Municipal Ash Disposal Rules
Ash disposal is not purely a personal safety matter—in many jurisdictions it is a regulated activity, particularly in areas with active fire prevention programs or strict solid waste management codes.
What Local Rules May Cover
Municipal regulations on ash disposal vary widely but commonly address:
- Whether ash may be placed in regular household trash (most areas allow this if fully cooled and properly contained)
- Whether ash from coal-burning appliances must be handled as hazardous waste rather than regular trash
- Restrictions on dumping ash on open land, particularly in fire-risk zones
- Time-of-year restrictions on outdoor ash disposal during red flag fire conditions
- Required containment (bagged vs. loose) for trash collection
Ash Can Programs
Some fire districts—particularly those in high-risk wildland-urban interface areas—operate ash can programs that provide residents with free or subsidized metal ash containers and educational materials on safe disposal. Check with your local fire district to see if such a program exists in your area. These programs exist precisely because improper ash disposal is consistently one of the leading causes of residential and wildland fires during the heating season.
When to Contact Your Waste Management Authority
If you have large quantities of ash to dispose of—such as after a major cleanup of an ash pit, after a chimney sweep removal of accumulated debris, or after any fire-related event—contact your municipal waste management authority before disposal. Large quantities may require separate drop-off at a transfer station rather than regular trash collection, and this prevents the dangers associated with large ash volumes in a standard garbage truck.
Wood Stove Ash vs. Open Fireplace Ash: Key Differences
Ash management from a wood stove differs from open fireplace ash management in several meaningful ways. If you use both appliances, or are transitioning from one to the other, understanding the differences helps you avoid surprises.
Volume Differences
A wood stove typically produces significantly less ash per cord of wood burned than an open fireplace. This is because wood stoves operate at higher combustion efficiency—the fire burns hotter and more completely, leaving less unburned carbon and mineral residue. Well-seasoned hardwood burned in a modern certified wood stove may produce as little as half the ash per cord compared to the same wood burned in an open masonry fireplace. This means the cleaning schedule for a wood stove is less frequent, but the ash itself may be denser and more concentrated.
Ash Access Differences
Wood stoves typically have a front-loading design with a smaller door, making ash removal a more confined and potentially messier operation than an open fireplace with a wide hearth. Many wood stoves are fitted with dedicated ash drawers or removable ash pans at the base of the firebox that simplify removal significantly. If your stove has an ash pan, empty it before it reaches capacity—an overfull ash pan can impede the airflow patterns inside the stove and reduce combustion efficiency.
Catalytic Combustor Ash
Some high-efficiency wood stoves are equipped with catalytic combustors—ceramic or metallic devices that ignite and burn the exhaust gases at lower temperatures than normal combustion, dramatically reducing emissions and creosote. Ash that accumulates on or around a catalytic combustor must be removed carefully to avoid damaging the fragile combustor matrix. Never use a metal tool to scrape ash from a catalytic combustor; use only soft natural fiber brushes. Follow your stove manufacturer’s specific guidance for catalytic combustor maintenance.
Seasonal Ash Management: A Month-by-Month Approach
Effective ash management is not a single task—it is a continuous rhythm tied to the heating season and the calendar. Here is a practical season-by-season framework.
Fall (Season Start)
Have your chimney professionally swept and inspected before lighting the first fire. Confirm your metal ash bucket has a functional lid and is in good condition. Prepare your chosen ash disposal or reuse strategy before ash starts accumulating. Stock the firebox with a one-inch ash bed from last season or fresh ash if starting clean.
Winter (Active Season)
Clean the firebox every 5–7 days (or when ash exceeds 2–3 inches) for a daily-use fireplace. Always use proper PPE. Follow the full metal bucket quarantine protocol every time. Keep a running supply of dry ash set aside for ice traction on walkways—this dual-use approach eliminates disposal trips on the busiest winter days.
Spring (Season End)
Perform a complete cleanout of the firebox, removing the entire ash bed. Inspect the firebox floor and walls for cracks. Apply a final season’s accumulation of fully cooled ash to garden beds if pH testing supports it. Clean and store your ash bucket in a dry location for next season. Schedule the annual chimney sweep.
Summer (Off Season)
Confirm the fireplace damper is fully closed to prevent insects and humidity from entering the flue. If you have an ash pit, inspect the cleanout door seal. Keep a small emergency supply of ash in the garage for oil spills and next fall’s ice management. Use the off-season to address any repairs identified during spring inspection.
Quick Reference: Safe Ash Disposal Checklist
- Wait: Allow fire to fully extinguish and ash to cool for a minimum of 24 hours—ideally 72 to 96 hours for large loads.
- Gear Up: Put on N95 dust mask, safety glasses, and leather or heat-resistant gloves before opening the firebox.
- Transfer Correctly: Use a metal shovel to scoop ash into a metal bucket with a tight-fitting metal lid only. No plastic, cardboard, or paper.
- Isolate the Bucket: Place the sealed metal bucket on concrete or bare soil, at least 10 feet from the house, firewood, deck, or any structure.
- Quarantine 72 Hours: Leave the bucket in place for a minimum of 3 full days. Do not move it inside during this period.
- Heat Test Before Disposal: Hold your hand above (not on) the bucket lid. Zero warmth must be detected before proceeding.
- Know Your Ash: Only reuse ash in the garden or compost if it came from clean, untreated hardwood. Coal ash or treated-wood ash goes in the trash in sealed bags.
- Soil Test Before Garden Use: Apply garden ash only to soils with confirmed pH below 6.5, at no more than 20 lbs per 1,000 sq ft per year.
- Check Local Rules: Verify your municipality’s requirements for ash in household trash, especially for coal ash or large quantities.
- Clean Firebox Fully Each Spring: Remove the full ash bed at season end, inspect the firebox, and schedule your annual chimney sweep.