Firewood Storage Ideas: Stylish & Practical Solutions
By The Chimney Insight Team | Expert Review
The difference between a cozy, roaring fire and a smoky, hissing disappointment often comes down to one thing: storage. You can buy the best firewood for your fireplace, but if you store it improperly it will absorb moisture, rot from the bottom up, and become a haven for termites, carpenter ants, and mice. Good firewood storage is not just about tidiness — it is the final stage of the seasoning process itself.
Whether you have a sprawling rural property with room for a full woodshed or a compact urban apartment where you need to store a week’s supply stylishly next to the hearth, this guide has a solution for every situation. We cover the science of seasoning, outdoor and indoor storage systems, DIY builds, pest control, climate-specific advice, and the creative decorative ideas that turn a firewood pile into a genuine design feature of your home.
📋 Table of Contents
- 1The 3 Golden Rules
- 2How Much to Store
- 3Seasoning Timeline by Species
- 4Outdoor Storage Ideas
- 5Woodshed Plans & Dimensions
- 6Rack Materials Compared
- 7Stacking Methods
- 8Tarping Without a Shed
- 9Indoor Storage (15 Ideas)
- 10Small Space Solutions
- 11Deck & Patio Storage
- 12Basement Storage
- 13Climate-Specific Advice
- 14Pest Control Guide
- 15When Is It Ready?
- 16Labeling & Organization
- 17DIY: Build Your Own Rack
- 18Top Amazon Recommendations
- 19Safety & Maintenance
- 20Frequently Asked Questions
📐 The 3 Golden Rules of Firewood Storage
Before you build or buy a rack, you must understand the science of seasoning. As we covered in our comparison of seasoned vs. unseasoned firewood, airflow is the single most important variable in the entire storage equation.
- Elevation — Never touch the ground. Soil moisture wicks continuously upward into the lowest logs through capillary action. Ground contact also invites fungal rot, termites, and ground-dwelling insects. The minimum clearance is 4–6 inches; 8–12 inches is ideal. Use pallets, a purpose-built log rack, pressure-treated lumber rails, or concrete blocks as your base.
- Circulation — Let air move through the pile. Stack with the cut ends facing outward, where the open wood fibers can release moisture into the air. Avoid packing logs so tightly that airflow is blocked. Leave 3–4 inches of space behind the stack if it sits against a wall or fence. Air movement is the mechanism of seasoning — without it, wood simply holds its moisture.
- Protection — Cover the top, expose the sides. The most common storage mistake is completely wrapping a stack in a tarp. This traps moisture inside and actually reverses the seasoning process in warm weather. Cover only the top third of the stack to shed rain. Leave all four sides fully open to allow evaporation to do its work.
📦 How Much Firewood Do You Actually Need to Store?
Before designing your storage system, you need to answer the most fundamental question: how much wood will you actually burn? Overbuilding storage is a wasted investment; underbuilding means running out mid-winter. Here is how to calculate your seasonal requirement.
| Usage Pattern | Climate Zone | Estimated Annual Consumption | Storage Space Needed |
|---|---|---|---|
| Occasional ambiance fires only | Any | 0.5–1 cord | One 8-ft standard rack |
| Supplemental heat, evenings only | Mild (zones 6–8) | 1–2 cords | Two 8-ft racks or a small shed |
| Primary heating source | Moderate (zones 5–6) | 3–4 cords | Dedicated woodshed, 6×8 ft min. |
| Primary heating, cold climate | Cold (zones 3–4) | 4–7 cords | Woodshed, 8×12 ft or larger |
| Cooking + heating (off-grid) | Any cold climate | 6–10 cords | Large woodshed + overflow stacks |
The “Buy Ahead” Strategy
The most important storage principle that goes beyond physical space is the “buy two seasons ahead” strategy. Purchase or harvest next winter’s wood during the previous spring, giving it the full summer and fall to season. This means your storage system always holds two overlapping supplies: the wood you are actively burning this season and the wood that is seasoning for next season.
This approach eliminates the most common firewood mistake — burning unseasoned wood purchased in October because you did not plan ahead. Proper storage design should accommodate this two-season overlap: typically twice your annual consumption in total storage capacity.
⏳ Seasoning Timeline by Wood Species
The single most critical variable in your storage timeline is the species you are drying. Seasoning times vary dramatically — from as little as 4–6 months for cedar to 24 months or more for dense oak or hickory. Planning your storage around these timelines prevents the frustration of burning prematurely seasoned wood.
| Species | Type | Min Season Time | Ideal Season Time | Difficulty to Dry |
|---|---|---|---|---|
| White Oak | Hardwood | 18 months | 24 months | Hard |
| Hickory | Hardwood | 18 months | 24+ months | Hard |
| Sugar Maple | Hardwood | 12 months | 18 months | Medium |
| Ash | Hardwood | 6–12 months | 12 months | Easy |
| Birch | Hardwood | 12 months | 12–18 months | Medium |
| Cherry | Hardwood | 12 months | 12 months | Easy |
| Douglas Fir | Softwood | 6–9 months | 12 months | Medium |
| Pine | Softwood | 6 months | 9–12 months | Easy |
| Cedar | Softwood | 4–6 months | 6 months | Easiest |
These timelines assume ideal conditions: split wood, elevated storage, good airflow, and a warm season with low humidity. Storing wood in a shaded, damp, or poorly ventilated location can double these timelines. This is why storage location and structure design are not optional details — they directly determine when your wood becomes usable.
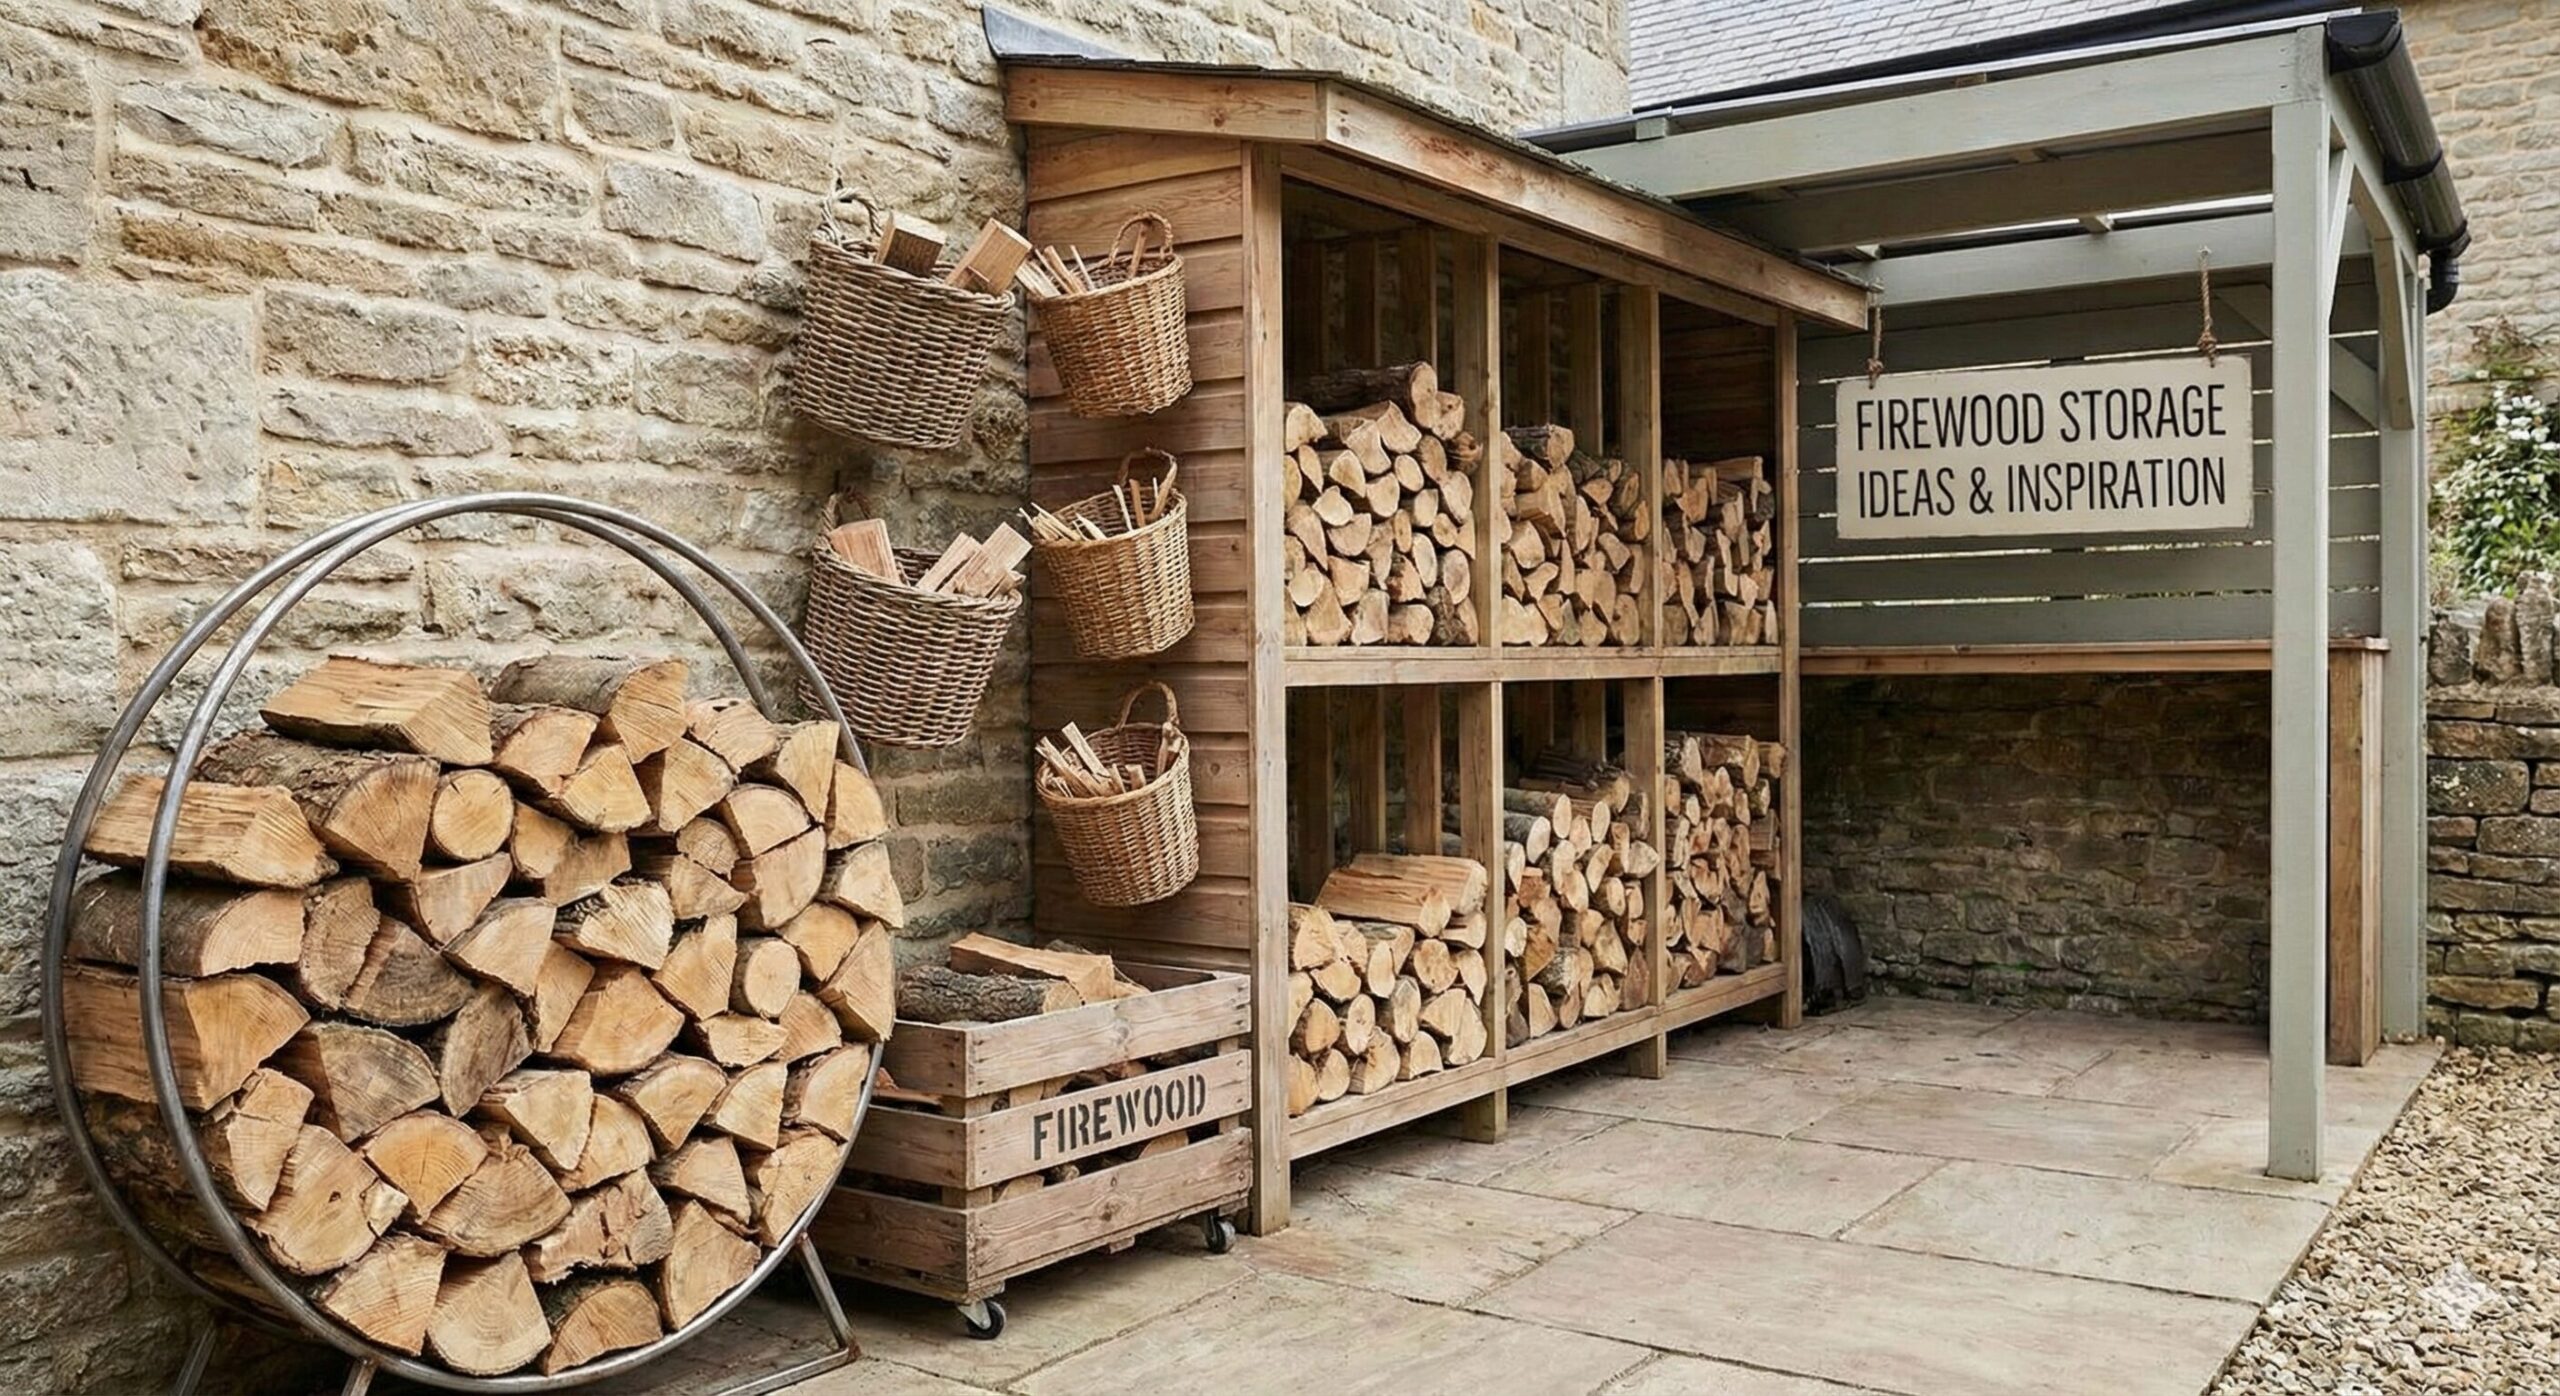
🌲 Outdoor Storage Ideas: Rugged & Efficient
For long-term seasoning and bulk storage, outdoors is the right environment. Sun, wind, and air movement accelerate moisture removal far more effectively than any sheltered indoor space. Here are the core outdoor storage approaches, from the simple to the architectural.
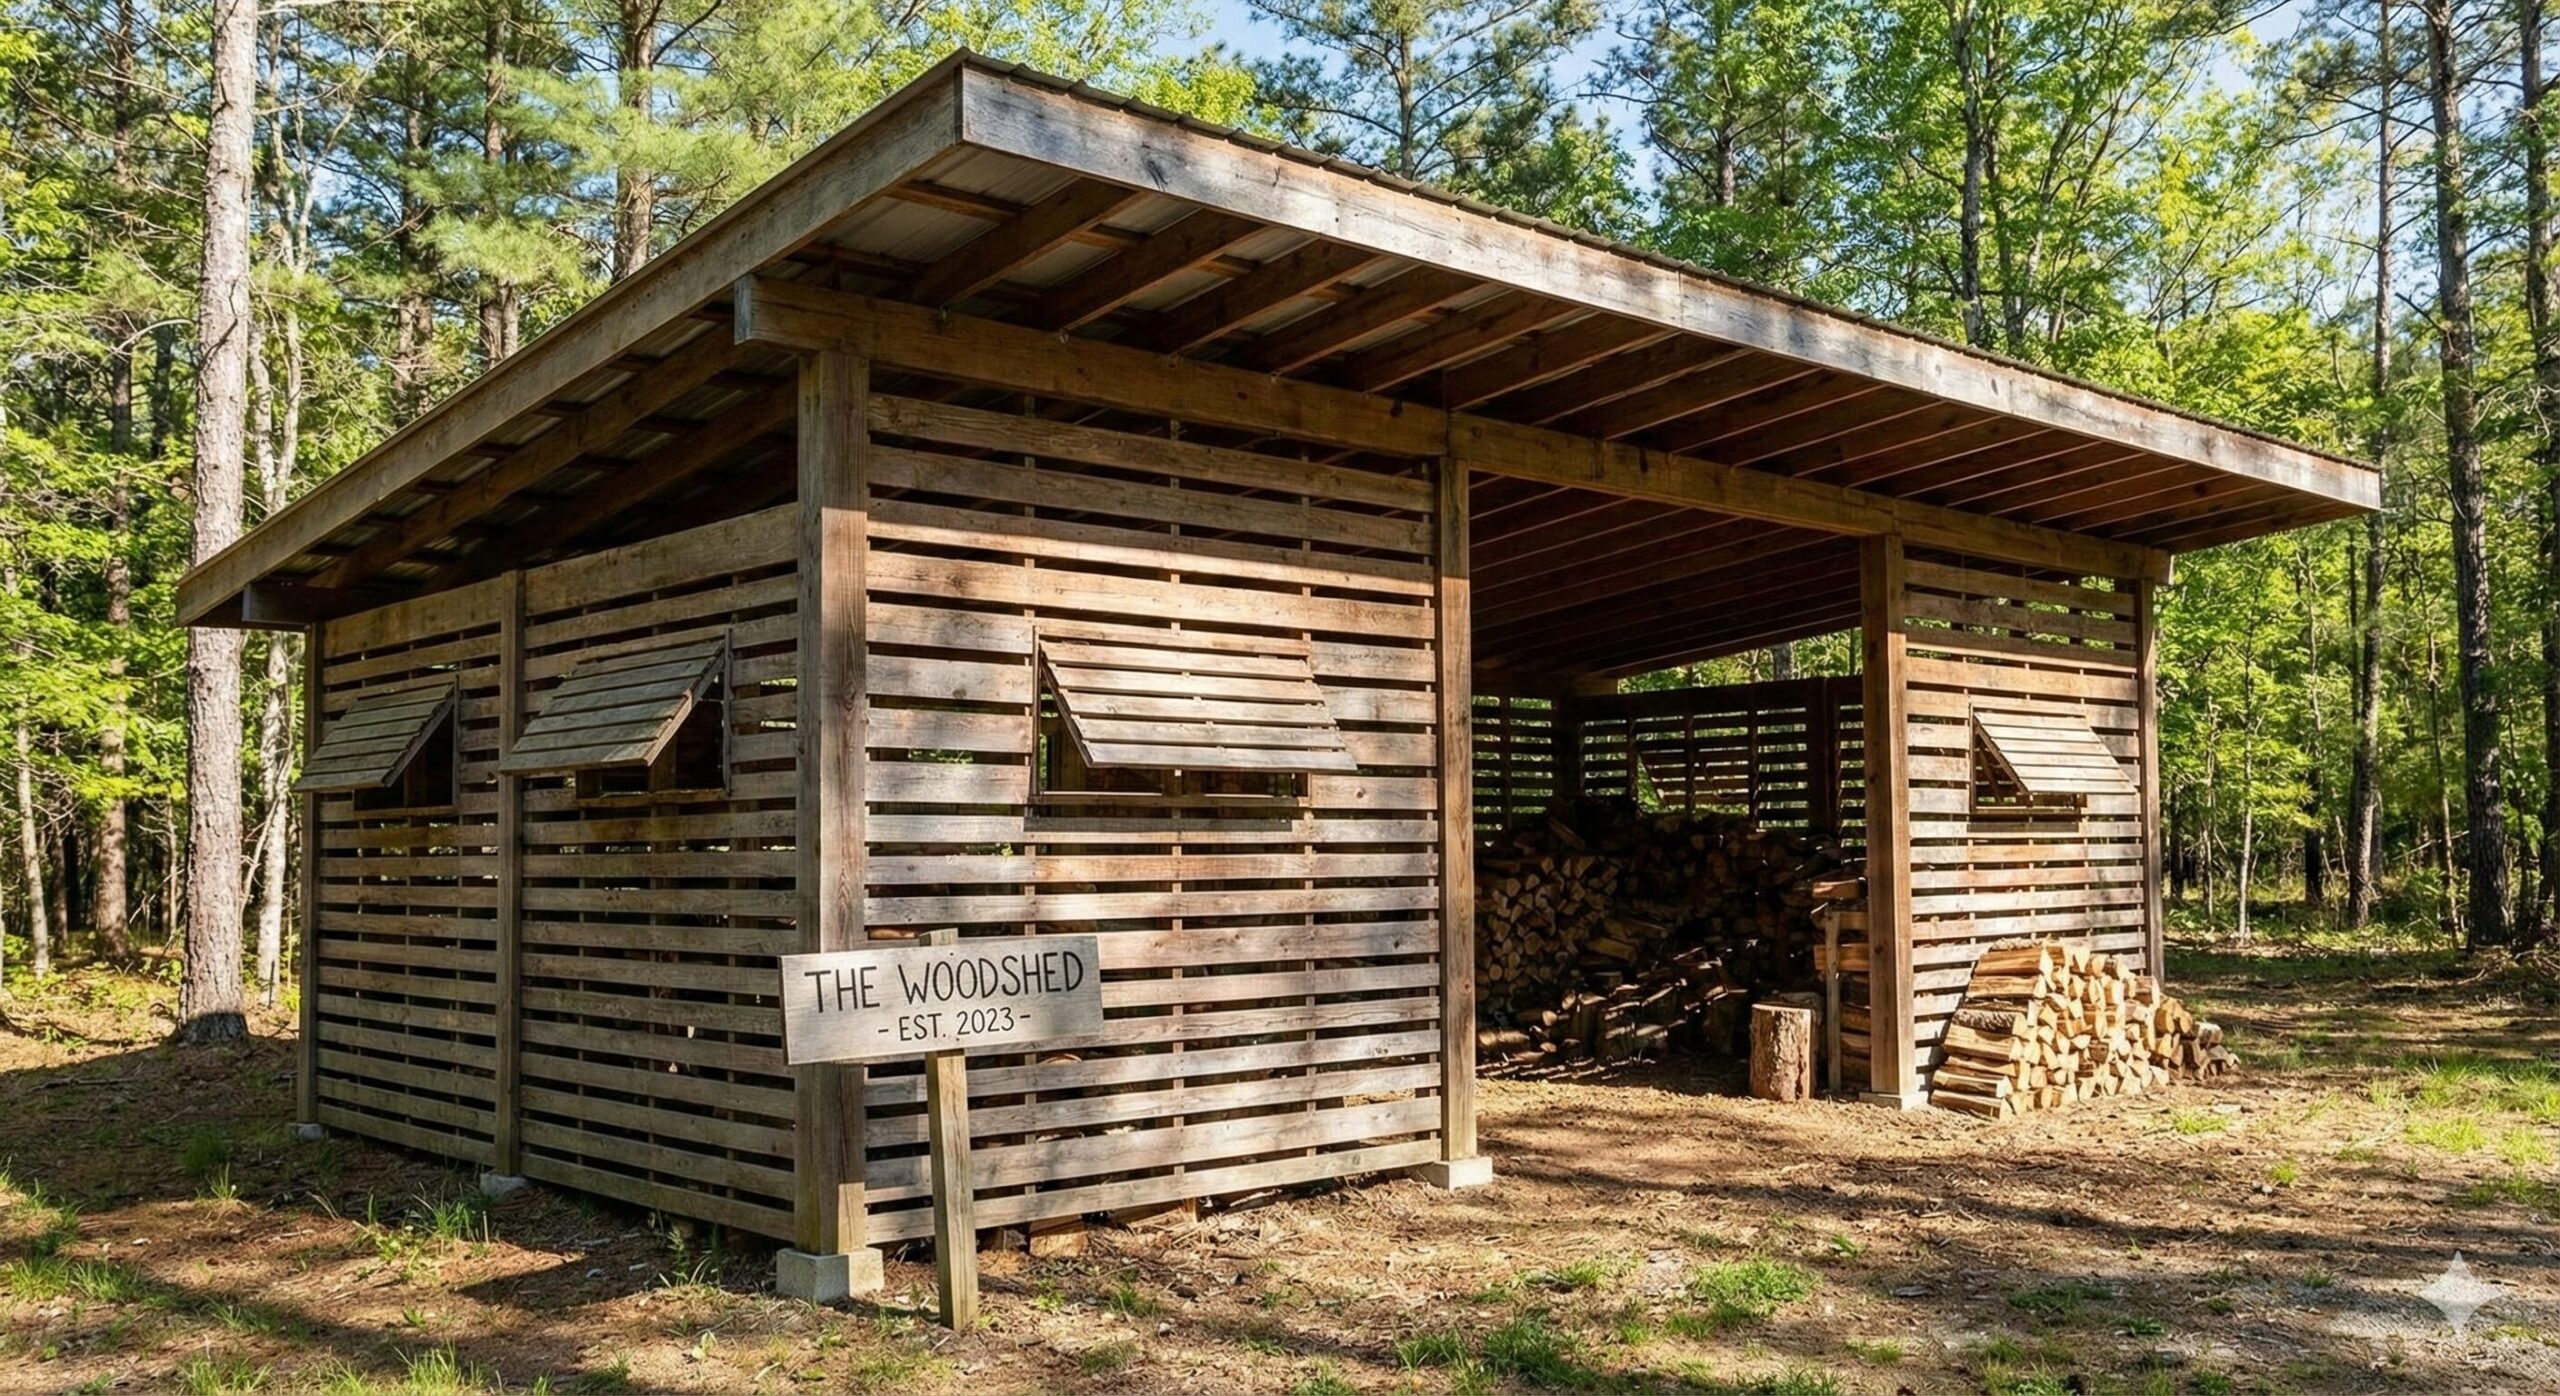
The Classic Woodshed
A dedicated roofed structure with open or slatted sides is the gold standard for outdoor firewood storage. The roof keeps rain and snow off the wood; the open sides allow continuous airflow. A properly built woodshed can store 4–8 cords, season wood reliably, and last decades. Ensure you understand how to waterproof the roof properly for long-term performance.
Pallet Racks
Cost-effective and immediately available. Pallets provide instant ground clearance and excellent airflow through their slatted decking. Arrange two pallets parallel as side rails and stack between them, or stand two pallets vertically as end supports. Make sure pallets are heat-treated (HT stamp) and untreated — see our guide on what not to burn.
If you are building near a patio or outdoor kitchen, consider integrating your storage into your outdoor cooking setup. Check our guide on the best chimney for kitchen ventilation to ensure smoke does not ruin your BBQ experience.
🏗️ Woodshed Plans & Dimensions: How to Size Your Build
If you are ready to build a dedicated woodshed, sizing it correctly from the start saves significant time and money. A shed that is too small forces inconvenient overflow stacking; one that is too large is wasted material and space.
Standard Log Dimensions to Plan Around
Firewood is typically cut to 16-inch, 18-inch, or 24-inch lengths. The depth of your shed’s storage bay should match your standard log length plus a few inches of clearance — typically 18–26 inches deep. The height and width determine how many cords fit.
| Shed Dimensions (interior floor) | Approximate Storage Capacity | Best For |
|---|---|---|
| 4 ft × 8 ft | ~1 cord | Supplemental burner, small household |
| 6 ft × 8 ft | ~1.5–2 cords | Regular supplemental heating |
| 8 ft × 12 ft | ~3–4 cords | Primary heating, moderate climate |
| 10 ft × 16 ft | ~5–7 cords | Primary heating, cold climate |
| 12 ft × 20 ft+ | 8+ cords | Off-grid, multi-season reserve |
Key Woodshed Design Principles
- Sloped roof: A single-slope (lean-to) or gabled roof with at least 1:6 pitch sheds water away from the wood. Metal roofing is ideal — durable, low-maintenance, and effective.
- Open or slatted walls: Solid walls on the prevailing wind side (usually north or northwest) block driving rain; open or slatted walls on the other three sides allow airflow. A 50/50 balance between protection and ventilation is ideal.
- Elevated floor or no floor: Either build on a gravel pad (best drainage, lowest cost) or on pressure-treated lumber runners elevated 4–6 inches above grade. Avoid concrete slabs without drainage — they trap moisture beneath the bottom course of wood.
- East-west orientation: Align your shed so the open side faces south or southeast, maximizing sun exposure on the wood stack throughout the day. Solar radiation significantly accelerates drying.
- Bay dividers: For large sheds, install vertical dividers every 8 feet to separate seasoning from ready-to-burn wood. Label each bay with the cutting/storage date.
🔩 Firewood Rack Materials: Steel vs. Wood vs. Galvanized
If you are buying or building a freestanding rack rather than a full shed, material selection affects durability, cost, aesthetics, and suitability for your climate.
| Material | Pros | Cons | Best Climate | Lifespan |
|---|---|---|---|---|
| Powder-Coated Steel | Strong, affordable, widely available, clean look | Can rust if coating chips; requires touch-up maintenance | Dry to moderate climates | 5–15 years with care |
| Hot-Dip Galvanized Steel | Highly rust-resistant, longest-lasting metal option | More expensive than powder-coat; industrial appearance | Wet, coastal, or humid climates | 20–30+ years |
| Pressure-Treated Lumber | Inexpensive, strong, DIY-friendly, blends naturally | Heavier; requires regular checking for ground rot | All climates (on gravel/raised base) | 10–20 years |
| Cedar or Redwood | Naturally rot-resistant, beautiful appearance | More expensive than treated pine; needs occasional sealing | All climates (excellent in wet) | 15–25 years |
| Wrought Iron / Decorative | Attractive, heavy-duty, works well indoors | Expensive; not ideal for outdoor long-term use without coating | Primarily indoor / covered patio | Decades if maintained |
🪵 Stacking Methods: Standard, Holz Hausen & More
How you stack firewood affects not just its appearance but its drying rate and structural stability. There are three primary stacking methods used by wood burners around the world, each with distinct advantages.
Method 1: The Linear Row Stack (Most Common)
The standard approach: parallel rows of split logs with cut ends facing outward, supported by end posts or a rack frame. Simple, space-efficient, and easy to load and unload. For stability, the ends should be supported or built in a “crisscross” end pattern (alternating staggered logs at each end to create self-supporting corners). Maximum stack height without internal support should not exceed 4 feet for safety.
Method 2: The Holz Hausen (Round Stack)
The Holz Hausen (German for “wood house”) is a centuries-old circular stacking method popular in Central Europe. Wood is arranged in a circle with the bark side facing outward, angled slightly inward toward the center. The center is filled loosely with smaller pieces. A circular cap of bark-side-up logs is placed on top as a weather roof.
The genius of the Holz Hausen is that the circular shape creates its own stable structure without end supports, the inward angle sheds rain outward naturally, and the design dramatically increases surface area exposed to wind — accelerating drying by 30–40% compared to a linear stack of the same volume. A 5-foot diameter Holz Hausen holds approximately half a cord.
Method 3: The Norwegian Bark-Side-Up Method
A simple variation of the linear stack: place every log with the bark facing upward rather than to the side. Bark is naturally water-resistant — it evolved to protect the living tree from rain. By orienting it upward, the bark acts as a natural shingle, shedding rain away from the cut wood below. This method requires no cover and works particularly well for dense hardwoods like oak and hickory in moderate-rain climates.
🧥 How to Keep Firewood Dry Without a Shed
Not every situation calls for a full woodshed. For smaller quantities, temporary stacks, or urban properties where structures are restricted, a well-executed tarping system provides adequate protection through the seasoning process and storage period.
The Correct Way to Tarp Firewood
- Choose a heavy-duty UV-resistant tarp. Cheap tarps degrade quickly under UV exposure, crack, and tear — especially in cold weather. Invest in a 5–6 mil polyethylene or woven poly tarp with reinforced grommets. Silver or white tarps reflect heat better than dark ones, which can raise temperature under the tarp and promote condensation.
- Cover only the top third of the stack. Drape the tarp over the top of the pile so it hangs down 12–18 inches on each side — enough to shed rain but not enough to reach the ground and seal the sides. Never tuck the tarp under the bottom of the pile.
- Secure without sealing. Use bungee cords or rope threaded through grommets to secure the tarp top. Do not tie the bottom edges to the rack or pile — the bottom must remain free so wind can lift it slightly, allowing air exchange under the cover.
- Remove during dry stretches. During extended dry, breezy periods, remove the tarp entirely to maximize drying. The goal is to protect from rain while maximizing airflow during dry conditions — not to maintain a permanent waterproof seal.
Alternative: Log Rack with Integrated Cover
The most elegant no-shed solution is a freestanding metal log rack with an integrated built-in cover — typically a powder-coated steel frame with a fitted polyethylene or canvas top. These units are designed with the correct coverage ratio built in and eliminate the guesswork of tarp placement. The top-rated Amazon option in our products section below is this category.
🏠 Indoor Firewood Storage: 15 Creative Ideas
Indoor storage should be temporary — typically enough for 2–3 days of active burning. This minimizes the risk of introducing pests and moisture into your living space. However, within that constraint, indoor firewood storage has become a genuine interior design opportunity. Here are 15 approaches ranging from purely functional to deliberately decorative.
A recessed niche built into the wall beside the fireplace. Keeps wood at arm’s reach, hidden, and architecturally integrated. Requires non-combustible lining if near the firebox.
Dead space under a staircase becomes a natural firewood cubby. Install slatted front panels for ventilation and aesthetics. One of the most space-efficient solutions for open-plan homes.
A classic fireplace accessory. A large iron basket beside the hearth holds a day’s supply with zero installation. The logs become part of the décor — especially beautiful with birch rounds.
Adds warmth and organic texture to a living room. Best for homes with a Scandinavian, coastal, or bohemian aesthetic. Keep it away from the firebox opening (3-foot minimum clearance).
A metal log holder in copper or brass finish elevates the fireside to luxury status. The reflective surface amplifies firelight beautifully and develops a rich patina over time.
A deep floating shelf (14–16 inches) installed at knee height beside the fireplace creates a minimalist log storage ledge that appears to float. Popular in modern and Japandi interior styles.
Galvanized pipe fittings and flanges assembled into a log rack create an industrial-chic storage piece. Extremely sturdy, fully customizable to any size, and costs under $50 in materials.
A large canvas tote folded into a self-standing carrier serves as both transport and display. Lean it beside the fireplace between uses and the fabric exterior integrates naturally with upholstered furnishings.
Deliberately stacking short log rounds (6–8 inches long) in a geometric pattern inside a frame or alcove creates a genuine wall art installation. Birch and aspen rounds with their distinctive bark are especially striking.
An entryway bench with an open lower section stores firewood and provides seating for removing outdoor shoes. Practical dual purpose for homes where firewood is carried in from outside regularly.
Two painted cinder blocks as end supports with 2×4 rails. Costs under $20, holds half a cord, and has a pleasing brutalist-minimal aesthetic. Excellent for covered porches and mudrooms.
A large wine rack — especially a floor-standing honeycomb style — is a natural firewood holder for short rounds cut to 10–12 inches. Works beautifully in rustic kitchens with a fireplace or range hood.
A built-in cabinet with louvered or slatted doors hides firewood completely in the living room. Perfect for minimalist interiors where the visual presence of logs would disrupt the room’s aesthetic.
Old galvanized milk crates stacked in a 2×2 arrangement hold a generous 2-day supply and create an unmistakably vintage farmhouse storage moment. The open wire sides provide natural ventilation.
A minimal Scandinavian concept: a steel rod suspended from leather straps attached to the ceiling or a wall bracket holds a neat bundle of logs in suspension. Architectural, surprising, and requires zero floor footprint.
🏙️ Small Space & Apartment Solutions
Urban and apartment dwellers with a wood-burning fireplace or stove face genuine storage constraints. The good news is that even the smallest spaces can accommodate a practical supply if the right approach is used.
Strategies for Tight Spaces
- Vertical stacking: Go up, not out. A narrow floor-to-ceiling rack takes a 12-inch footprint and holds 30–40 logs — enough for a week of evening fires.
- Under-furniture storage: Low-profile log carriers that slide under a sofa or coffee table keep firewood accessible but visually hidden.
- Corner racks: Purpose-built corner log racks fit into unused room corners and hold a generous quantity in a space that is otherwise wasted.
- Buy smaller quantities more frequently: Rather than storing a full season’s supply, purchase 2–4 bundles or a face cord at a time and replenish weekly. Kiln-dried bundled firewood from grocery or hardware stores eliminates home storage requirements almost entirely — at a premium cost.
- Balcony storage: If allowed by building rules, a compact log rack on a covered balcony is an excellent solution. Ensure wood is protected from precipitation but exposed to airflow. Check building regulations before installing.
🌿 Deck & Patio Firewood Storage
A deck or patio is a natural location for a small-to-medium firewood supply — close to the back door for easy indoor access, often covered by a roof overhang, and visually integrated with outdoor living. However, deck storage comes with specific considerations that differ from ground-level storage.
Deck Safety Considerations
- Weight limits: Decks are designed for specific live load ratings, typically 40–60 lbs per square foot. A cord of dense oak weighs 2,500–3,500 lbs. Never store more than a face cord (approximately 1/3 cord) on a wood-frame residential deck without engineering consultation.
- Moisture damage to deck boards: Damp firewood sitting directly on deck boards introduces persistent moisture that accelerates rot and staining. Use rubber-footed racks or place boards beneath the rack’s feet to distribute weight and create airflow under the metal feet.
- Sparks from the fire pit: Do not position firewood storage immediately adjacent to an outdoor fire pit or chiminea. Maintain at least 6 feet of clearance between active fire and stored wood.
- Pest pathways: Deck storage close to the house can give insects and rodents a shorter migration path to the building. Elevate wood on rack feet, inspect regularly, and treat the deck perimeter with pest deterrents if needed.
Best Rack Types for Decks
Compact powder-coated steel racks with built-in covers are ideal for deck use. They hold a manageable quantity (one face cord or less), have a clean appearance that suits outdoor living areas, and their integrated covers eliminate the need for tarp wrestling after every rainstorm. Look for racks with rubber or plastic feet — metal feet in direct contact with deck boards will leave rust stains.
🏚️ Basement Firewood Storage: When It Works & When It Does Not
Basement storage is a common request — understandably so. Basements are protected from weather, close to the heating appliance in many homes, and offer large floor areas. However, basement storage is only appropriate under very specific conditions.
✓ When Basement Storage Works
- Wood is 100% seasoned and dry (below 20% moisture)
- Basement is dry with no moisture intrusion issues
- Supply is limited to 2–3 weeks’ use at a time
- Wood was inspected for pests before moving inside
- Basement has good air exchange / HVAC
✗ When to Avoid Basement Storage
- Basement has any moisture or humidity issues
- Wood is not fully seasoned — will release moisture, promoting mold
- You plan to store a full cord or more (pest risk, weight, moisture)
- Basement is used for living space — odors and insects will follow
The most common basement storage mistake is storing green or partially seasoned wood. A cord of wet wood releases 50–80 gallons of water as it dries — in a sealed basement, this moisture has nowhere to go and creates prime conditions for black mold growth on adjacent drywall, framing, and insulation.
🌍 Climate-Specific Storage Advice
What works for a wood pile in arid Arizona is actively harmful in humid coastal Maine. Your local climate should directly inform your storage approach, structure design, and seasoning expectations.
Pacific Northwest, coastal New England, British Columbia
- Enclosed shed with solid roof is nearly mandatory
- Face the open side away from prevailing rain direction
- Add 30–50% to standard seasoning timelines
- Galvanized steel racks prevent rust
- Elevate at least 8–12 inches — soil is persistently wet
Great Lakes, Rocky Mountains, Upper Midwest, Canada
- Store bulk supply outdoors all summer; bring in a reserve before first freeze
- Stack snow sheds or extra cover before heavy snow events
- Keep a dedicated “immediate supply” stack near door — you will not want to dig through 3 feet of snow for firewood at 5 a.m.
- Frozen wood splits more easily — plan splitting sessions for cold days
Southwest, Southern California, Texas, Nevada
- Shade is important — direct desert sun can crack end grain excessively
- Scorpions, black widows, and other venomous species shelter in wood piles — inspect carefully before handling
- Seasoning is faster — reduce timelines by 20–30%
- Fire season restrictions may limit when and how much you can burn
Southeastern U.S., Gulf Coast, Florida
- High ambient humidity slows seasoning significantly even without rain
- Termite risk is highest in this region — elevation and inspection are critical
- Mold on bark is common in summer — does not affect burning quality if wood is otherwise dry
- Consider kiln-dried as primary fuel source to eliminate humidity challenges
🐛 Complete Pest Control Guide for Firewood Storage
A firewood pile is, from an insect’s perspective, an ideal habitat: food, shelter, stable temperature, and moisture. Managing pests in and around your wood storage is not optional — it directly protects your home from structural damage and infestation.
Common Firewood Pests
| Pest | Signs of Presence | Primary Risk | Prevention |
|---|---|---|---|
| Termites | Mud tubes on bottom logs, hollow sound when tapped | Structural damage to home if they migrate from pile | 30-ft distance from house, elevation, inspect monthly |
| Carpenter Ants | Sawdust trails, galleries in soft or rotting wood | Nest migration to home structure | Remove rotting wood immediately, keep pile dry |
| Bark Beetles / Borers | Small round holes, fine sawdust (frass), pitch tubes | Spread to living trees nearby | Use wood within 1–2 seasons, do not move infested wood |
| Mice / Voles | Droppings, nesting material, chewed bark | Home infestation, hantavirus risk | Keep pile away from house, remove debris around base |
| Spiders | Webs in gaps between logs | Venomous species in some regions | Wear gloves when handling; shake logs before carrying inside |
| Raccoons / Opossums | Disturbed pile, droppings, food debris | Chimney intrusion risk | Motion lights, secure compost/food sources, cap chimney. See raccoon removal guide |
Pest Prevention Best Practices
- Keep the pile 30 feet from the house. This is the distance recommendation of most pest control professionals and entomologists. At 30 feet, the likelihood of insect colonies using the wood pile as a staging point to invade your home’s structure drops dramatically.
- Elevate at least 6 inches — 12 inches is better. Ground-level storage is an open invitation for ground-dwelling termites, beetles, and rodents. The air gap between the bottom log and the soil should be visible from the side.
- Remove bark from bottom logs. Bark is the most pest-attractive part of the log — many insects live specifically between bark and wood. Logs that are bark-stripped on the bottom course eliminate the easiest entry point.
- Do not spray pesticides on stored firewood. Pesticide residue on wood burns into toxic fumes. Never apply insecticides to wood you intend to burn indoors. Control pests through physical barriers, not chemical treatment.
- Inspect every log before bringing it inside. A quick visual check for sawdust, holes, or moving insects takes 3 seconds and prevents bringing an infestation into your living room. Make this a non-negotiable habit.
Birds are another issue worth watching. If migratory birds nest in your woodshed, they may find their way to your chimney. If that happens, check who to call for a bird stuck in a chimney for guidance.
✅ How to Know When Your Stored Wood Is Ready to Burn
Storing wood correctly sets up the drying process; knowing when the process is complete is equally important. Burning insufficiently seasoned wood is the most common cause of poor fire performance, excessive smoke, and accelerated creosote buildup. Here are the definitive methods for confirming readiness.
Test 1: The Moisture Meter (Most Reliable)
A digital pin-type moisture meter is the only tool that gives a definitive, quantified answer. Split a fresh face on a representative log — the measurement must be taken on the freshly exposed wood, not the seasoned surface. Press the two pins firmly into the cut face and read the percentage. Below 20% = ready to burn. Premium burners aim for 15% or below. The meter in our products section below provides instant, accurate readings.
Test 2: Visual Indicators
- Radial end grain cracks: Cracks spreading outward from the center indicate significant water loss has occurred as the wood contracts during drying.
- Gray or darkened ends: Fresh-cut wood has bright, almost white end grain. Seasoned wood turns gray, tan, or darker as surface oxidation occurs during drying.
- Bark loosening or falling: The cambium layer that bonds bark to sapwood breaks down as the wood dries. Bark that peels or falls easily is a reliable sign of significant seasoning.
- Noticeably lighter weight: Pick up a seasoned log and a green log of the same species and size — the difference in weight is often dramatic. Dry wood of the same size can weigh 40–60% less than green wood.
Test 3: The Knock Test
Strike two logs sharply together end-to-end. Seasoned wood produces a sharp, resonant, hollow-sounding “clunk.” Green wood produces a dull, wet “thud.” This test is surprisingly reliable once you have heard the difference a few times. Experienced wood burners can assess seasoning almost entirely by this sound.
🏷️ Firewood Labeling & Organization Tips
If you store wood from multiple sources, multiple species, or across multiple seasons, a simple labeling and organization system saves significant frustration and ensures you always burn the oldest, driest wood first.
The FIFO Method (First In, First Out)
Just as a supermarket rotates stock so the oldest product sells first, a FIFO approach to your wood pile ensures you never accidentally burn freshly cut wood while older seasoned wood sits in the back of the pile deteriorating. Stack new deliveries at the back; always pull from the front. This sounds obvious but requires deliberate stacking habits to maintain.
Simple Labeling System
- Date stakes: A simple wooden stake with the cutting or delivery date written in permanent marker, placed in each new stack, tells you exactly how long that batch has been seasoning.
- Color-coded twine: Tie different colored twine around one end of each species batch — orange for oak, yellow for ash, green for pine. Useful when you actively use multiple species with different burn characteristics.
- Spray paint markers on end grain: A quick dot of spray paint on the end grain of the most accessible log in each bay identifies the species without requiring a label that can fall off or fade.
- Bay signage: For large sheds with multiple bays, a simple 4×6 weatherproof card in a sleeve stating the species, cut date, and estimated ready date removes all guesswork during fire-starting.
🔨 DIY: Build Your Own Firewood Rack
Building your own storage is a rewarding weekend project that can be completed at a fraction of the cost of purchased racks. The simplest designs require only basic tools and readily available materials.
The Cinder Block & 2×4 Rack (Under $30)
- Materials: 4 cinder blocks, two 8-foot 2×4 pressure-treated boards, two 4-foot 2×4 boards as cross-ties.
- Place two cinder blocks at each end, stacked two high, with the hollow cavities facing up. These become your end supports.
- Insert the 8-foot 2×4s vertically into the hollow cavities of the cinder blocks — one board per cavity per end. This locks the boards in place without fasteners.
- Stack your firewood between the 2×4 uprights. The cinder block weight holds everything stable. Add cross-tie boards at the base to further prevent spreading if needed.
- Optional: Add a third row of cinder blocks and additional uprights for a taller rack holding up to 1.5 cords.
Video Walkthrough
For a visual walkthrough of a more elaborate DIY build including a lean-to roof:
While you are working on outdoor projects, it is a good time to inspect your chimney’s exterior. You may need to refresh your flashing sealant or check whether you need a chimney antenna mount for your rooftop equipment.
🛒 Top-Rated Storage Gear on Amazon
If you prefer a ready-made solution, these are the top picks for durability, value, and style.
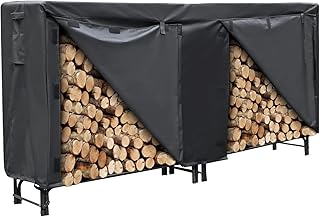
Heavy Duty Log Rack Cover
Waterproof, UV-resistant, and engineered to keep the top dry while allowing full side airflow. The correct coverage ratio is built in — no guessing required.
Check Price on Amazon
Canvas Log Carrier Tote
Stop dropping bark and dirt on your carpet. Carry logs cleanly from the outdoor pile to the indoor hearth, then use the tote as stylish indoor storage between hauls.
Check Price on Amazon
Digital Moisture Meter
Know exactly when your stored wood is ready. Prevents smoke, wasted BTUs, and creosote. Takes a reading in under 5 seconds on any freshly split wood face.
Check Price on Amazon🛡️ Safety, Maintenance & Chimney Connection
Always inspect your storage area for pests at least monthly during the burning season. Raccoons love wood piles for their protected, enclosed gaps. If they move from the pile to your flue, you will need to know how to get a raccoon out of your chimney before you can safely start a fire.
Finally, keep your chimney clean. Storing excellent dry wood is useless if your flue is lined with creosote that will either restrict the draft or catch fire. Use the best chimney sweep vacuum for regular maintenance, or hire the best chimney services for an annual professional inspection and clean.
❓ Frequently Asked Questions
Does homeowners insurance cover termite damage from firewood?
Typically no. Termite and pest damage to a home’s structure is considered “preventable maintenance” rather than a sudden, accidental event — which is the standard insurance coverage trigger. Most policies explicitly exclude pest and rot damage. Check our guide on insurance covering chimney repair for information on what fire-related damage is typically covered.
Can I store firewood in my garage?
It is not recommended unless the wood is 100% seasoned and pest-free, and even then only in limited quantities. Green wood releases significant moisture as it dries — in an enclosed garage this causes rust on metal tools, mold on drywall and stored items, and swelling of wooden doors and cabinetry. Beyond moisture, garage storage is a reliable pathway for insects and rodents to enter your home’s wall cavities. A covered outdoor rack within 30 feet of the garage door is a much better solution.
What is the best paint for a wooden storage shed?
Use an exterior-grade latex or oil-based stain with mildewcide. For the shed roof and any areas that will be exposed to maximum UV and moisture, a solid acrylic latex stain outlasts thin paint. If you are painting near masonry elements, see our review of the best paint for chimney brick for compatible high-durability options.
How do I keep my firewood pile from attracting snakes?
Snakes are attracted to wood piles for warmth, shelter, and the rodents that inhabit them. The most effective prevention is removing the conditions snakes are seeking: eliminate the rodent population that draws them (by maintaining a tidy pile and removing debris), keep the area around the pile mowed and clear of tall vegetation, and elevate the pile high enough (12+ inches) that gaps large enough for nesting are eliminated. A well-maintained, elevated pile on a gravel pad is rarely a snake habitat.
How do I dry firewood faster?
The single most impactful step is splitting rounds immediately after cutting, before they begin to surface-dry with the natural moisture barrier. After splitting, maximize sun exposure and airflow: south-facing stack placement, loose stacking with airflow gaps, bark-side-up orientation, and removal of any cover during dry breezy weather. In wet climates, a solar kiln — a simple transparent-sided enclosure that traps solar heat — can cut hardwood seasoning times by 30–50% compared to open-air stacking.
Is it safe to store firewood near a propane tank?
No. Firewood should not be stored within 10 feet of a propane tank at minimum — and most codes recommend keeping all combustible materials further than this. Propane regulators and connections can develop slow leaks, and accumulated propane gas near a flammable material is a serious fire and explosion risk. Keep firewood storage well clear of all fuel storage, including propane, heating oil tanks, and gasoline containers.
Can firewood season too long? Is there such a thing as over-dried wood?
Technically yes, but in practice it is rarely a problem. Wood that has seasoned for 3–5 years in good conditions may become very dry (below 10% moisture) and burn very fast, producing less long-lasting heat per log than wood at 15–18% moisture. Extremely old dry wood may also develop punky (spongy) sections where rot has set in from extended ground contact or moisture intrusion. In practice, using wood within 2–3 seasons of cutting and storing it properly produces optimal burn quality.
Should I remove the bark before storing firewood?
There is no consensus on this, and it varies by species and situation. Bark does slow moisture release from the sides of the log (moisture primarily exits through end grain anyway), but it also provides habitat for wood-boring insects and creates a surface for fungal growth. For most practical purposes, leave the bark on and orient the stack with cut ends facing outward for maximum drying. If you are storing indoors or in a situation where insects are a serious concern, bark removal from logs in the lowest tiers is a reasonable precaution.