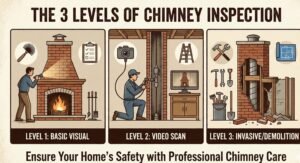
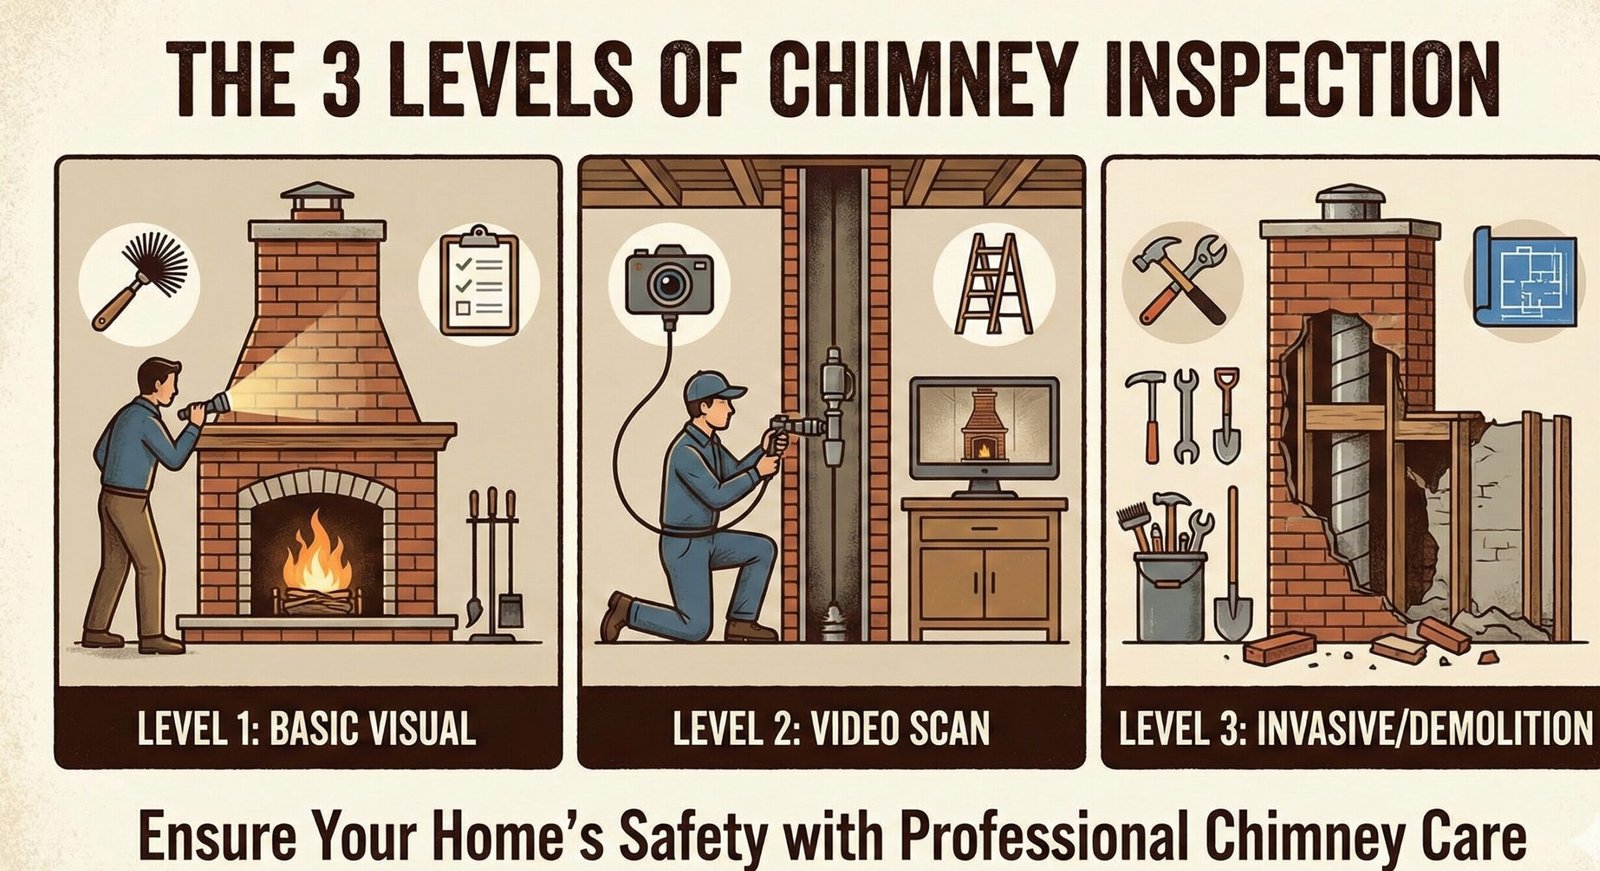
What Are the 3 Levels of Chimney Inspection? A Complete NFPA 211 Guide
Level 1: Annual visual-only check of accessible areas — no tools required. Cost: $80–$200. Required every year.
Level 2: Video camera scan of the full flue interior plus attic/crawlspace access. Cost: $200–$500. Required at real estate transfer, fuel type change, or after external events.
Level 3: Partial demolition to access concealed hazards. Cost: $1,000–$5,000+. Reserved for suspected hidden structural failures following chimney fires or severe events.
📋 Table of Contents
- Understanding NFPA 211
- The Three Levels at a Glance
- Level 1: The Annual Checkup
- What Level 1 Actually Covers (Full Checklist)
- Level 2: The Real Estate Standard
- Video Scanning Technology Explained
- Level 2 Trigger Events
- Level 3: The Investigative Approach
- Level 1 vs. Level 2 vs. Level 3 Comparison
- Cost Deep-Dive: What Drives the Price
- Common Issues Found During Inspections
- Creosote: Understanding the 3 Stages
- Liner Types and Their Failure Modes
- Choosing a Qualified Inspector
- DIY vs. Professional Inspection
- Seasonal Inspection and Prep Checklist
- Frequently Asked Questions
When was the last time you thought about the structural integrity of your chimney? For most homeowners, the chimney is an “out of sight, out of mind” component of the house — until smoke starts filling the living room or, worse, a chimney fire occurs. Understanding the health of your venting system is not just about maintenance; it is a critical safety protocol defined by the National Fire Protection Association (NFPA).
The NFPA 211 standard breaks down chimney inspections into three distinct levels. These levels range from a basic visual check to a destructive demolition-based investigation. Knowing which level you need can save you thousands in repairs, prevent deadly carbon monoxide poisoning, and ensure your fireplace operates efficiently.
Whether you are buying a new home, changing your heating fuel, or simply keeping up with annual maintenance, this guide dissects the 3 levels of chimney inspection in full detail — covering what happens during each process, what equipment is used, what issues get uncovered, and exactly why each level matters for your family’s safety.
The Authority: Understanding NFPA 211
Before diving into the levels, it is essential to understand who sets the rules. The National Fire Protection Association (NFPA) is the governing body that establishes the codes for fireplaces, solid fuel-burning appliances, and venting systems in the United States. Their code, NFPA 211: Standard for Chimneys, Fireplaces, Vents, and Solid Fuel-Burning Appliances, is the industry standard adopted by most state and local building authorities.
This code dictates that all chimneys, fireplaces, and vents must be inspected at least once a year. The intensity of that inspection depends on specific triggers, such as a chimney fire, a property transfer, a change in the heating appliance, or a malfunction. Failing to follow these guidelines does not just risk an insurance claim denial — it risks lives.
Why NFPA 211 Exists: The Statistics Behind the Standard
The NFPA framework was developed in response to documented patterns in residential fire causes. Solid-fuel heating equipment — primarily fireplaces and woodstoves — is consistently among the leading causes of home heating fires. The majority of these fires are directly attributable to failures that a properly conducted inspection would have identified: blocked flues, cracked liners, accumulated creosote, or deteriorated mortar joints that allow heat to transfer directly to combustible building framing.
Carbon monoxide is the other core threat. A chimney with a cracked liner, a blocked vent cap, or a disconnected flue section can silently introduce odorless combustion gases into the living space. Unlike smoke, CO provides no warning before it reaches dangerous concentrations. An annual inspection is the only reliable mechanism for detecting these conditions before they become emergencies.
🚨 Carbon Monoxide Is Odorless and Colorless
A functioning CO detector is an essential complement to annual chimney inspections — not a replacement. CO detectors should be installed on every level of the home and tested monthly. Even a recently inspected chimney can develop a new blockage from a bird nest or debris between inspection cycles.
The Three Levels at a Glance
Annual Checkup
Visual-only. Readily accessible areas. No tools, no camera, no demolition. Routine maintenance baseline.
Real Estate Standard
Full Level 1 plus video camera scan of the flue liner and inspection of attic, crawlspace, and basement passages.
Investigative Approach
Full Level 2 plus removal of structure or chimney components to access concealed damage. Reserved for suspected critical failures.
Each level is cumulative — a Level 2 inspection includes everything covered in Level 1, and a Level 3 includes everything covered in Level 2. They are not separate protocols but escalating levels of access and diagnostic depth applied when the preceding level reveals or suggests a problem that requires a closer look.
Level 1 Inspection: The Annual Checkup
A Level 1 inspection is the minimum requirement for a chimney system. It is the standard service provided during a routine annual cleaning. If your appliance has not changed and you plan to use the system exactly as you have in the past, this level is usually sufficient.
What Happens During a Level 1 Inspection?
A certified chimney sweep examines the readily accessible portions of the chimney exterior, interior, and the accessible portions of the appliance and chimney connection. “Readily accessible” means the technician can see it without using tools to remove panels, doors, or coverings. The inspection assesses three core dimensions: the serviceability of the overall system, the basic soundness of the structure and flue, and the absence of obstructions or hazardous deposits.
- Visual Check: Scanning the exterior for missing mortar, spalled bricks, damaged flashing, and an intact chimney cap.
- Combustible Deposits: Checking for creosote layers — particularly Stage 2 or Stage 3 buildup — that could trigger a fire.
- Damper Condition: Verifying the damper opens and closes fully, seats tightly when closed, and shows no corrosion that would impair operation.
- Firebox Inspection: Examining the firebox floor, walls, and hearth extension for cracks, deteriorated refractory panels, or open mortar joints.
- Obstruction Check: Confirming the flue is clear of bird nests, debris, or fallen masonry using a flashlight from above and below.
- Chimney Cap and Crown: Checking that the cap screens are intact (no holes large enough to admit animals) and that the crown shows no cracking or erosion.
The Full Level 1 Inspection Checklist
Here is exactly what a thorough Level 1 inspection should document, item by item:
- Exterior masonry: brick condition, mortar joint integrity, spalling
- Chimney cap: present, intact mesh screening, no corrosion through
- Crown: cracks, erosion, slope toward exterior (correct drainage direction)
- Flashing: sealed against the chimney body, no open gaps at step or counter-flashing
- Chase cover (metal prefab chimneys): present, rust-free, no open gaps
- Firebox floor and walls: no cracks in firebox floor, refractory panels undamaged
- Smoke chamber: visible mortar parge coat, no open joints visible from below
- Damper: opens and closes fully, seals correctly when closed
- Throat area: clear of debris and bird nest material
- Flue interior (flashlight visual): no obvious fallen tiles, no heavy soot hanging from walls
- Creosote deposit level: Stage 1, 2, or 3 designation noted
- Obstruction check: confirmed clear from both above and below
When Do You Need a Level 1?
A Level 1 inspection is appropriate when:
- You are conducting your annual scheduled maintenance.
- Nothing has changed in your system — same fuel, same appliance, same usage patterns.
- You have no reason to suspect damage and there have been no unusual events (chimney fires, storms, seismic activity).
ℹ️ The Limitation of Level 1
A Level 1 inspection can identify surface conditions — but it cannot see through clay tile liner walls. A tile liner can appear perfectly intact from below with a flashlight while harboring hairline cracks that allow heat transfer to nearby combustibles. If any condition is uncertain or ambiguous, the NFPA protocol requires escalation to Level 2.
While this level is vital, it has real limitations. If you have a clay tile liner that is cracked internally, a technician using only a flashlight might miss it. This is why having the right tools — such as the best chimney sweep vacuum — is essential for clearing debris to get a clearer view of the flue interior.

Professional Chimney Sweep Kit
Keep your flue clean between professional inspections with a high-quality rotary cleaning kit.
Check Price on AmazonLevel 2 Inspection: The Real Estate Standard
A Level 2 inspection is deeper, more detailed, and critical for safety in higher-stakes situations. This is the most commonly required inspection level during real estate transactions and following any event that might have impacted the chimney’s structural integrity. If you are buying a home with a fireplace, a standard home inspector will typically defer the chimney portion to a CSIA-certified specialist for a Level 2 check.
The Video Scanning Advantage
The defining feature of a Level 2 inspection is the use of video scanning technology — often called a “Chim-Scan” or closed-circuit camera inspection. A purpose-built, high-resolution camera on a flexible cable is lowered down the full length of the flue, transmitting a live 360-degree close-up feed to a monitor. This reveals cracks, missing mortar joints, gap separations between liner sections, pyrolyzed deposits, and structural deformations that are completely invisible to the naked eye even with a powerful flashlight.
The camera footage is typically recorded and provided to the homeowner as a documented record — important for both insurance purposes and for prioritizing repair decisions. A professional inspector will pause the camera feed at any point of concern and annotate the footage with location measurements so that any subsequent repair contractor can pinpoint the exact position of a defect within the flue without guesswork.
What Is Covered in Level 2?
In addition to everything in Level 1, a Level 2 inspection includes:
- Full Video Scan: 360-degree camera inspection of the entire accessible flue length from top to bottom, looking for liner integrity issues.
- Accessible Areas: Examination of attics, crawl spaces, and basements where the chimney passes through the structure, checking clearances to combustibles and visible exterior chimney condition.
- Clearance Verification: Confirming the chimney structure maintains code-required separation from wood framing, insulation, and other combustibles at every floor and ceiling penetration.
- Appliance Connection: Inspecting the connection between the heating appliance and the chimney (the connector pipe) for proper installation, seal integrity, and correct sizing.
When Is a Level 2 Inspection Required?
According to NFPA 211, a Level 2 inspection is mandatory in the following trigger scenarios:
🏠 Home Sale or Purchase
Any real estate transaction involving a home with a chimney or venting system. Required for all property transfers — not optional.
🔥 Fuel Type Change
Converting from wood to gas, gas to wood, or changing appliance BTU output. Each fuel type has different flue sizing and lining requirements.
🌊 External Events
Building fire, chimney fire, earthquake, tornado, or severe weather event such as a lightning strike anywhere near the structure.
⚙️ New Liner or Appliance
Before installing a new flue liner, a new insert, or a replacement heating appliance. Ensures the existing structure can support the new system.
⚠️ Real Estate Agents Frequently Skip This Step
A standard home inspection does not include a Level 2 chimney inspection — it includes only a basic visual check equivalent to a partial Level 1. Buyers should always request a full Level 2 inspection as a separate contingency item when purchasing any home with a wood-burning fireplace or woodstove, regardless of the age or condition of the property.
Common issues found during Level 2 inspections include cracked flue tiles, which can allow heat to transfer to the home’s frame, or improper flashing. If leaks are detected, you may need the best chimney flashing sealant to prevent water damage. Furthermore, if you are converting an open fireplace, understanding the fireplace vs. insert differences and the gas fireplace venting options is crucial — but confirming the chimney can support the change always requires this level of inspection first.

Safety First: Carbon Monoxide Detector
A compromised chimney liner can leak deadly gas. Always have a working CO detector nearby.
Check Price on AmazonLevel 3 Inspection: The Investigative Approach
A Level 3 inspection is the most intensive chimney evaluation available. It is an intrusive procedure that involves removing parts of the building structure or the chimney itself to gain access to concealed areas that cannot be evaluated by any other means. It is not routine; it is investigative — performed only when Level 1 or Level 2 evidence strongly suggests a hidden hazard.
The Process of Demolition and Discovery
This level is only recommended when a Level 2 inspection identifies or strongly suggests a serious hidden hazard. The scope of demolition varies depending on where the suspected problem is located. It might involve:
- Removing drywall to expose the exterior surface of the chimney within a wall cavity and confirm whether flue gases have been escaping into the building structure.
- Removing the chimney crown or upper masonry sections to inspect the structural integrity of the flue and surrounding masonry from above.
- Removing the fireplace facing, hearth extension, or surround to access the firebox structure and smoke chamber from a different angle.
- In extreme cases, removing a section of the liner itself to examine whether the chimney’s framing clearances are being maintained or whether combustible materials are in contact with the chimney structure.
When Is Level 3 Necessary?
Level 3 is reserved for scenarios where the safety of the chimney is in serious doubt and the problem cannot be diagnosed otherwise. The most common triggers are a severe chimney fire that generated temperatures high enough to damage the structure behind the walls, or Level 2 footage showing liner damage in areas where the camera cannot fully resolve the extent of the problem. Identifying chimney fire signs early can sometimes prevent the escalation to Level 3 — but when a significant fire has occurred, Level 3 is often unavoidable.
🚨 Do Not Use the Fireplace After a Chimney Fire
If you suspect or have confirmed a chimney fire has occurred — indicated by loud cracking or popping sounds, a strong hot smell, visible smoke from the flue exterior, or warped damper components — stop all use of the fireplace immediately and do not restart it until a Level 2 or Level 3 inspection has been completed and any required repairs have been made. Using a structurally compromised chimney after a fire dramatically increases the risk of the fire extending into the building structure.
Once the inspection is complete and the issue is identified — such as crumbling masonry, a collapsed liner, or a combustibles clearance violation — the repair scope will be defined. This could involve using the best mortar for chimney repair, complete liner replacement, or applying specialized waterproofing sealants after structural remediation.
Cost and Scope Reality
Level 3 inspections are priced at $1,000–$5,000 or more — not because of the inspection itself, but because the demolition work required to access the concealed areas is labor-intensive and the subsequent restoration of the opened wall or masonry sections is additional cost on top of whatever repairs the inspection reveals are necessary. Homeowners should request a written scope of work before authorizing Level 3 access, with clear documentation of exactly what will be opened, why, and what the restoration process will involve after the inspection concludes.
Comparison: Level 1 vs. Level 2 vs. Level 3
| Feature | Level 1 | Level 2 | Level 3 |
|---|---|---|---|
| Primary Purpose | Routine Maintenance | Real Estate / Changes / Events | Hidden Structural Investigation |
| Tools Used | Flashlight, Brushes | Video Scanner (Camera) | Demolition Tools + Camera |
| Intrusiveness | Low — Visual only | Medium — Internal scan | High — Structural removal |
| Liner Interior Viewed? | Partially (flashlight) | Fully (360° video) | Fully (video + direct access) |
| Attic/Crawlspace Access | No | Yes | Yes |
| Common Scenario | Annual cleaning | Buying a house / fuel change | Chimney fire / suspected hidden damage |
| Estimated Cost | $80 – $200 | $200 – $500 | $1,000 – $5,000+ |
| Duration | 30–60 minutes | 60–90 minutes | Half day to multiple days |
| Triggers Required? | None — schedule annually | Yes — specific NFPA trigger events | Yes — Level 2 must suggest hidden hazard first |
Cost Deep-Dive: What Drives the Price
Understanding cost ranges for chimney inspections requires knowing what factors create price variation beyond just the level designation. The same Level 2 inspection can cost $200 in a small city and $500 in a high cost-of-living metropolitan area, and both prices are legitimate.
Factors That Increase Inspection Cost
- Geographic location: Labor rates in major metro areas are substantially higher than in rural markets. The same CSIA-certified sweep charges more in New York than in rural Ohio — not because the inspection is different, but because their operating costs are higher.
- Number of flues: A home with two or three fireplaces requires inspecting two or three separate flue systems. Expect cost to scale roughly linearly per additional flue.
- Chimney height and roof access complexity: Steeply pitched roofs, metal roofing, or very tall chimneys require additional safety rigging and time. Some sweeps charge a height premium for structures requiring fall protection setup.
- Combined service (inspection + cleaning): Many companies offer inspection and cleaning as a bundled service. This is generally more cost-effective than scheduling them separately, but confirm the inspection fee includes a separate written report — not just verbal findings.
- Report documentation: Written inspection reports with annotated video stills cost more than a verbal walk-through. Always pay for the written documentation — it is your evidence record for insurance and repair negotiations.
✅ Always Request a Written Report
Regardless of inspection level, request a formal written report with any video footage provided on a USB or shared link. Verbal-only findings have no legal standing for insurance claims and leave you with no documentation if a dispute arises with a contractor over the repair scope defined by the inspection.
Common Issues Uncovered During Inspections
Regardless of the level, inspectors are looking for specific hazards that threaten your home and family. Here is a deeper look at the most frequently discovered problems.
1. Creosote Buildup
Creosote is a highly flammable byproduct of incomplete combustion when burning wood. It deposits on the interior walls of the flue as smoke cools while rising, and its character changes dramatically as it accumulates and ages. Using the best firewood for fireplace — well-seasoned hardwood with moisture content below 20% — is the single most effective measure for minimizing creosote formation, but burning habits and draft conditions also play major roles.
The Three Stages of Creosote
Stage 1: Flaky Soot
Light, dusty, easily brushed away. Indicates hot, efficient fires with dry wood. Low fire risk. Removed by routine cleaning with standard brushes.
Stage 2: Crunchy/Shiny
Dark, harder deposits with a crunchy or shiny-flake appearance. Indicates moderate combustion inefficiency. Requires more aggressive rotary cleaning tools to remove.
Stage 3: Glazed/Tar
Dense, tar-like, hard coating. Extremely flammable. Standard cleaning brushes cannot remove it. Requires chemical treatment and specialized equipment. Represents a serious fire hazard.
2. Water Damage
Water is a masonry chimney’s worst enemy. The freeze-thaw cycle is a destructive mechanism: water infiltrates microscopic cracks in the mortar and brick, expands approximately 9% in volume when it freezes overnight, then contracts when it thaws. Repeated cycles over multiple winters cause progressive spalling of the brick face and deterioration of mortar joints. If an inspector finds moisture infiltration, they will recommend immediate waterproofing. You may need to learn how to waterproof a chimney or apply the best chimney waterproofing products before the next winter season.
Water also attacks from above through a failed chimney crown. The crown is the concrete or mortar cap that covers the top of the masonry chimney except for the flue opening. It is designed to shed water away from the chimney body, but cracks develop as the crown ages and is subjected to thermal expansion cycles. Once cracked, water runs directly into the chimney’s interior, accelerating liner deterioration and saturating the surrounding masonry.
3. Animal Intrusion
Without a properly screened chimney cap, an open flue is an attractive nesting site for chimney swifts (federally protected migratory birds), European starlings, raccoons, squirrels, and in some regions, bats. A Level 1 inspection may catch a fresh nest at the throat of the chimney. A Level 2 camera scan often reveals nests lodged deep within the flue, invisible from above, that create both a fire hazard and a significant obstruction to draft. If you have this issue, you need to know how to get a bird out of your chimney safely and legally. Installing the best chimney caps for rain and animals is the correct preventive solution.
4. Liner Damage
The flue liner is the most structurally critical component of the chimney from a fire safety standpoint. Its purpose is to contain combustion gases and heat within a continuous, sealed passage from the appliance connection to the flue exit — preventing any contact between hot gases and the combustible framing of the house.
Clay tile liners (the most common type in homes built before the widespread adoption of stainless steel) crack as they age through thermal expansion and contraction cycles. The mortar joints between tile sections deteriorate through the same freeze-thaw mechanism that damages exterior masonry. Once a liner develops even a hairline crack that extends through its full thickness, combustion gases can escape directly into the building structure. If you have a stainless steel liner, ensure you are using the best chimney brush for stainless steel liner to avoid scratching and compromising the metal’s integrity.
5. Improper Clearances to Combustibles
Building codes require a specified minimum clearance between the exterior of the chimney structure and any combustible material — wood framing, insulation, or OSB sheathing. When chimneys are modified, added to, or improperly rebuilt, these clearances are sometimes violated. Even if the clearance was originally correct, settling of the structure over decades can shift framing into contact with the chimney body. A Level 2 inspection in the attic, basement, and crawlspace specifically checks these clearances where they are most often compromised and least visible during routine use.
Liner Types and Their Failure Modes
| Liner Type | Common In | Primary Failure Mode | Detection Method |
|---|---|---|---|
| Clay Tile | Homes built before ~1990 | Thermal cracking, mortar joint deterioration, spalled tile face | Level 2 video scan |
| Stainless Steel (rigid) | Modern installs, relining projects | Joint separation at connectors, surface pitting with extended high-heat exposure | Level 2 video scan |
| Stainless Steel (flexible) | Retrofit liners, gas appliances | Corrosion from condensate in low-BTU gas applications, kinking at bends | Level 2 video scan |
| Cast-in-Place (pumice) | Older relining projects | Delamination from chimney interior, cracking at settling seams | Level 3 may be required |
| No Liner (unlined) | Very old homes (pre-1940s) | Direct contact between hot gases and masonry — constant clearance violation | Requires immediate relining |
Choosing a Qualified Inspector: Credentials Matter
Not all chimney sweeps are equally qualified to perform all three levels of inspection. Understanding the credential landscape prevents you from paying for a Level 2 inspection and receiving what is effectively a Level 1 in terms of the inspector’s ability to interpret what the camera reveals.
CSIA Certified Chimney Sweep (CCS)
The Chimney Safety Institute of America (CSIA) certification is the most widely recognized professional credential for chimney technicians in the United States. CSIA-certified sweeps have passed a comprehensive examination covering chimney construction, venting principles, creosote chemistry, NFPA codes, and inspection methodology. They are required to complete continuing education hours to maintain certification. For any inspection above Level 1, always verify your inspector holds active CSIA certification — not just a business license or a general contractor’s license.
NFI Certified (National Fireplace Institute)
NFI certification is specific to hearth products — fireplaces, inserts, stoves, and venting systems. NFI-certified technicians have demonstrated knowledge of appliance-specific installation and venting requirements that is particularly relevant for Level 2 inspections triggered by fuel type changes or new appliance installations. An inspector with both CSIA and NFI credentials provides the most comprehensive evaluation capability for complex chimney systems.
What to Ask Before Hiring
- Do you hold current CSIA certification? (Request certificate number for verification)
- Will you provide a written report with video footage for a Level 2 inspection?
- Are you insured for chimney-related work?
- How many Level 2 inspections do you perform per year?
- What is your process if Level 2 suggests Level 3 is needed? (Avoid inspectors who are also the sole contractor who would perform any resulting repairs — this creates a conflict of interest)
Can You Do Your Own Chimney Inspection?
In the age of DIY, many homeowners ask if they can skip professional fees. The honest answer depends entirely on the inspection level you need.
What a Homeowner Can Legitimately Do
A homeowner can perform a useful baseline visual check — essentially an informal pre-inspection that helps you decide whether to escalate to a professional. This involves:
- Looking at the exterior masonry for obvious spalling or fallen mortar joints at ground level
- Checking that the chimney cap is present and the screen is intact with no large holes
- Operating the damper and confirming it moves freely and seats correctly when closed
- Using a bright flashlight to look into the firebox and up toward the smoke chamber, checking for obvious blockages or heavy soot hanging from walls
- Checking for white residue (efflorescence) on the exterior bricks, which indicates moisture infiltration
What Requires Professional Equipment
Everything beyond this baseline requires professional equipment and training. A homeowner cannot perform a proper Level 2 inspection without a Chim-Scan camera system, which costs $3,000–$8,000 and requires training to interpret correctly. More importantly, recognizing whether what the camera reveals constitutes a code violation — and what the appropriate remediation is — requires the specific knowledge base that CSIA certification establishes. For safety, always hire a CSIA-certified sweep for any formal inspection. If you need to find one, search for the best chimney services in your area using the CSIA’s official sweep locator.
⚠️ The Liability Risk of Self-Inspection
If a chimney fire or CO incident occurs after a homeowner-performed “inspection,” insurance companies will investigate whether a professional inspection was conducted. A self-inspection provides no documentation and no professional accountability. An annual professional inspection — which costs $80–$200 — is one of the lowest-cost safety investments available for homeowners with fireplaces.
Seasonal Inspection and Preparation Checklist
The best practice for fireplace owners is to schedule the annual Level 1 inspection and cleaning before the heating season begins — ideally in late summer or early fall — rather than waiting until the chimney is already in heavy use. Here is a complete seasonal preparation checklist to guide the process.
Late Summer / Early Fall: Before the Heating Season
-
Schedule Professional Inspection and Cleaning
Contact a CSIA-certified sweep to schedule your annual Level 1 inspection and cleaning. Late August through September is the peak scheduling period — book early to secure your preferred date. If you are buying a new home or have had any unusual events this year, specify that a Level 2 inspection is needed.
-
Check and Test Your CO Detectors
Replace batteries in all carbon monoxide detectors. Test each unit with the test button. CO detector sensors have a limited lifespan of approximately 5–7 years — check the manufacture date and replace any units that are approaching or past this threshold.
-
Inspect the Chimney Cap from Ground Level
Using binoculars if necessary, verify the chimney cap is still in place and the screen mesh has no holes or deformations large enough to admit birds or squirrels. Caps can be displaced by severe wind events, falling tree branches, or raccoon activity between annual inspections.
-
Examine the Firebox and Damper Yourself
Before the professional visit, check the firebox for any new cracks, loose refractory panel sections, or fallen debris that might indicate activity since the last inspection. Operate the damper handle through its full range of motion to confirm it moves freely.
-
Season Your Firewood
Confirm that stored firewood has been properly seasoned — ideally at least 6 months since splitting, with moisture content below 20% (a moisture meter confirms this). Burning unseasoned wood is the primary cause of Stage 2 and Stage 3 creosote accumulation and the leading preventable driver of chimney fires.
End of Heating Season: Spring Closure
- Close the damper tightly to prevent conditioned indoor air loss through summer
- Note any unusual observations from the season (smoke spillage, odors, unusual sounds) to report at next annual inspection
- Dispose of ash once fully cold — ash holds heat for up to 72 hours, never dispose in plastic or combustible containers
- Place a chimney balloon or damper cover if the damper does not seal tightly — an open damper in summer loses meaningful air conditioning through the flue
Frequently Asked Questions
A Level 1 inspection combined with a cleaning typically takes 45–90 minutes depending on the chimney’s condition and the amount of creosote requiring removal. A Level 2 inspection adds the video scan setup and roof access to the Level 1 scope — expect 60–90 minutes minimum, often longer for complex multi-story homes or systems with multiple flues. Level 3 inspections vary enormously based on the demolition scope required and may take half a day or span multiple visits.
Coverage depends on the cause of the damage. Sudden, unexpected events — a documented chimney fire, a lightning strike, hail damage, or a fallen tree — are typically covered under the dwelling portion of a standard homeowners policy after your deductible. Gradual deterioration caused by lack of maintenance, age-related wear, freeze-thaw spalling, or creosote damage is almost universally excluded as “maintenance issues.” Annual professional inspection documentation is important evidence when filing a claim, as it establishes that you exercised reasonable care. Read more about does homeowners insurance cover chimney repair.
Gas fireplaces require annual inspection despite burning cleaner than wood. Direct-vent gas fireplaces draw combustion air from outside and exhaust directly to the exterior — but the exterior vent cap can become blocked by spider webs (a surprisingly common cause of carbon monoxide intrusion), bird nests, or ice in extreme cold. B-vent (natural draft) gas fireplaces use the same masonry flue as wood systems and are subject to all the same liner integrity requirements. Ceramic log sets and refractory panels in gas fireplaces deteriorate over time and need to be examined annually for cracking that could affect combustion. See our guide on does a gas fireplace need a chimney for more detail.
Yes, and the conversion is popular — gas inserts are significantly more efficient than open wood fireplaces. However, a fuel type change is an NFPA-defined Level 2 inspection trigger. Gas combustion produces water vapor as a byproduct, and if the flue is not properly lined with the correct type of liner for the gas appliance’s BTU output and vent category, acidic condensate will attack the liner and potentially the surrounding masonry. A Level 2 inspection before conversion confirms whether the existing liner is compatible or whether relining is required. You will also need to decide between direct vent vs. ventless gas fireplace options, which have very different venting requirements.
These are two different services with different triggers. Inspection frequency is set by NFPA 211 at annually as the minimum, with additional inspections triggered by specific events regardless of when the last inspection occurred. Cleaning frequency depends entirely on usage — specifically, the volume of wood burned and the quality (moisture content and species) of the wood. The CSIA recommends cleaning when Stage 2 or Stage 3 creosote is detected or when soot deposits exceed 1/8 inch in depth. Light users burning two to four cords per season typically need an annual cleaning that coincides with their annual inspection. Heavy users burning six or more cords may need a mid-season cleaning in addition to the annual service.
Efflorescence is the white, powdery or crystalline deposit that appears on exterior masonry surfaces. It forms when water moves through the masonry, dissolves naturally occurring soluble salts within the brick or mortar, and carries them to the surface where the water evaporates and the salts crystalize. The efflorescence itself is not structurally harmful — it is a symptom. The concern is the active moisture infiltration that is causing it. If left unaddressed, repeated moisture infiltration leads to the progressive freeze-thaw spalling and mortar deterioration that are the primary causes of chimney structural failure. An inspector will note efflorescence as evidence of active moisture movement and recommend addressing the source — typically through crown repair, cap maintenance, and application of a breathable masonry waterproofer.
Chimney relining costs vary significantly based on liner type, flue height, and number of offsets in the chimney structure. Flexible stainless steel liner systems for gas appliances in a standard two-story chimney (approximately 20–25 feet of liner) typically run $1,500–$2,500 including installation and a new chimney cap. Rigid stainless liner systems for wood appliances cost somewhat more — approximately $2,000–$3,500 — because rigid liner sections are more labor-intensive to install in chimney with any angles or offsets. Cast-in-place liner systems are the most expensive option at $3,500–$6,000+ but create a seamless, thermally efficient liner that conforms to the irregular interior of any existing masonry chimney and is the best choice for very old or damaged chimneys with irregular interior geometry.
Unlike a vehicle safety inspection, there is no formal pass/fail system for chimney inspections — the inspector provides findings and recommendations, and the homeowner decides what repairs to pursue. However, a responsible inspector will clearly communicate which findings represent an immediate safety hazard that warrants suspending use of the appliance versus which findings represent maintenance items that can be monitored or addressed at the next scheduled service. If an inspector identifies an immediate safety hazard — a severely cracked liner with exposed combustibles, Stage 3 glazed creosote, or a significant structural breach — they are obligated to recommend that the appliance not be used until repairs are completed. Ignoring this recommendation and continuing to use a condemned fireplace creates significant liability and voids most homeowners insurance coverage for any resulting fire damage.
Final Thoughts: Don’t Skip the Inspection
Understanding the 3 levels of chimney inspection is more than technical knowledge — it is about protecting your home and family from two of the most preventable household hazards: chimney fires and carbon monoxide intrusion. Whether it is the routine assurance of a Level 1 check or the deep-dive diagnostics of a Level 2 scan during a home purchase, these inspections are the only reliable mechanism for ensuring your fireplace remains a source of warmth and comfort rather than a hidden hazard.
The cost of an annual professional inspection — $80 to $200 for a Level 1 — is one of the most economical safety investments a homeowner with a fireplace can make. For context, a single chimney fire can result in $10,000–$50,000 in structural repairs, and a carbon monoxide incident can be fatal. If you suspect your chimney is leaking, has suffered a fire, or if you are just overdue for a cleaning, do not wait. Schedule an inspection, and if repairs are needed, use the highest quality materials — from the best paint for chimney brick to reliable waterproofing agents and professional-grade mortar repair compounds.

Maintenance Must-Have: Creosote Sweeping Log
Help break down dangerous creosote buildup between professional cleanings.
Check Price on Amazon