Seasoned vs. Unseasoned Firewood: Why Your Safety and Comfort Depend on the Difference
By Chimney Insight Tech Team | Fire Safety & Heating Experts
There is a science to the warmth of a fire. Every winter, homeowners struggle with smoky living rooms, glass doors black with soot, and fires that hiss and sizzle but refuse to produce heat. The culprit is almost always the same: unseasoned firewood. This guide goes beyond the basics — we cover the thermodynamics of moisture in combustion, how to identify dry wood using eight sensory and instrument tests, how to avoid being sold green wood as “seasoned,” the true financial cost of burning wet wood, and how to accelerate the drying process so you are never without ready fuel.
📋 Table of Contents
- 1Defining the Rivals
- 2Moisture Science Explained
- 3The Physics: Water Kills Heat
- 4BTU Loss by Moisture Level
- 5The Real Cost of Wet Wood
- 68 Ways to Spot Wet Wood
- 7Moisture Meters Guide
- 8Starting Moisture by Species
- 9Dangers of Green Wood
- 10Creosote Stages Explained
- 11Carbon Monoxide Risk
- 12EPA Rules on Wood Moisture
- 13Air vs. Kiln vs. Solar Drying
- 14How to Season Wood Yourself
- 15Accelerating Seasoning
- 16Buying Seasoned Wood Safely
- 17Green Wood Myths Debunked
- 18Climate & Drying Speed
- 19Recovering Partially Dry Wood
- 20Essential Tools
- 21Expert Resources
- 22FAQ
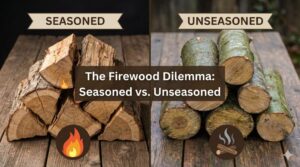
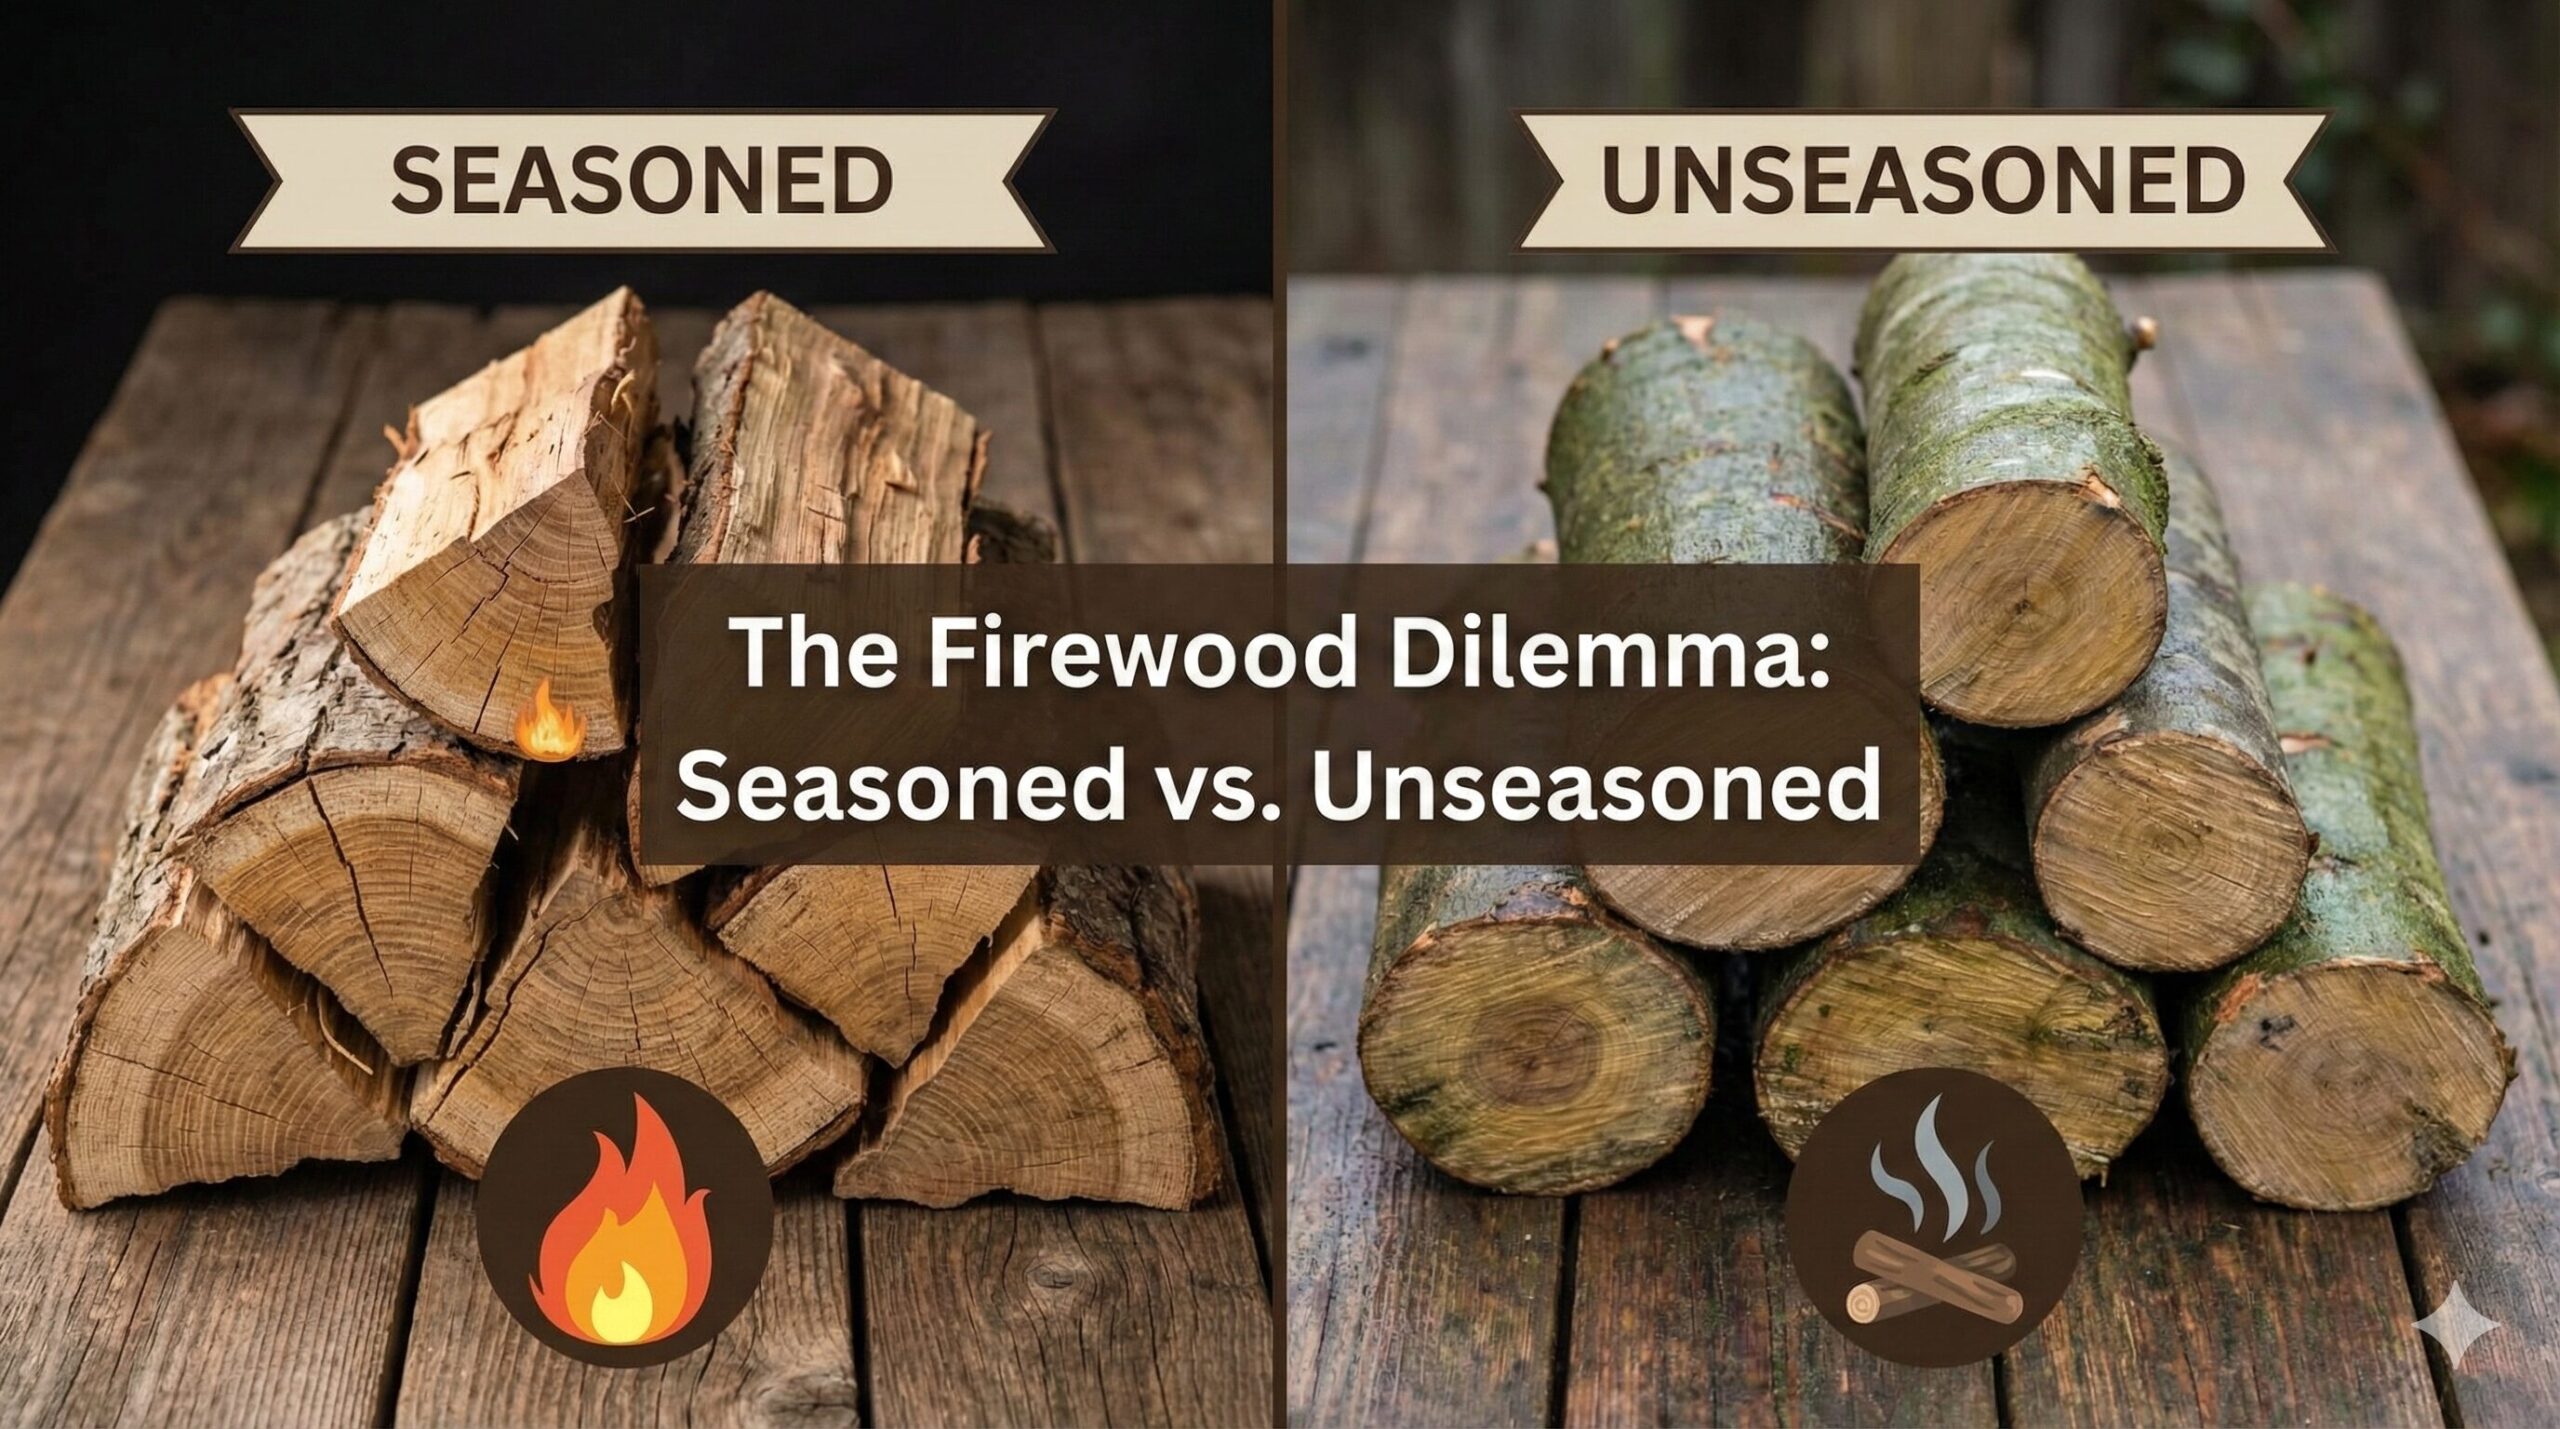
🪵 Defining the Rivals: Seasoned vs. Unseasoned
Before we dive into testing methods, we must define our terms. Wood is essentially a sponge; living trees are filled with water used to transport nutrients from roots to canopy. When a tree is felled, that water remains trapped inside the cellular structure in two distinct forms — and understanding both is the key to understanding why some wood burns brilliantly while other wood barely stays lit.
| Feature | Seasoned Wood (Dry) | Unseasoned Wood (Green) |
|---|---|---|
| Moisture Content | Below 20% | 45% to 60%+ |
| Ignition | Lights easily, stays lit | Hard to light, smolders |
| Sound (knock test) | Hollow, ringing “clunk” | Dull, heavy “thud” |
| Heat Output | High BTU efficiency | Low — energy wasted boiling water |
| Smoke Color | Clear/white, minimal | Thick, gray/black, acrid |
| Flame Character | Bright, active, orange-yellow | Sluggish, dark-smoking, low |
| Creosote Risk | Low | Very High |
| CO Risk | Low | Elevated |
| End Grain Appearance | Radial cracks, gray/tan color | Fresh, bright color, no cracks |
| Bark | Loose or peeling | Firmly attached |
Understanding this distinction is vital for wood stove vs. fireplace heating efficiency. If you put green wood in a high-efficiency stove, you negate the technology’s entire advantage.
🔬 The Moisture Science: Free Water vs. Bound Water
Not all moisture in wood is equal. Wood scientists distinguish between two fundamentally different types of water in a log, and understanding this distinction explains why some wood dries quickly while other wood takes years.
Free Water
Free water is liquid water held in the hollow cavities (cell lumens) of the wood’s vascular system — the channels that transported water and nutrients through the living tree. Free water evaporates relatively easily once the log is felled and exposed to air. This is why fresh-cut softwoods can sometimes be burned within 6 months — they release their free water quickly.
Bound Water
Bound water is chemically attached to the cell walls themselves — it is part of the wood’s fiber structure. This water does not evaporate until the free water has been removed and the wood has dropped to its Fiber Saturation Point (FSP), typically around 28–30% moisture content. Below the FSP, the remaining moisture is bound water that must be literally pulled from the cell walls by heat and low ambient humidity. This is why dense hardwoods like oak and hickory — with very thick cell walls — take 18–24 months to properly season even in ideal conditions.
What “Below 20%” Actually Means
The 20% moisture threshold is not an arbitrary number — it represents the point at which most wood has released sufficient bound water that combustion becomes efficient and creosote formation drops to manageable levels. Below 20%, the energy required to drive off remaining moisture is small relative to the energy released by combustion. Above 20%, that ratio inverts and your fire is effectively fighting itself.
Premium wood burners and EPA-certified appliance guidelines often target 15% or below. At this level, combustion is nearly complete, flame temperatures are maximized, and creosote deposits are minimal.
⚗️ The Physics: Why Water Kills Heat
Why does wet wood produce less heat? It is simple thermodynamics. When you burn a log, the heat generated must first complete two energy-consuming tasks before the wood fiber itself can combust fully:
- Raise the water temperature to 212°F (100°C). Every degree of heat applied to the fire below this threshold goes into warming the water inside the log rather than burning anything. This delays ignition and reduces combustion temperature.
- Vaporize the liquid water into steam. Evaporating water requires an enormous amount of energy — approximately 970 BTUs per pound of water. A log with 50% moisture content and a dry weight of 5 lbs contains roughly 5 lbs of water. Evaporating all of it consumes nearly 4,850 BTUs — energy that never reaches your room.
The resulting “cold fire” produces smoke that is cool and heavy. This cool smoke does not rise quickly through the flue, causing fireplace draft problems and smoke rolling back into your room. See our guide on smoke coming into the house for detailed diagnosis.
Additionally, cool flue gases mean that combustion byproducts condense on chimney walls before they exit the stack — precisely the mechanism by which creosote forms. The physics of wet wood burning and chimney fouling are inseparable.
📉 BTU Loss by Moisture Level: The Numbers
The relationship between moisture content and usable heat output is direct and quantifiable. Here is what the data shows for a representative cord of mixed hardwood as moisture content increases from optimal to green:
| Moisture Content | Status | Approx. Usable BTUs / Cord | Heat Efficiency vs. Dry |
|---|---|---|---|
| 12–15% | Premium Dry | ~24–26 million BTUs | 100% (baseline) |
| 15–20% | Ready to Burn | ~22–24 million BTUs | ~92–95% |
| 20–28% | Borderline | ~18–22 million BTUs | ~75–85% |
| 28–40% | Under-Seasoned | ~14–18 million BTUs | ~60–70% |
| 40–55% | Green / Wet | ~10–14 million BTUs | ~40–55% |
| 55%+ | Freshly Felled | <10 million BTUs | <40% |
💸 The Real Financial Cost of Burning Wet Wood
Many homeowners buy unseasoned wood because it is cheaper per cord. This is a financially self-defeating decision. Here is a complete accounting of what burning wet wood actually costs beyond the purchase price.
The condensed acidic moisture in wet wood smoke attacks mortar joints aggressively. Over time, you may find yourself needing the best mortar for chimney repair or dealing with water infiltration requiring leaky chimney fixes. In short, the “cheap” cord of green wood frequently ends up costing several times its purchase price in downstream damage.
🔍 How to Identify Seasoned Wood: 8 Tests
You do not always need instruments to assess firewood quality. Your senses provide surprisingly reliable information when you know what to look and listen for. Here are eight tests, ranging from the most obvious to the subtler signs professionals use.
1. The Knock Test
Bang two pieces of wood end-to-end.
- Seasoned: Hollow, ringing “clunk” — the sound resonates through the dry fibers like a drum.
- Unseasoned: Dull, flat “thud” — water absorbs the vibration and kills the resonance.
2. The Visual End-Grain Test
Inspect the cut ends of the log.
- Seasoned: Radial cracks (checks) spreading from the center; gray, tan, or darkened color from oxidation.
- Unseasoned: Fresh, bright color; no cracks; sometimes visible sap or wet sheen.
3. The Weight Test
Pick it up.
- Seasoned: Surprisingly light — dense hardwoods like dry oak lift noticeably easier than green oak of the same size.
- Unseasoned: Feels dense and heavy; the water essentially doubles the log’s functional mass.
4. The Scent Test
Smell the freshly split face.
- Seasoned: Faint woody smell or almost no scent — the volatile aromatics have off-gassed during seasoning.
- Unseasoned: Strong, sappy, fresh-cut aroma. Pine resin is particularly pungent when green.
5. The Bark Test
Try to peel the bark.
- Seasoned: Bark peels away easily or falls off on its own — the cambium binding layer has dried and detached.
- Unseasoned: Bark adheres firmly and takes significant force to remove.
6. The Color Test
Look at the sides and ends.
- Seasoned: Split faces appear gray, tan, or weathered; darker than fresh-cut wood.
- Unseasoned: White or cream-colored split faces; vibrant and fresh-looking.
7. The Fire Test
Observe what happens when it burns.
- Seasoned: Catches quickly on a hot coal bed, burns with bright orange-yellow flames, minimal smoke.
- Unseasoned: Struggles to ignite; hisses and steams; produces dark, sluggish smoke; may extinguish the existing fire.
8. The Moisture Meter Test
The definitive measurement — not a sensory estimate.
- Seasoned: Reads 20% or below on a fresh split face. Premium target: 15% or below.
- Unseasoned: Reads 30–60%+ depending on species and time since felling.
📏 Moisture Meters: The Complete Buyer’s Guide
A digital moisture meter is the only tool that removes all guesswork and gives you a quantified, actionable reading. Understanding the different types and how to use them correctly is essential — a good meter used incorrectly gives misleading results.
Two metal pins are pressed into the wood. The meter measures electrical resistance between pins — wetter wood conducts electricity better and yields a higher moisture reading.
- Most accurate type for firewood
- Must be used on fresh split face (not weathered surface)
- Insert pins along the grain, not across it
- Affordable — quality models from $20–$60
Uses electromagnetic wave signals projected into the wood surface without pin insertion. Faster for scanning large quantities but less accurate than pin meters for firewood assessment.
- Less accurate for irregular firewood shapes
- Only measures the outer 0.75–1.5 inches of wood
- Better for flat lumber than split logs
- More expensive for equivalent accuracy
How to Get Accurate Readings
- Split a fresh face. Always take readings on a freshly split surface, not the weathered exterior. The outer surface of a seasoned log may read low while the interior is still above 25%. Split the log and test the exposed face for a true center-of-log reading.
- Insert pins along the grain. Pins pressed parallel to the wood grain (pointing with the long axis of the log) give more accurate readings than pins pressed across it.
- Take multiple readings. Test at least 3–5 logs from different positions in the pile. Moisture varies within a stack — logs at the bottom often retain more moisture than those at the top.
- Set species correction if available. Many meters include a species setting or correction factor. Oak, hickory, and other dense hardwoods have different calibration requirements than softwoods. Use the correct species mode if available.
- Read at ambient temperature. Wood temperature significantly affects meter readings. Wood stored in freezing conditions may read artificially low; warm it to room temperature before testing for the most accurate result.
🌳 Starting Moisture Content by Species
Every species starts with a different moisture content at the time of felling, and this directly determines how long it needs to season. Here is the baseline data for commonly used firewood species:
| Species | Type | Green Moisture (at felling) | Min Season Time | Target Moisture |
|---|---|---|---|---|
| White Oak | Hardwood | 75–80% | 18–24 months | 15–20% |
| Hickory | Hardwood | 65–75% | 18–24 months | 15–20% |
| Sugar Maple | Hardwood | 65–70% | 12–18 months | 15–20% |
| Black Locust | Hardwood | 55–65% | 12–18 months | 15–20% |
| Ash | Hardwood | 45–50% | 6–12 months | 15–20% |
| Birch | Hardwood | 55–65% | 12–18 months | 15–20% |
| Douglas Fir | Softwood | 50–70% | 6–12 months | 15–20% |
| Ponderosa Pine | Softwood | 90–100% | 9–12 months | 15–20% |
| Cedar | Softwood | 35–50% | 4–6 months | 15–20% |
⚠️ The Dangers of Burning Green Wood
The risks of burning unseasoned wood extend far beyond poor heat output. This section addresses the full spectrum of hazards — from structural damage to your chimney system to direct life-safety concerns.
Burning green wood produces cool, heavy smoke that condenses on flue walls as it rises. This condensation forms creosote — a family of tar-like, highly flammable compounds that are the primary fuel of chimney fires. The buildup requires you to know how often to clean a chimney (far more often when burning wet wood). If your liner is stainless steel, you will need the best chimney brush for stainless steel liner to remove glazed deposits without scratching.
The acidic moisture in wet wood smoke also attacks mortar joints, gradually dissolving the calcium silicate binders that hold masonry together. Over seasons of wet-wood burning, you may find yourself facing structural repointing requiring the best chimney mortar, or dealing with water infiltration requiring leaky chimney repairs.
🔥 Creosote Stages: How Wet Wood Creates a Fire Hazard
Creosote progresses through three distinct stages of severity, each more dangerous and more difficult to remove than the last. Understanding how wet wood accelerates this progression is essential for anyone managing a wood-burning appliance.
Stage 1: Dusty/Flaky Soot
Light, gray-black, dusty deposits that brush away easily. The result of occasional cool fires or short burn periods. Primarily affects chimneys used infrequently with adequate draft.
Removal: Standard chimney brush — DIY-friendly.
Stage 2: Tar-Like Coating
Black, shiny, hardened deposits with a crunchy or glazed texture. The direct result of consistently burning wet or insufficiently seasoned wood. Significantly more flammable than Stage 1.
Removal: Chemical treatment plus professional sweeping. Not DIY-safe.
Stage 3: Dense Glazed Creosote
Heavy, tar-like, highly concentrated deposits that essentially coat the flue wall in a continuous layer of fuel. Extremely difficult to remove and capable of burning at temperatures that crack or destroy flue liners.
Removal: Requires professional chemical rottenstone treatment, possible liner replacement.
Burning wet wood accelerates Stage 2 and 3 formation dramatically. A single winter of consistently burning wood above 30% moisture content can move a previously Stage 1 chimney to Stage 2 buildup requiring professional chemical treatment. Learn the warning signs of a chimney fire and know how to respond if one starts.
🫁 Carbon Monoxide Risk from Wet Wood
Carbon monoxide (CO) is the product of incomplete combustion — a process where fuel is oxidized but the reaction does not complete fully, producing CO instead of harmless CO₂. Wet wood burning is one of the most reliable routes to incomplete combustion in a residential setting, for two interconnected reasons:
- Reduced firebox temperatures: The energy diverted to evaporating water prevents the firebox from reaching the combustion temperatures (above 600°F) at which complete oxidation of all carbon compounds occurs. Incomplete combustion generates significantly more CO per unit of wood burned.
- Increased creosote blocking flue draft: As creosote accumulates from repeated wet-wood burning, it progressively narrows the flue’s effective cross-section. Reduced draft can cause combustion gases — including CO — to back-draft into the living space, particularly during wind events or when interior air pressure drops due to exhaust fans running elsewhere in the home.
🏛️ EPA Rules on Wood Moisture
The Environmental Protection Agency’s New Source Performance Standards (NSPS) for residential wood heaters regulate particulate matter (PM2.5) emissions — and moisture content is directly linked to PM2.5 output. Wet wood burning produces dramatically more PM2.5 than dry wood combustion, which is why moisture management is increasingly a regulatory concern, not just a comfort issue.
While the EPA does not yet directly mandate moisture content for individual homeowners burning wood in residential settings, several important regulatory contexts create practical reasons to comply with the 20% threshold:
- EPA-certified stove warranties: Many manufacturers void warranties on EPA-certified appliances when evidence of wet-wood burning (Stage 2 or 3 creosote) is found during warranty inspections. Burning wood above 20% may constitute a warranty violation.
- Burn ban exemptions: In areas with air quality-triggered burn bans, EPA-certified pellet stoves are often exempt from restrictions. Wet-wood burning in an EPA-certified wood stove is typically not exempt — the exemption is earned by the appliance’s clean combustion, which requires dry fuel to achieve.
- State and municipal regulations: Several states (notably those in the Pacific Northwest and California) have enacted regulations specifying maximum moisture content for commercially sold firewood. Violations carry fines for sellers.
☀️ Air-Drying vs. Kiln-Drying vs. Solar Kiln
There are three primary methods for drying firewood, each with different costs, timelines, and quality outcomes. Understanding the trade-offs helps you choose the right approach for your situation.
| Method | Drying Time | Final Moisture | Cost | Best For |
|---|---|---|---|---|
| Air-Drying (Traditional) | 6–24 months depending on species | 15–20% (good conditions) | Near-zero — requires only space and time | Most homeowners with outdoor space and planning horizon |
| Industrial Kiln-Drying | 3–7 days in commercial kiln | 10–15% (guaranteed) | High — adds $40–80/cord to retail price | Those who need immediately burnable wood and can pay the premium |
| Solar Kiln (DIY) | 4–8 weeks (summer, sunny climate) | 12–18% achievable | Low — materials cost $50–$200 for basic build | Homeowners who want faster drying without industrial cost |
| Greenhouse/Polytunnel Method | 6–10 weeks in season | 15–20% achievable | Very low if existing structure available | Market gardeners or homesteaders with existing poly structures |
Kiln-Dried: Is It Worth the Premium?
Kiln-dried wood offers guaranteed moisture content — typically below 15% — which is its primary advantage over air-dried wood purchased from a seller whose “seasoned” claim cannot be verified. For homeowners who did not plan their firewood supply in advance, or who want the cleanest, most efficient burn available, kiln-dried is worth the higher cost. It also eliminates insect and mold concerns that can accompany air-dried wood stored for extended periods.
The trade-off is cost — kiln-dried firewood typically retails at 40–80% more per cord than equivalent air-dried wood. For whole-season primary heating, this premium becomes significant. For supplemental or ambiance burning, it is more easily justified.
🪓 How to Season Wood Yourself
Buying pre-seasoned wood is expensive and requires trust in your supplier. Seasoning your own gives you complete control over quality, cost, and timing. The process is simple — but the details matter.
- Split it immediately. Wood dries primarily through the cut ends, where open vascular channels allow moisture to escape. Whole rounds trap moisture inside the bark for far longer. Split to your final firebox size immediately after felling or delivery — do not wait.
- Elevate off the ground. Use pallets, purpose-built log racks, or pressure-treated lumber rails to keep all wood at least 4–6 inches above soil level. Ground contact introduces persistent moisture and provides direct access for termites.
- Stack with cut ends facing out. Moisture exits primarily through end grain. Face the cut ends of logs toward the prevailing airflow direction, not the bark side. Use a “crisscross” pattern at the ends for self-supporting stability.
- Allow airflow through the pile. Stack loosely — leave small gaps between logs. Place the stack away from walls and fences (3–4 inches minimum clearance) so air can circulate around all sides of the stack.
- Cover the top only. Drape a tarp or fitted cover over the top third of the pile to shed rain. Never seal the entire stack — this traps evaporating moisture and reverses the drying process. Use a UV-resistant tarp with reinforced grommets. See our winter home comfort tips for more preparation advice.
- Orient for maximum sun exposure. Position the stack so the open face receives direct sunlight for the maximum hours per day — ideally south-facing in the Northern Hemisphere. Solar radiation significantly accelerates surface drying and raises the temperature within the stack.
- Wait the full timeline. Resist the temptation to burn prematurely. Verify with a moisture meter when the wood is ready — do not rely on the calendar date alone. Environmental conditions vary widely and affect actual drying time.
⚡ Accelerating the Seasoning Process
If you are working with a compressed timeline — you received green wood mid-autumn, or you have next season’s wood but want it ready faster — these techniques can meaningfully reduce seasoning time.
Split Smaller
Splitting logs into quarters or smaller pieces (3–4 inch width) instead of halves dramatically increases surface area and accelerates drying. Smaller splits are also easier to ignite and produce hotter, cleaner fires.
Build a Simple Solar Kiln
A clear plastic sheeting enclosure around the wood stack traps solar heat and creates a greenhouse effect. Even a simple system — plastic sheeting over a south-facing stack with an air gap at the top — can cut drying time by 40–60% in summer months.
Maximize South-Facing Exposure
Relocating a stack from a shaded north-facing position to full south-facing sun exposure can reduce drying time by 30–40% with no other changes. Stack placement is one of the highest-impact variables in seasoning speed.
Remove the Cover in Dry Periods
During extended dry, breezy stretches — common in late spring and summer — remove the tarp entirely. Wind is the most powerful natural drying agent. A single week of good drying weather with the cover off can accomplish more than a month of covered storage.
Elevate Higher
Increasing ground clearance from 4 inches to 12 inches improves airflow beneath the pile and reduces capillary moisture intrusion from soil. Simple improvement with significant drying impact in wet climates.
The Holz Hausen Stack
This circular European stacking method increases the wood pile’s total surface area relative to volume and creates natural draft through the center. Studies suggest it accelerates drying by 30–40% compared to a conventional linear stack of the same volume.
🛒 Buying Seasoned Firewood Safely: Avoiding Green Wood Scams
“Seasoned firewood” is one of the most loosely used and most commonly misrepresented terms in the home heating supply industry. There is no universal legal standard for what “seasoned” means, and unscrupulous sellers exploit this ambiguity to charge seasoned-wood prices for green or borderline wood. Here is how to protect yourself.
Red Flags When Buying Firewood
- Seller cannot or will not specify the species in the load
- Wood was cut and sold within the same month (“just split this week — it’ll dry in your garage”)
- Seller refuses to let you inspect the load before payment
- Price is significantly below market rate for your region and species
- Delivery is offered as a “thrown cord” rather than stacked — making volume impossible to verify
- Bark is entirely intact on all visible logs (a sign of recent cutting)
How to Verify Before Paying
- Bring your moisture meter to the delivery point and test several logs immediately on arrival
- Request that the seller stack the cord for you — this allows volume verification and gives you time to inspect
- Ask specifically: “When was this wood cut?” and “What species is in the load?”
- Check end grains for radial cracks and darkened color before accepting delivery
- Buy from established local suppliers with verifiable reviews rather than roadside or Craigslist sellers for your primary supply
🚫 Green Wood Myths Debunked
Several persistent myths about wet and green wood lead homeowners to make costly mistakes. Here are the most common — and the truth behind each.
🌍 How Climate Affects Drying Speed
The standard seasoning timelines assume reasonably favorable drying conditions. In reality, your local climate can dramatically compress or extend how long it takes any given piece of wood to reach the 20% threshold.
| Climate Type | Effect on Drying | Adjustment to Timeline | Key Consideration |
|---|---|---|---|
| Hot & Dry (SW USA, Mediterranean) | Dramatically accelerates drying | Reduce timeline by 30–50% | Risk of over-drying and excessive checking (cracking) in very arid conditions |
| Temperate & Moderate (Midwest, Mid-Atlantic) | Standard drying rates apply | Use standard species timelines | Plan wood purchase 12–18 months ahead for dense hardwoods |
| Wet & Rainy (Pacific NW, Coastal NE) | Significantly slows drying | Add 30–50% to standard timelines | A covered shed is nearly mandatory; open stacking is inadequate |
| Cold & Snowy (Upper Midwest, Canada) | Slows in winter; good in summer | Buy/cut in early spring for next winter | Use warm months efficiently — wood barely dries October through April |
| Humid Subtropical (Gulf Coast, Southeast) | High ambient humidity slows drying even without rain | Add 20–40% to standard timelines | Covered shed with maximum ventilation is essential; mold on bark is common |
🔄 Recovering Partially Seasoned Wood
You may find yourself with wood that is not yet ready — purchased too recently, stored too long in poor conditions, or received as green wood. There are several practical strategies for recovering a partially dry supply and getting it to burnable condition as quickly as possible.
- Re-split oversized pieces. If large rounds or thick splits are still above 20%, run them through the splitter again. Halving the thickness dramatically accelerates moisture release — a 6-inch split will dry to 20% in half the time of a 12-inch split.
- Move to a solar position. Relocate the stack to the most sun-exposed, wind-exposed location available. Even a few weeks in an optimal position during warm months can drop moisture content by 5–8 percentage points.
- Build a simple plastic enclosure. A greenhouse-effect enclosure using clear plastic sheeting creates elevated temperatures within the stack that actively drive moisture out of the wood. Even a crude structure significantly outperforms open-air stacking in cool, damp weather.
- Use as a blended supplemental fuel. If your partially seasoned wood is between 25–30% moisture, use it as a secondary fuel added to a firebox that is already burning hot with dry wood. Do not start a fire with it, but add it to an established hot fire where the firebox temperature will drive out the remaining moisture before problems develop.
- Set aside and wait. For wood above 30% moisture with no short-term options, the pragmatic solution is to store it correctly, label it with the current date, and wait. Use purchased dry or kiln-dried wood this season and plan to burn your own supply next season when it will be genuinely ready.
🛒 The Pro’s Toolkit: Measure, Split & Maintain
These are the top-rated tools for the serious wood burner — each one directly addresses a key challenge in the seasoned-wood workflow.

Digital Wood Moisture Meter
Instantly reads percentage water content. Insert pins into freshly split grain. The only way to know for certain your wood is safe and efficient to burn.
Check Price on Amazon
Heavy Duty Canvas Log Carrier
Stop dragging dirt and insects into your home. Carry seasoned logs cleanly and protect your floors from bark debris.
Check Price on Amazon
Cast Iron Kindling Splitter
Seasoned wood splits far more easily than green wood. Make kindling quickly and safely without the risk of a swinging axe.
Check Price on Amazon
Creosote Sweeping Log
A maintenance aid if you suspect you have burned some wet or under-seasoned wood. Helps loosen Stage 1 deposits between professional sweeps.
Check Price on Amazon📚 Expert Resources
For more insights on tree species and drying times, we recommend checking out TreesUK’s guide on firewood differences.
If you are upgrading your overall setup, consider our reviews on best chimney services for professional inspections. If seasoning wood feels like too much ongoing work, explore electric fireplace vs. wood fireplace as an alternative heating approach.
Stay safe, burn dry, and keep warm.
❓ Frequently Asked Questions
Does kiln-dried wood count as seasoned?
Yes — and it is often better than air-seasoned wood. Kiln-dried wood is heated in an industrial oven to remove moisture rapidly, typically bringing levels to 10–15%. This creates the cleanest, most efficient burn available. The trade-off is cost: kiln-dried firewood typically retails at 40–80% more per cord than equivalent air-dried wood. For occasional burning or supplemental use, the premium is easily justified.
Can I season wood in my garage?
It is not recommended unless your garage is well-ventilated, receives direct sunlight through windows or an open door, and has good airflow. Wood needs wind and sun exposure to dry efficiently. A damp, enclosed garage slows drying significantly and releases the moisture into the garage environment — promoting mold, rust on tools, and swelling of wood doors and trim. An open-sided covered structure outdoors is far superior. Also ensure you know what not to burn to avoid bringing pests indoors with partially dry wood.
Does insurance cover chimney fires from wet wood?
Usually yes, if the fire is sudden and accidental. However, if an inspection reveals that the homeowner was aware of hazardous creosote buildup and failed to take action, negligence claims can result in denial or reduced settlements. Read our guide: Does homeowners insurance cover chimney repair?
How do I know if wood is seasoned without a moisture meter?
Use the combination of the knock test (hollow “clunk” vs. dull “thud”), visual end-grain inspection (radial cracks, darkened color), bark test (bark peels easily), and weight test (noticeably lighter than a green log of the same size). None of these is as definitive as a moisture meter reading, but used together they give a reliable assessment. For any significant firewood purchase, investing in a pin-type moisture meter ($20–$40) is strongly recommended.
Is it safe to burn wood that has mold on the bark?
Generally yes, if the mold is only on the bark surface and the interior of the wood is properly dry. Surface mold on bark is common in stored wood, particularly in humid climates, and does not necessarily indicate the wood is too wet to burn. Split a log and test the interior moisture — if it reads below 20%, the wood is safe to burn. The mold on the bark burns off quickly. However, wood that is spongy, punky, or extensively rotted on the interior should not be burned as it will produce poor combustion and high ash.
Can I mix seasoned and unseasoned wood in the same fire?
You can add partially seasoned wood (25–30% moisture) to a firebox that is already running hot with dry wood, but this is not ideal. The wet wood will cool the fire temporarily, increase smoke production, and contribute to creosote. Never start a fire with wet wood — only add it to an already-hot established fire if necessary. The better practice is always to use wood below 20% moisture and reserve partially dry wood for further outdoor seasoning.
How long does seasoned firewood stay seasoned once stored?
Properly seasoned wood stored in an elevated, covered, well-ventilated stack will remain in good condition for 3–4 seasons. Beyond that, some species (particularly birch) can begin to develop rot or punky sections if left on the ground or in contact with persistent moisture. Dense hardwoods like oak can remain in excellent condition for 5+ years under good storage conditions. The risk of over-extended storage is not that the wood becomes too dry — it is that poor storage conditions allow reabsorption of moisture or structural decay.
What is the fastest-seasoning hardwood?
Ash is widely considered the easiest and fastest-seasoning hardwood, often reaching below 20% moisture within 6–12 months even in moderate climates. Ash has an unusually low initial moisture content at felling compared to most other hardwoods, a relatively open vascular structure that releases moisture more readily, and a straight grain that splits easily — exposing more surface area. This combination makes it the preferred “first season” choice for homeowners who did not plan their wood supply far enough in advance.
Does splitting wood in winter affect seasoning?
Splitting in winter — particularly in freezing conditions — has one interesting advantage: frozen wood often splits more cleanly and easily than room-temperature wood because ice within the cells helps the wood fracture along grain lines. However, drying progress essentially halts in freezing conditions. Wood split in winter will not begin meaningful seasoning until spring temperatures rise above freezing and airflow increases. Plan to have all splitting done before the first freeze for optimal results.